
Introduction
In this tutorial, we will be using an 8×8 LED matrix that is controlled by a MAX7219 chip. We will be using a Raspberry Pi Pico as our microcontroller and we will be programming it in MicroPython. This project is a great intro to using LED matrix and the MAX7219 chip.
Required Components
- Raspberry Pi Pico
- 8×8 LED matrix
- jumper wire
- breadboard
MAX7219 LED Dot Matrix Display
The dot-matrix display is an electrical device that can show information on machines, clocks, and many other devices. In this project, we will use the Raspberry Pi Pico to control the 8×8 LED dot matrix to make a heart pattern.
The MAX7219 SPI interface allows you to control the module with just a few wires, making it perfect for use with Raspberry Pi Pico. Getting Started Raspberry Pi Pico – Pinout, Specs – Beginner Guide
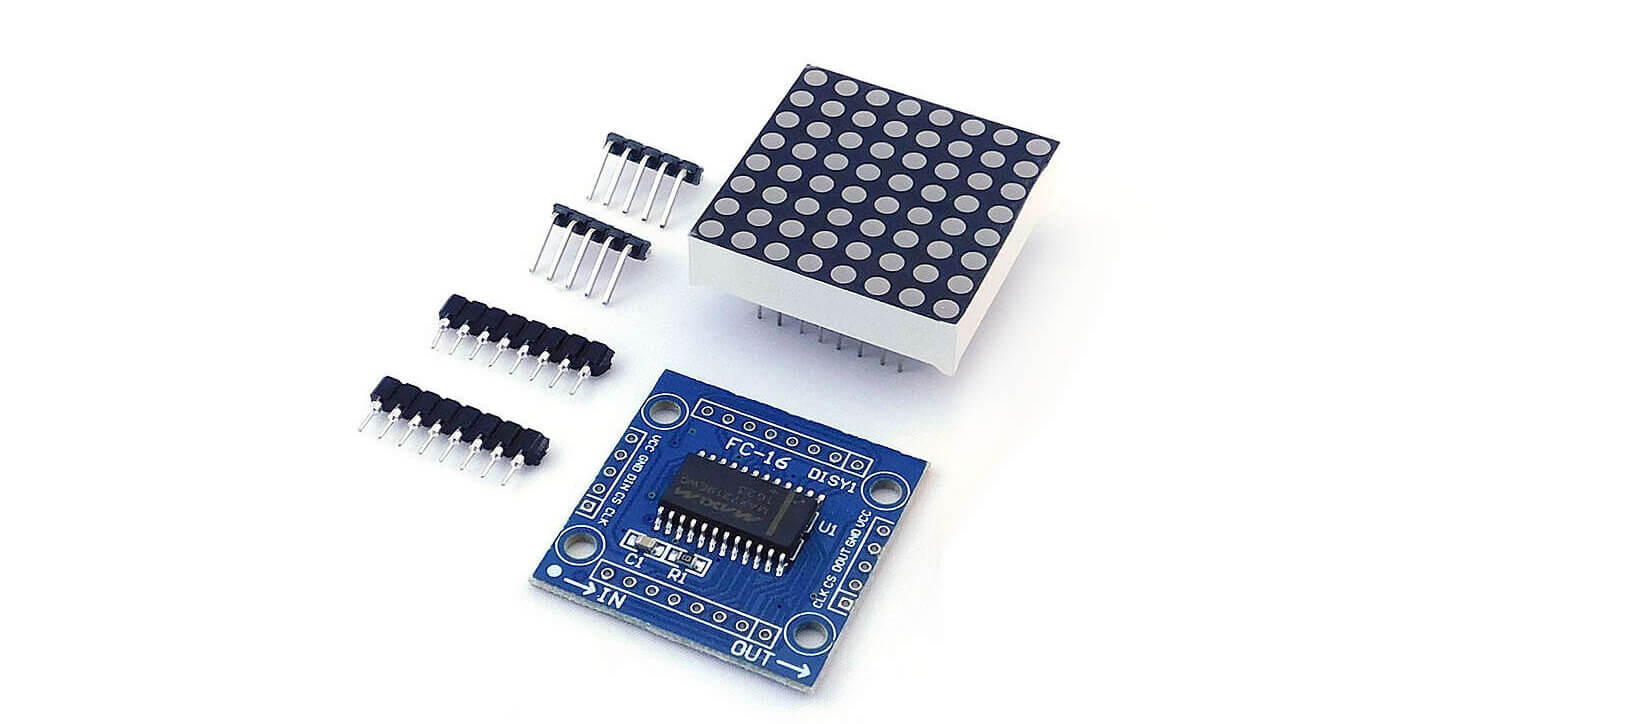
This module can be used to control an 8×8 LED matrix or 64 individual LEDs. You can use it to create animations, games, or any other creative project. The module is easy to use and only requires a few wires to connect it to your project. The MAX7219 comes with a built-in voltage regulator so it can be powered by either a 5V or 3.3V power supply.
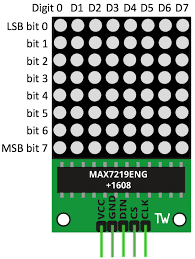
MAX7219 Dot Led Matrix Pinout
The LED matrix can be done through two driving modes. They are parallel (where each row or column is sent with parallel data) and serial (where the data is sent serially and an IC is operated to convert this serial data into parallel data).
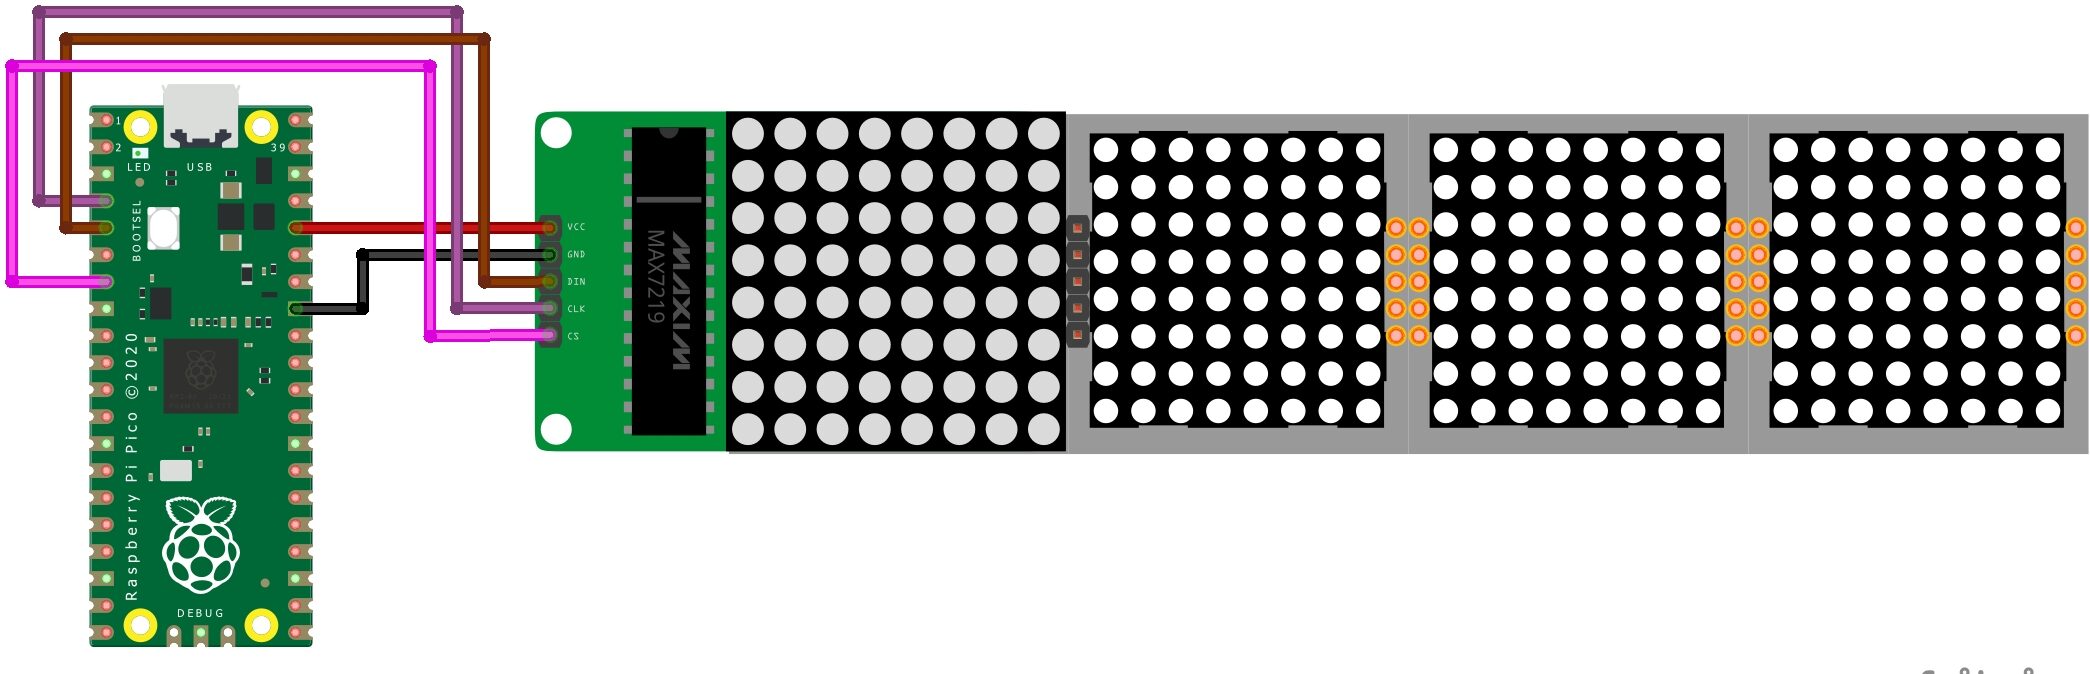
Schematic Diagram – 8×8 LED Matrix MAX7219 With Raspberry Pi Pico
| MAX7219 | Pico Name | Pico GPIO | Pico PIN |
|---|---|---|---|
| VCC | VBUS | 40 | |
| GND | GND | 38 | |
| DIN | MOSI (SPI0 TX) | GP7 | 10 |
| CS | SPI0 CSn | GP5 | 7 |
| CLK | SCK | GP6 | 9 |
Micropython Code & Libraries
This 8×8 LED Matrix Library module will be interfaced with Raspberry Pi Pico for displaying alphabets, symbols & logos. First, we require to download a micropython library specifically designed for LED MATRIX. Getting Started With Raspberry Pi Pico With Thonny IDE
Installing MAX7219 MicroPython Library
Open a new tab in Thonny IDE. Copy the code here. Save it to Raspberry Pi Pico with the name max7219.py under the lib folder.
max7219.py
The below libraries allow you to control the max7219 LED driver with a variety of different commands.
main.py
copy the below code and Save it in Pico.
Conclusion
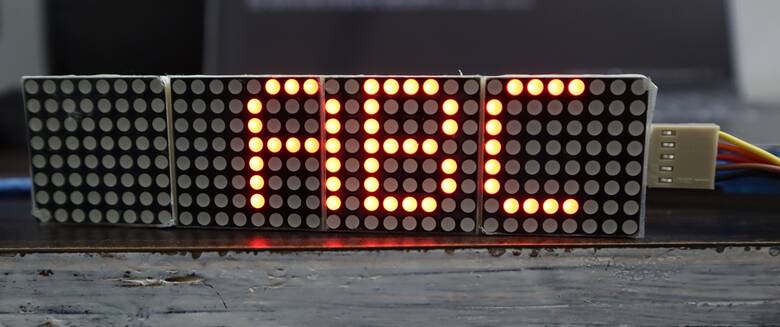
In ending, the 8×8 LED matrix MAX7219 with raspberry pi pico is a perfect project for anyone interested in electronics and coding. This project is simple With a little bit of creativity, you can create a unique display that is sure to impress your friends.
Popular Raspberry Pi Pico Posts
- Raspberry Pi Pico W Relay Module Web Server Using Thonny IDE
- Control 28BYJ-48 Stepper Motor With Raspberry Pi Pico – Micropython
- Raspberry Pi Pico W Remote Controlled Car Robot Web Server
- How to Control WS2812 LED w/ Raspberry Pi Pico W & Adafruit IO
- BME280 With Raspberry Pi Pico W Using MicroPython
- Raspberry Pi Pico W Web Server with BME280 – Mini Weather Station


