Introduction
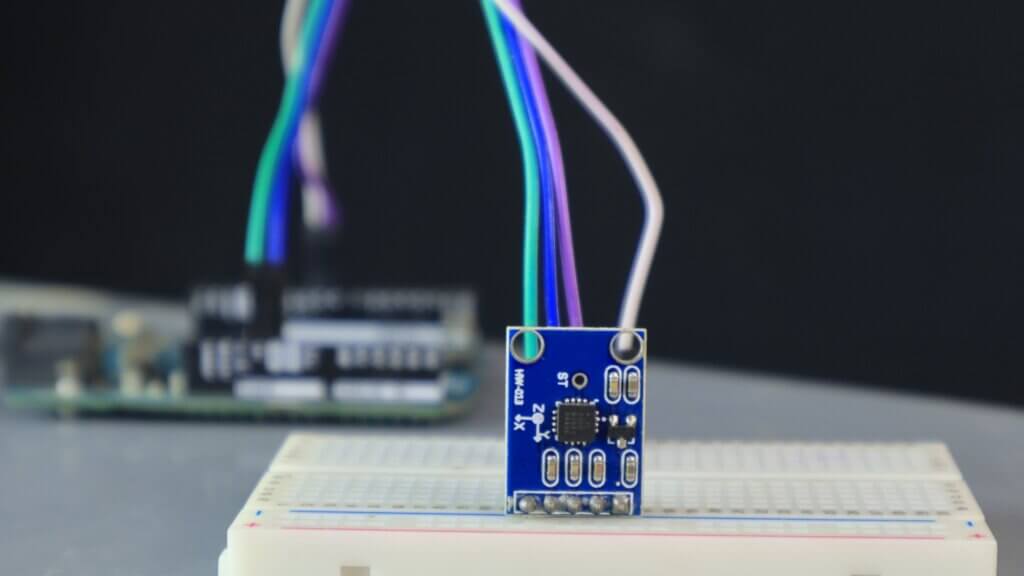
In this project, we will be interfacing an ADXL335 accelerometer with Arduino to measure the acceleration along the X, Y, and Z-axis. The ADXL335 is a low-power, single-axis MEMS accelerometer. It is perfect for applications such as monitoring human movement and detecting shock and vibration, It is ideal for applications requiring high accuracy and low power consumption.
Thank You NextPCB:
This project is successfully finished because of the service and support from NextPCB. NextPCB is one of the most professional PCB manufacturers in Global and has specialized in the PCB and assembly industry for over 16 years. Not only could NextPCB deliver the most creative printed circuit boards and assembly technologies in the most elevated quality standards, but the fastest delivery turnaround was also as fast as 24 hours.
Guys if you have a PCB project, please visit their website and get exciting discounts and coupons. if you sign-up using this link you will get free coupons worth $100. Checkout out NextPCB now and get amazing discounts on your first order.
- Only 0$ for 5-10pcs PCB Prototypes:https://www.nextpcb.com/PCBPrototypes
- 4-layer PCB price reduction up to 40%: nextpcb.com/40%off
- Register and get $100 from NextPCB: Nextpcb.com/coupon
What is an accelerometer?
An accelerometer is an electromechanical device that measures the vibration and acceleration of motion. It is commonly used to measure the acceleration of a moving object, but can also be used to measure the static acceleration of an object at rest. Accelerometers are used in a variety of applications, including automotive safety, aerospace engineering, and sports science, they may be dynamic as in the case of mobile devices.
How does the accelerometer work?
An accelerometer comes in the shape of a simple circuit for a big electronic device. the accelerometer is made of different parts and works in many modes, two of which are the Piezoelectric Accelerometer, Piezoresistive Accelerometer, and the Capacitance Accelerometer.
Types of Accelerometer
There are three types of Accelerometer
- Piezoelectric Accelerometer
- Piezoresistive Accelerometer,
- Capacitance Accelerometer
1. Piezoelectric Accelerometer
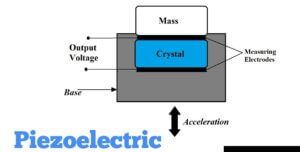
IMG Source: Youtube The piezoelectric accelerometer is a type of sensor that measures acceleration and vibration. It consists of a piezoelectric crystal that is mounted on a base. This sensor absorbs the vibrations and creates the same amount of electrical signals. This voltage can be used to measure acceleration or vibration. The piezoelectric accelerometer is a very sensitive sensor. It can measure very small changes in acceleration and vibration
2. Piezoresistive Accelerometer
A piezoresistive accelerometer is a detector that measures acceleration using the piezoresistive effect. The piezoresistive effect is the change in resistivity of a material in response to the applied force. When a force is applied to a piezoresistive material, the material’s resistivity changes in proportion to the applied force
3. Capacitance Accelerometer
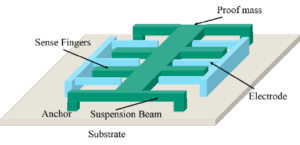
A capacitance accelerometer is a device that measures acceleration using the change in capacitance of a sensor. The sensor is typically a metal plate that is mounted on a moving body. When the body moves, the plate moves with it and the change in capacitance is used to calculate the acceleration.
How does an ADXL335 accelerometer work?
The ADXL335 is a 3-axis accelerometer with a digital output. It measures acceleration in both the x and y axes, as well as the z-axis. The output of the sensor is a voltage that is proportional to the acceleration, ADXL335 is a popular accelerometer used in many projects because it is small, inexpensive, and easy to use the ADXL335 measures acceleration by detecting the thing’s movement.
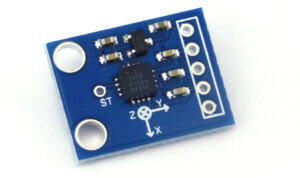
ADXL335 module
- The ADXL335 gives a total 3-axis acceleration measurement.
- The ADXL335 module measures acceleration within the range ±3 g in the x, y, and z-axis.
- The ADXL335 output signals of this module are analog voltages that are balanced to the acceleration.
ADXL335 Accelerometer Pinout
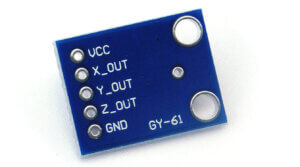
The Pinout diagram for the ADXL335 is given below:
- VCC: Power supply pin 5V.
- X_OUT: X-axis analog output.
- Y_OUT: Y-axis analog output.
- Z_OUT: Z-axis analog output.
- GND: Ground pin.
- ST: The self-Test pin controls the self-test feature.
ADXL335 Wiring Diagram
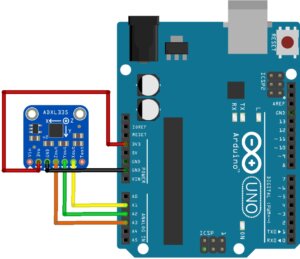
The circuit diagram for the ADXL335 accelerometer with Arduino is given below:
ADXL345 Arduino Connections:
- Connect X_OUT pin to Arduino pin A1
- Connect Y_OUT pin to Arduino pin A2
- Connect Z_OUT pin to Arduino pin A3
- Connect GND to Arduino GND
- Connect VCC to Arduino 3.3V
ADXL335 Accelerometer With Arduino Source Code
Source Code
Code For Interfacing the ADXL335 with Arduino
|
1 2 3 4 5 6 7 8 9 10 11 12 13 14 15 16 17 18 19 20 21 22 23 24 25 26 27 28 29 30 31 32 33 34 35 36 37 38 39 40 41 42 43 44 45 46 47 48 49 50 51 52 53 54 55 56 57 58 59 60 61 62 63 |
const int xInput = A1; const int yInput = A2; const int zInput = A3; // initialize minimum and maximum Raw Ranges for each axis int RawMin = 0; int RawMax = 1023; // Take multiple samples to reduce noise const int sampleSize = 10; void setup() { analogReference(EXTERNAL); Serial.begin(9600); } void loop() { //Read raw values int xRaw = ReadAxis(xInput); int yRaw = ReadAxis(yInput); int zRaw = ReadAxis(zInput); // Convert raw values to 'milli-Gs" long xScaled = map(xRaw, RawMin, RawMax, -3000, 3000); long yScaled = map(yRaw, RawMin, RawMax, -3000, 3000); long zScaled = map(zRaw, RawMin, RawMax, -3000, 3000); // re-scale to fractional Gs float xAccel = xScaled / 1000.0; float yAccel = yScaled / 1000.0; float zAccel = zScaled / 1000.0; Serial.print("X, Y, Z :: "); Serial.print(xRaw); Serial.print(", "); Serial.print(yRaw); Serial.print(", "); Serial.print(zRaw); Serial.print(" :: "); Serial.print(xAccel,0); Serial.print("G, "); Serial.print(yAccel,0); Serial.print("G, "); Serial.print(zAccel,0); Serial.println("G"); delay(200); } // Take samples and return the average int ReadAxis(int axisPin) { long reading = 0; analogRead(axisPin); delay(1); for (int i = 0; i < sampleSize; i++) { reading += analogRead(axisPin); } return reading/sampleSize; } |

