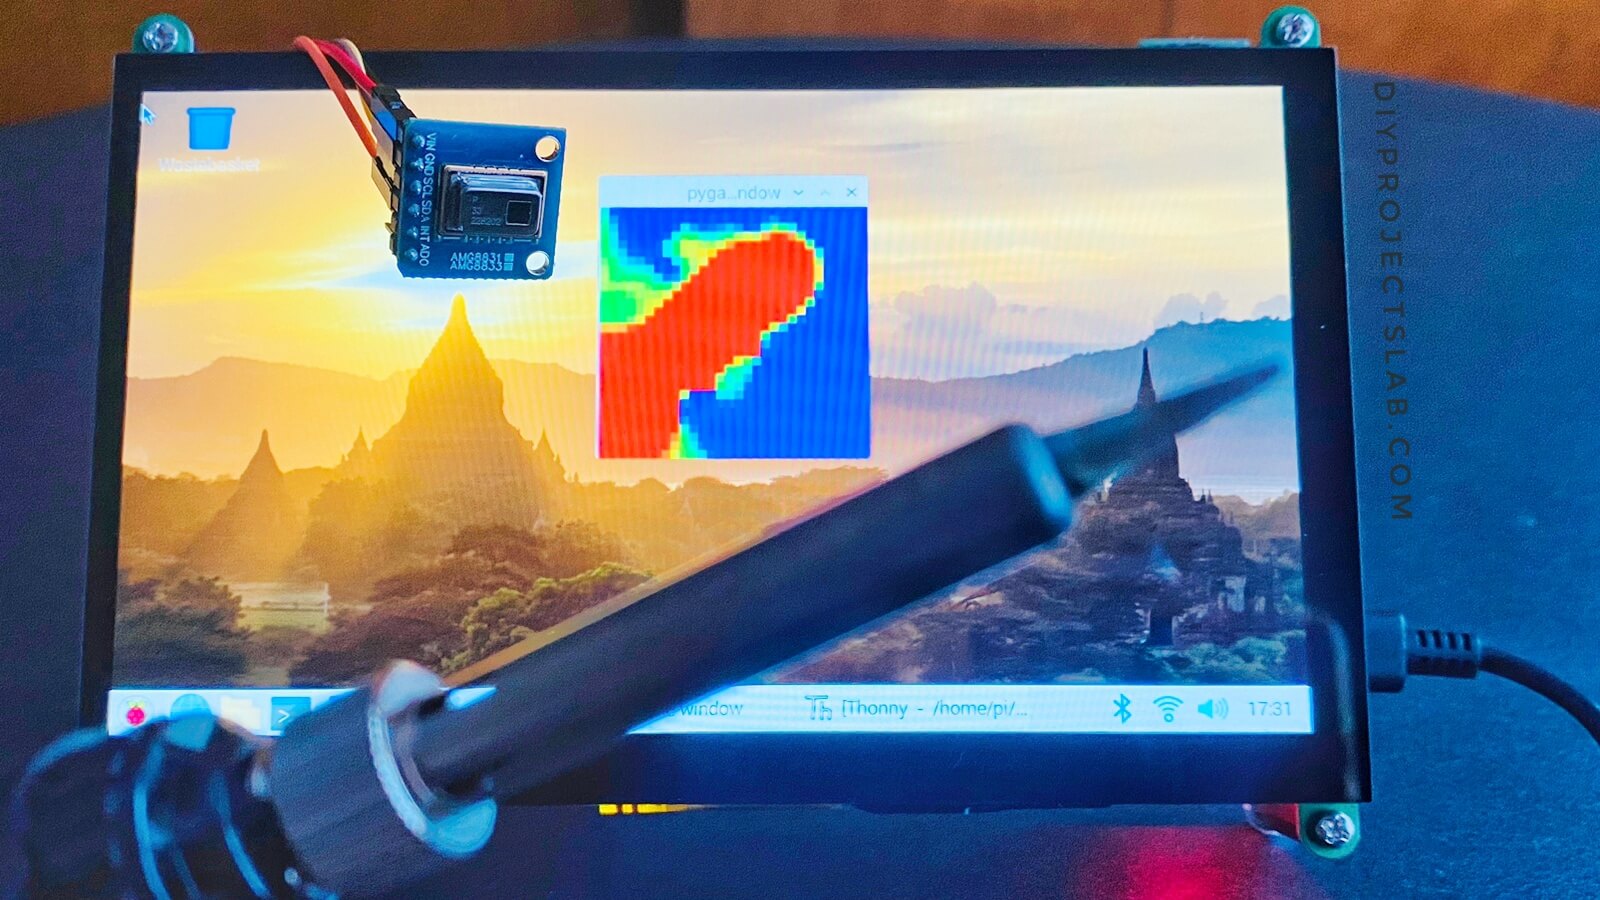
In this tutorial, we’ll be using the AMG8833 Thermal Camera Sensor with Raspberry PIreate a thermal imaging camera. The AMG8833 is an 8×8 pixel thermal camera sensor, with a 74-degree field of view.
The sensor can measure temperatures from 0°C to 80°C (32°F to 176°F), with an accuracy of +- 2.5°C (4.5°F). AMG8833 sensor can be used to create a thermal map of an area, by taking multiple readings at different points and then creating a heat map. Raspberry Pi 4 Pinout, Specifications, Pin Configuration & Programming
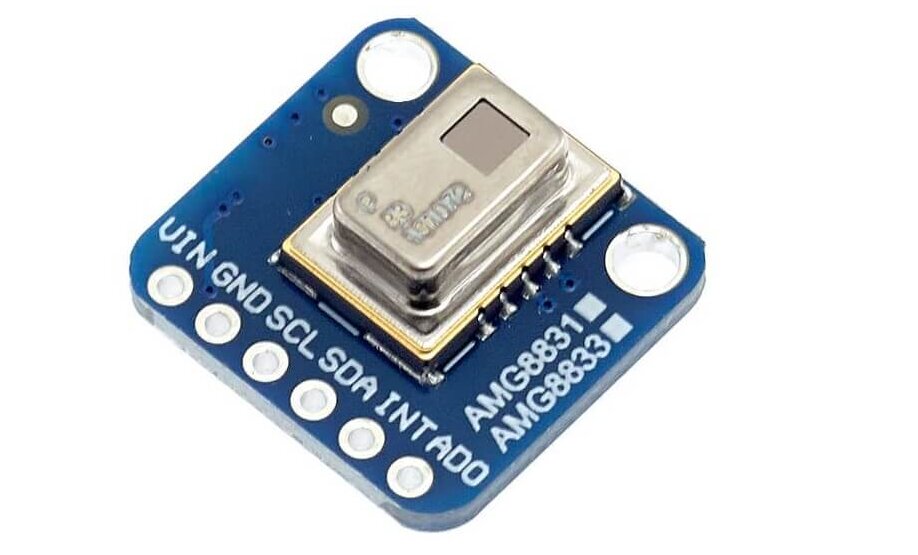
AMG8833 8×8 Thermal Camera Sensor
AMG8833 IR 8*8 Thermal Imager Array camera Sensor Module can measure temperatures ranging from 0°C to 80°C (32°F to 176°F) with an accuracy of +- 2.5°C (4.5°F). It will catch humans from a distance of up to 7 meters (23) feet. using this sensor you can convert your Raspberry Pi into a powerful mini thermal camera or human detection with a maximum frame rate of 10Hz.
The sensor is the next-era product that offers increased performance over its prototype, the AMG8831. This new 8×8 thermal IR sensor supports I2C communications, so you can easily connect it to your Microcontroller or other devices for data collection.
The AMG8833 8×8 IR sensor communicates over I2C and each pixel of the sensor can be read independently, obtaining 64 individual infrared temperature readings. The I2C address is configurable through the AD0 pin, if left unconnected the address is 0x69, and connected to GND the address changes to 0x68.
Refer to the datasheet for more information: AMG8833 Datasheet
Technical Features of AMG8833 Thermal Camera Sensors=
- Temperature detection on a two-dimensional Area with 8 x 8 pixels(64).
- Digital output
- Data rate: 64 readings at 10 Hz
- Viewing angle 60°.
- Communication protocol: I2C
- Operating Voltage: 3V – 5V DC
- Current Consumption: 4.5mA
- Temperature range: 0ºC to 80ºC (32°F to 176°F)
- Temperature precision: 2.5ºC
- Number of pixels: 64 (8×8)
- I2C address: 0x69 (0x68 for AD0->GND)
- On-board 3.3V voltage regulator
- Pull-up resistors to VIN on board
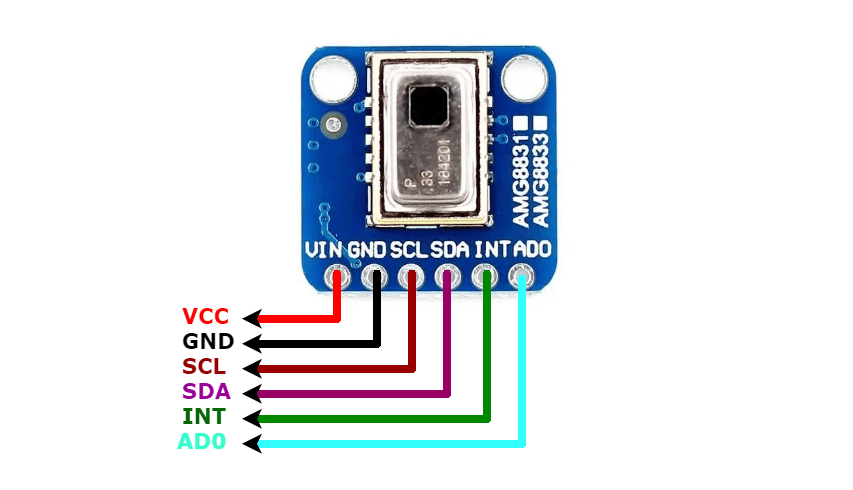
Pinout of MG8833 Thermal Camera Sensors
| PIN | SYMBOL | Description |
| 1 | VCC | 3.3V/5V |
| 2 | GND | Ground |
| 3 | SCL | I2C clock pin |
| 4 | SDA | I2C data pin |
| 5 | INT | External interrupt pin |
Applications of AMG8833 Thermal Camera Sensors
- Applications in thermal imaging
- Heat transfer analyses
- Human temperature monitoring
- Heating and air condition management
- Industrial control systems & different applications in non-contact temperature measure Projects
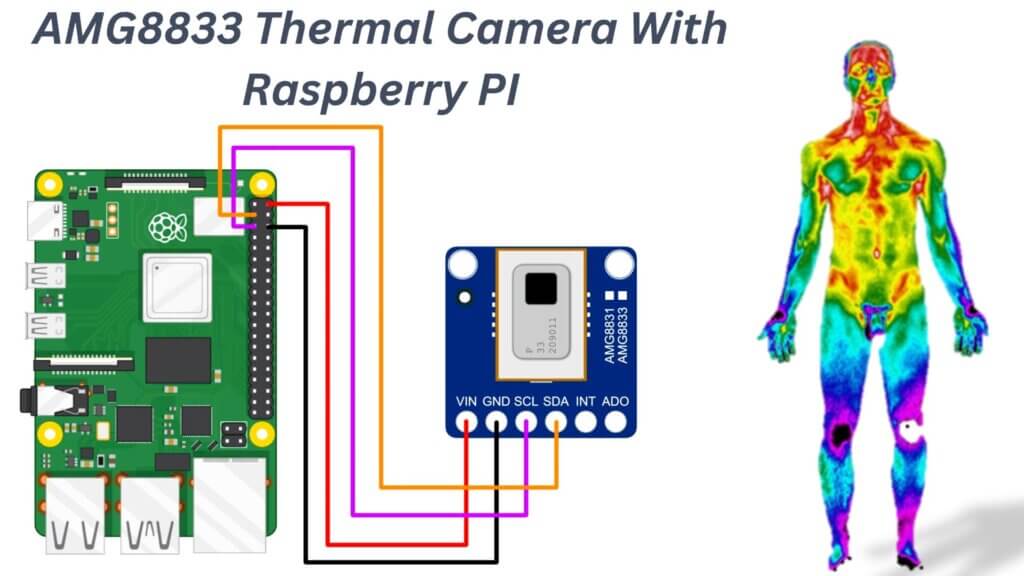
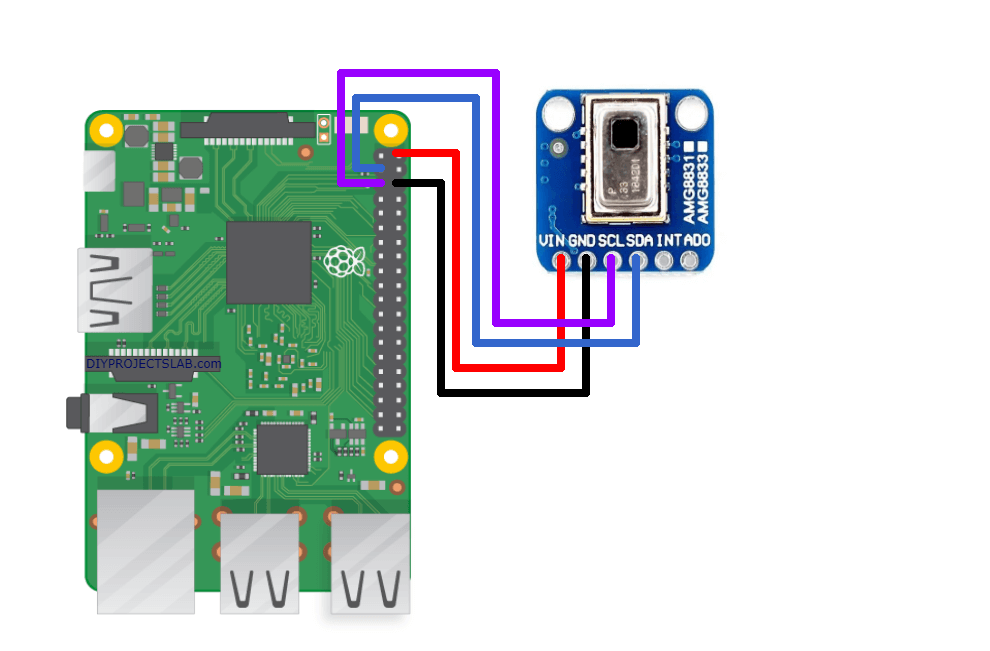
Interfacing AMG8833 Thermal Camera Sensor With Raspberry PI
- Connect Vin to the 3V or 5V power supply
- Connect GND to the ground pin of the Raspberry Pi
- Connect SDA to the SDA pin of the Raspberry Pi
- Connect SCL to the SCL pin of the Raspberry Pi
Enable the I2C Bus to Allow Communication With the AMG8833
The following commands enable the I2C port on the Raspberry Pi! I2C bus allows multiple devices to be connected to your Raspberry Pi, each with a unique address.
Install smbus and I2C tools for the RPi by inputting the following into the Pi’s terminal:
|
1 2 |
sudo apt-get install -y python-smbus sudo apt-get install -y i2c-tools |
Enable I2C interfaces
|
1 |
sudo raspi-config |
Go to “interfacing options” and Enable I2C Communications
|
1 |
sudo reboot |
Testing I2C
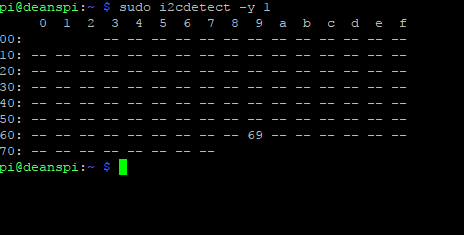
Check to see if I2C is Enabled correctly, Open Command Window and type “sudo i2cdetect -y 1”
|
1 |
sudo i2cdetect -y 1 |
This shows that one I2C addresses are in use – (0x69). If you don’t see 0x69, match your wiring.
Install Python Software
Download and install packages recommended in the Adafruit guide.
|
1 2 3 4 5 |
sudo apt-get update sudo apt-get install build-essential python-pip python-dev python-smbus git git clone https://github.com/adafruit/Adafruit_Python_GPIO.git cd Adafruit_Python_GPIO sudo python setup.py install |
Install pygame and scipy
|
1 2 |
sudo apt-get install -y python-scipy python-pygame sudo pip install colour Adafruit_AMG88xx |
Run example script
|
1 2 3 4 |
cd ~/ git clone https://github.com/adafruit/Adafruit_AMG88xx_python.git cd Adafruit_AMG88xx_python/examples sudo python thermal_cam.py |
Source code
|
1 2 3 4 5 6 7 8 9 10 11 12 13 14 15 16 17 18 19 20 21 22 23 24 25 26 27 28 29 30 31 32 33 34 35 36 37 38 39 40 41 42 43 44 45 46 47 48 49 50 51 52 53 54 55 56 57 58 59 60 61 62 63 64 65 66 67 68 69 70 71 72 73 74 75 76 77 78 79 80 81 82 83 84 85 86 87 88 89 90 |
import os import math import time import busio import board import numpy as np import pygame from scipy.interpolate import griddata from colour import Color import adafruit_amg88xx i2c_bus = busio.I2C(board.SCL, board.SDA) #low range of the sensor (this will be blue on the screen) MINTEMP = 26. #high range of the sensor (this will be red on the screen) MAXTEMP = 32. #how many color values we can have COLORDEPTH = 1024 os.putenv('SDL_FBDEV', '/dev/fb1') pygame.init() #initialize the sensor sensor = adafruit_amg88xx.AMG88XX(i2c_bus) # pylint: disable=invalid-slice-index points = [(math.floor(ix / 8), (ix % 8)) for ix in range(0, 64)] grid_x, grid_y = np.mgrid[0:7:32j, 0:7:32j] # pylint: enable=invalid-slice-index #sensor is an 8x8 grid so lets do a square height = 240 width = 240 #the list of colors we can choose from blue = Color("indigo") colors = list(blue.range_to(Color("red"), COLORDEPTH)) #create the array of colors colors = [(int(c.red * 255), int(c.green * 255), int(c.blue * 255)) for c in colors] displayPixelWidth = width / 30 displayPixelHeight = height / 30 lcd = pygame.display.set_mode((width, height)) lcd.fill((255, 0, 0)) pygame.display.update() pygame.mouse.set_visible(False) lcd.fill((0, 0, 0)) pygame.display.update() #some utility functions def constrain(val, min_val, max_val): return min(max_val, max(min_val, val)) def map_value(x, in_min, in_max, out_min, out_max): return (x - in_min) * (out_max - out_min) / (in_max - in_min) + out_min #let the sensor initialize time.sleep(.1) while True: #read the pixels pixels = [] for row in sensor.pixels: pixels = pixels + row pixels = [map_value(p, MINTEMP, MAXTEMP, 0, COLORDEPTH - 1) for p in pixels] #perform interpolation bicubic = griddata(points, pixels, (grid_x, grid_y), method='cubic') #draw everything for ix, row in enumerate(bicubic): for jx, pixel in enumerate(row): pygame.draw.rect(lcd, colors[constrain(int(pixel), 0, COLORDEPTH- 1)], (displayPixelHeight * ix, displayPixelWidth * jx, displayPixelHeight, displayPixelWidth)) pygame.display.update() |
Results

