Introduction
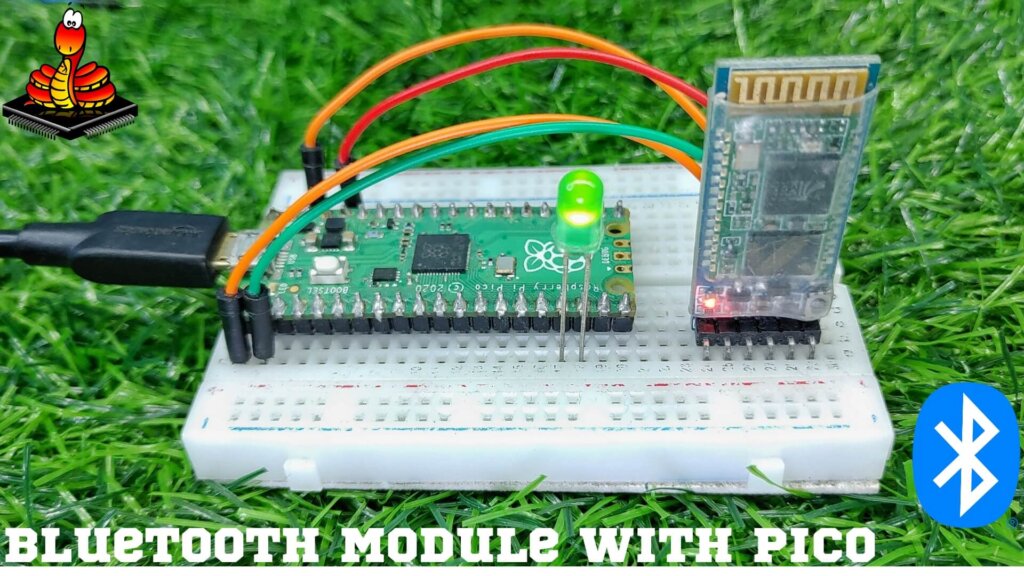
In this article, we will show you how to use a Bluetooth module with Raspberry Pi Pico. The Pico is a powerful yet small board that is perfect for projects. The Bluetooth module we will be using is the HC-05, which is a low-cost and easy-to-use module that is perfect for projects like this. check out Raspberry Pi Pico Weather Station Using DHT11 Sensor
Required Material
- Raspberry Pi Pico
- HC05 Bluetooth Module
- Jumper Wire
- Breadboard
What is the HC05 Bluetooth Module?
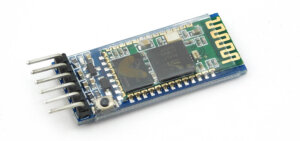
The HC05 Bluetooth Module is a small, inexpensive module that can be used to add Bluetooth connectivity to a project. It can be used to connect to a wide variety of Bluetooth devices. . It can be used for a variety of applications including data transfer, remote control, and wireless networking.
Specification
- Bluetooth protocol: Bluetooth Specification v2.0+EDR
- Frequency: 2.4GHz ISM band
- Emission power: ≤4dBm, Class 2
- Sensitivity: ≤-84dBm at 0.1% BER
- Speed: Asynchronous: 2.1Mbps(Max) / 160 kbps, Synchronous: 1Mbps/1Mbps
- Security: Authentication and encryption
- Profiles: Bluetooth serial port
- Range: <100m
- Supported baud rate: 9600,19200,38400,57600,115200,230400,460800.
HC-05 Default Settings
- Default Bluetooth Name: “HC-05”
- Default Password: 1234 or 0000
- Default Communication: Slave
- Default Mode: Data Mode
- Data Mode Baud Rate: 9600, 8, N, 1
- Command Mode Baud Rate: 38400, 8, N, 1
- Default firmware: LINVOR
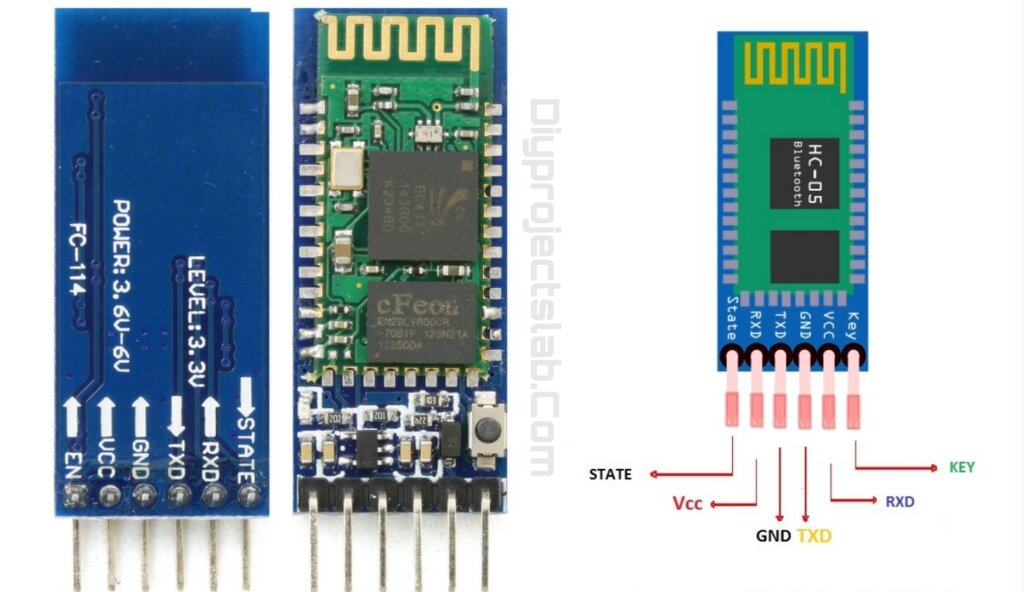
HC05 Bluetooth Module Pinout
How does the HC05 Bluetooth Module work with the Raspberry Pi Pico?
The HC05 Bluetooth Module is a small, inexpensive module that is used to add Bluetooth functionality to the Raspberry Pi Pico.
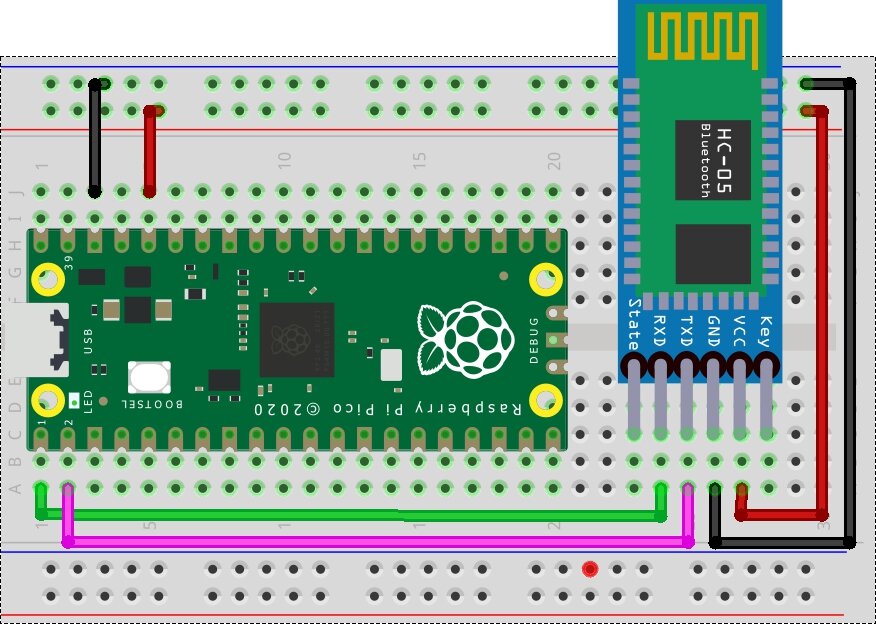
The HC-05 Bluetooth module communicates with the Raspberry pi Pico over the UART interface and can be configured to use either the hardware UART. The module can be powered from the Pico’s 3.3V power supply, or from an external power source.
Schematic Diagram – Bluetooth Module With Raspberry Pi Pico
Micropython Code
Copy the following code and paste it into the Thonny Editor. Check Also Getting Started With Raspberry Pi Pico With Thonny IDE
test.py
This is an example code for checking connections.
|
1 2 3 4 5 6 7 8 |
from machine import Pin,UART uart = UART(0,9600) while True: if uart.any(): command = uart.readline() print(Commands) |
main.py
|
1 2 3 4 5 6 7 8 9 10 11 12 13 14 15 16 17 18 19 |
#Diyprojectslab.com from machine import Pin, UART uart = UART(0, 9600) led = Pin(13, Pin.OUT) while True: if uart.any() > 0: data = uart.read() print(data) if "on" in data: led.value(1) print('LED on \n') uart.write('LED on \n') elif "off" in data: led.value(0) print('LED off \n') uart.write('LED off \n') |
Install Bluetooth Terminal Application
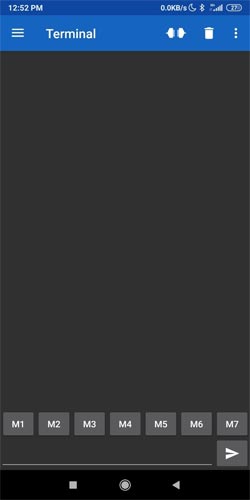
We suggest using the Android app “Serial Bluetooth Terminal” available in the Play Store. You need to download the Serial Bluetooth Terminal App. When you will open the app you can see the next layout. At the base of the app, you can see that we have some buttons marked“M1”, “M2” and so on. We must set up the “M1” as the “On” button and the “M2” as the “Off” button.
Conclusion
The HC-05 Bluetooth Module can be easily interfaced with the Raspberry Pi Pico.
Go to your smartphone and open the “Serial Bluetooth Terminal” app. Make sure you’ve allowed your smartphone’s Bluetooth. To connect to the Pico for the first time, you need to pair a new device.
Then, you can write the“On” and “Off” messages to control the LED.
Raspberry Pi Pico Projects
- 16×2 LCD Display With Raspberry Pi Pico Using Micropython
- PIR Motion Sensor with Raspberry Pi Pico
- Raspberry Pi Pico Home Automation System Using GSM SIM800
- Control PC Volume, and Brightness Using Raspberry Pi Pico & Rotary Encoder
- Interfacing Rotary Encoder With Raspberry Pi Pico Tutorial
- How To Use IR Sensor With Raspberry Pi Pico




2 Comments
Very god job smartronics bhai
Nice sir