
Introduction
In this post we will show you how to use the BME280 sensor with Raspberry Pi Pico W. We will be using MicroPython code to do this. This sensor can measure temperature, humidity, and pressure, and is perfect for use with the Raspberry Pi Pico. The code for this sensor is available on GitHub and is easy to use with the Raspberry Pi Pico. Also See Introduction to Raspberry Pi Pico W – Getting Started: Tutorials, Pinout
You Also Like this
- Raspberry Pi Pico W Web Server with BME280 – Mini Weather Station
- Controlling RGB LED From Raspberry Pi Pico W Web Server with MicroPython
- How To Make Raspberry Pi Pico W Web Server – MicroPython
For our project, we will use a library from a MicroPython, to read the BME280 sensor. Our application will display the readings on the Thonny Shell. After this part, we will try to display BME280 sensor readings on an OLED display which will provide you with more details on the weather monitoring system and weather conditions.
The BME280 library has all the commands to quickly handle the sensor, and commands to Communication via protocol Code, and circuits Examples: console reading, 0.96 OLED display sensor readings Library import
Required Components
You need the following components for this tutorial:
BME280 Sensor
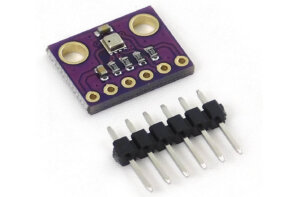
The BME280 sensor from Bosch Sensortec is a low-cost sensor with good accuracy for measuring humidity, barometric pressure and temperature. It is based on the Bosch BME280 humidity and temperature sensor. the BME280 sensor is a great choice for a wide range of applications. It is accurate, has low power consumption, and is very small. You can grab a document of the BME280 Datasheet here.
The BME280 sensor is the favourite and most continuously used for monitoring the weather in a given city, home and other places. BME280 sensors produce measurements for temperature, humidity and atmospheric pressure which are important for any weather monitoring system. Without these parameters, we cannot create a special weather monitoring system in a given city or house.
- Supply Voltage: 1.8 – 5V DC
- Interface: I2C (up to 3.4MHz),
- SPI (up to 10 MHz)
Operational Ranges:
- Temperature: -40°C to +85°C, +-1°C
- Humidity: 0-100%, -3%
- Pressure: 300-1100 hPa, +-1Pa
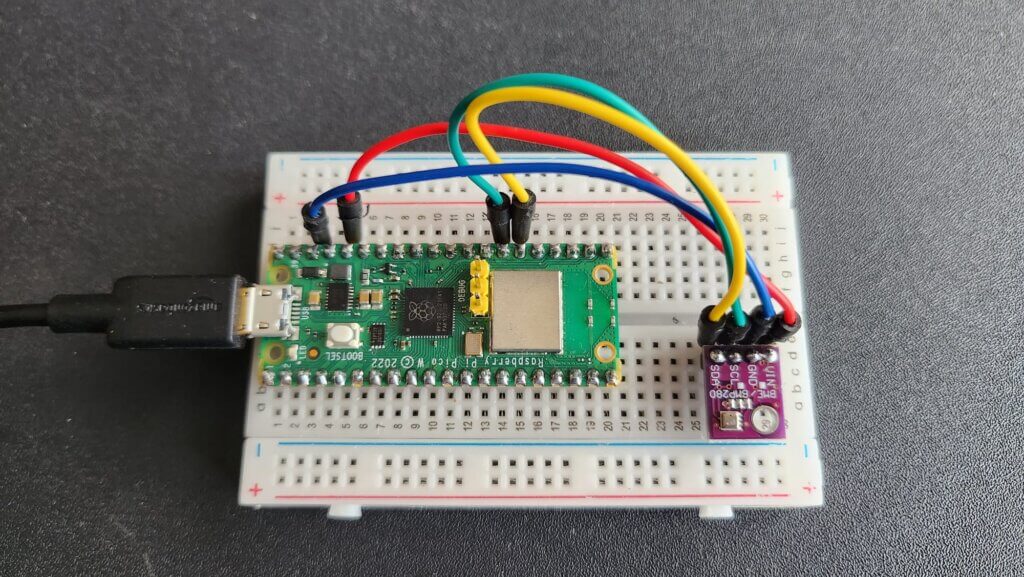
Schematic Diagram – BME280 Sensor With Raspberry Pi Pico W
As declared before, BME280 works with the I2C protocol. So we just need 4 connections. Refer to the connection Figure below:
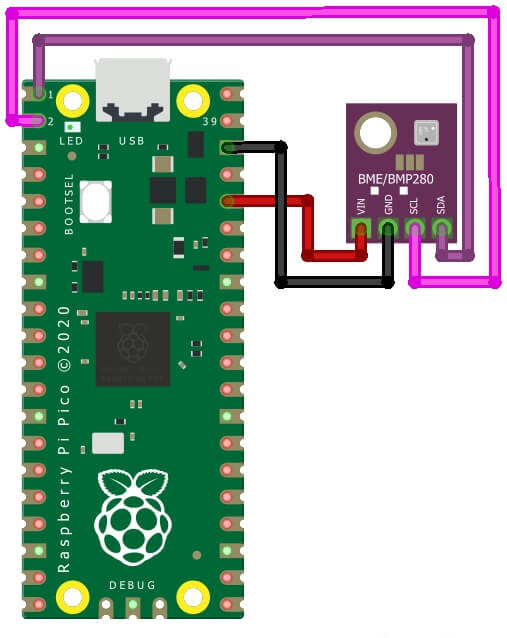
| BME280 | Raspberry Pi Pico |
| VCC | 3.3V |
| SDA | GP0 (I2C0 SDA) |
| SCL | GP1 (I2C0 SCL) |
| GND | GND |
Micropython Code & Libraries
The code for interfacing the BME280 Sensor with Raspberry Pi Pico separates into two parts:
- bme280.py
- main.py
The main code requires a library for BME280. The library consists of details of required modules and registers to extract the data from the Sensor.
bme280.py
Open your Thonny IDE, then paste the following code to the Thonny Editor and save the file as “bme280.py” in your Raspberry Pi Pico.
main.py
Open another tab on Thonny IDE and paste the following code and save the file as main.py on Raspberry Pi Pico
Upload the first line and then run the main.py program. In case everything is ok, the shell will display two alignment texts and two coded texts.
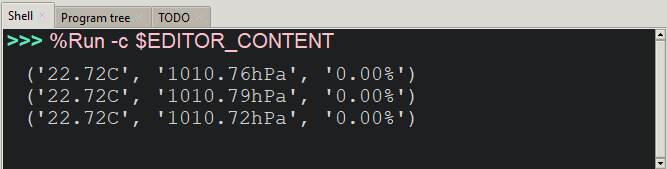
In thonny IDE, you can check the value of temperature, pressure, and humidity.
Interface BME280 Sensor with Raspberry Pi Pico & OLED Display
Let us explore how to connect a BME280 Sensor with a Raspberry Pi Pico & display the temperature, pressure, and humidity reading on a 0.96″ I2C OLED Display. The connection is pretty straightforward as shown below and does not require any third-party library.
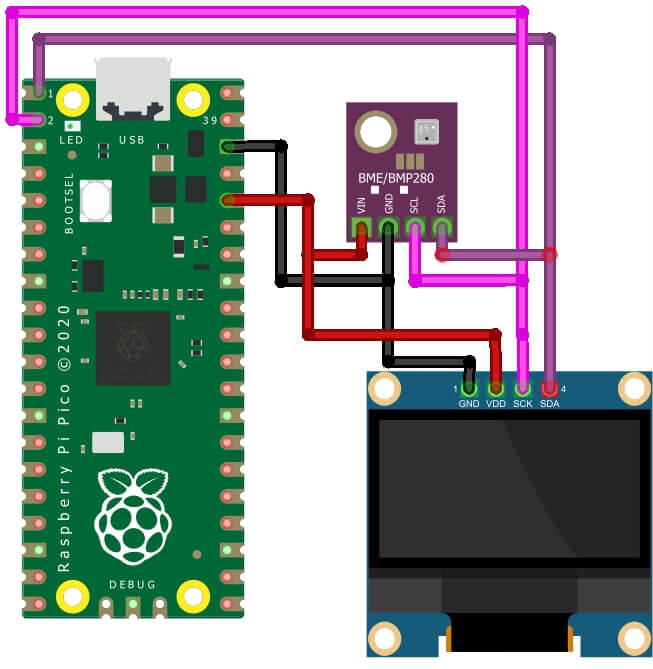
Attach the VCC, GND, SCL & SDA pins of the OLED Display to 3.3V, GND, GP1 & GP0 of Raspberry Pi Pico respectively.
MicroPython Code & Library: BME280, OLED Display & Pi Pico
The code for the BME280 & PICO Project is divided into three parts:
- bme280.py
- ssd1306.py
- main.py
The main code requires a library for BME280 & SSD1306 OLED Display. The library has all the required modules and registers to extract the data from the BME280 Sensor & display the reading on a 0.96″ OLED Display.
bme280.py
Save the file as bme280.py on Raspberry Pi Pico.
ssd1306.py
We need a library for the OLED Display. Open a tab on Thonny IDE and paste the following code. Save the file as ssd1306.py on Raspberry Pi Pico.
main.py
Open a new tab on Thonny IDE. The following code will be created and saved on a new tab. Save the file as main.py
Run the main.py code after you import all the dependent packages. The OLED will display the temperature, pressure, and humidity.
Conclusion
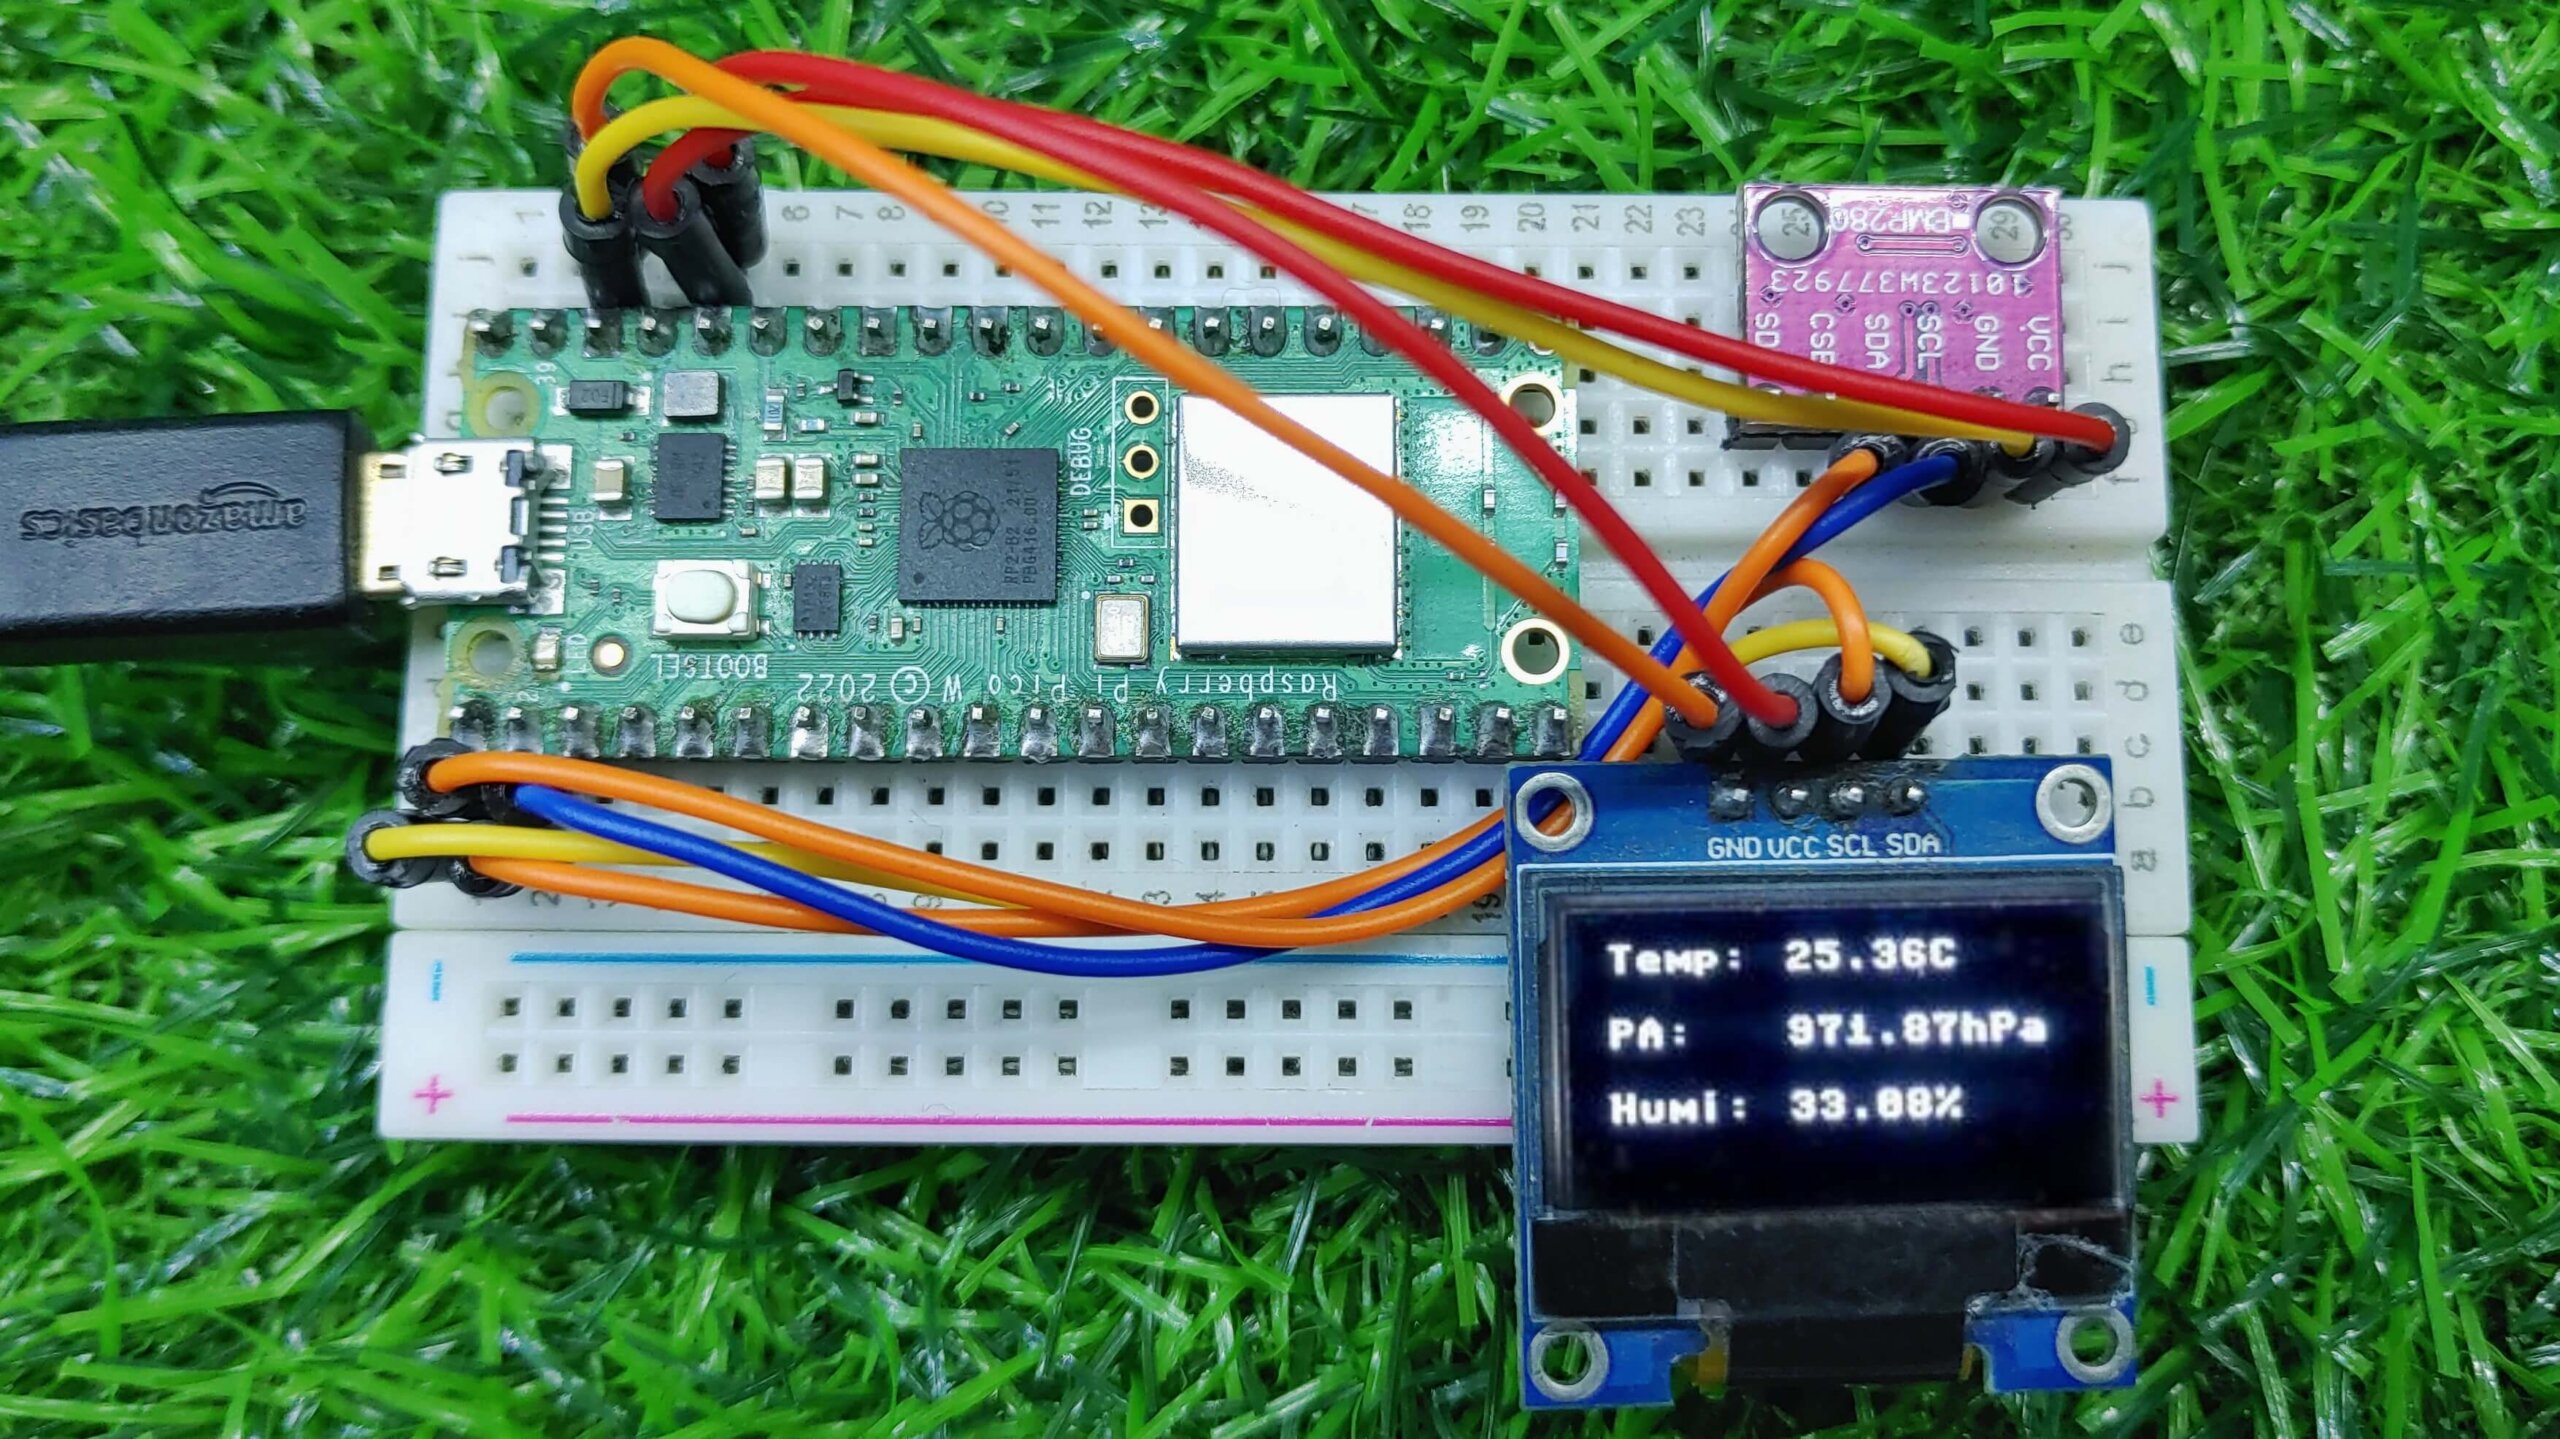
This MicroPython code shows how to use the BME280 sensor with the Raspberry Pi Pico W. The code first initializes the I2C bus and then creates a BME280 instance. The code then reads the temperature, humidity, and pressure data from the sensor and prints it to the OLED Display & console.


1 Comment
Pingback: Raspberry Pi Pico W Web Server With BME280 – Weather Station