
A Raspberry Pi is a tiny and affordable computer that you can use to learn programming through fun, practical projects. Join the global Raspberry Pi community. In this tutorial, we will learn how to Build a Remote Raspberry Pi Camera Server.
It can be used in your 3D Printer monitoring system, Camera (Record Photos/Videos and also Time-lapse), Server, and a Linux desktop. And the useful part is because we are using Remote-it service we can access all this remotely from anywhere in the globe.
Supplies
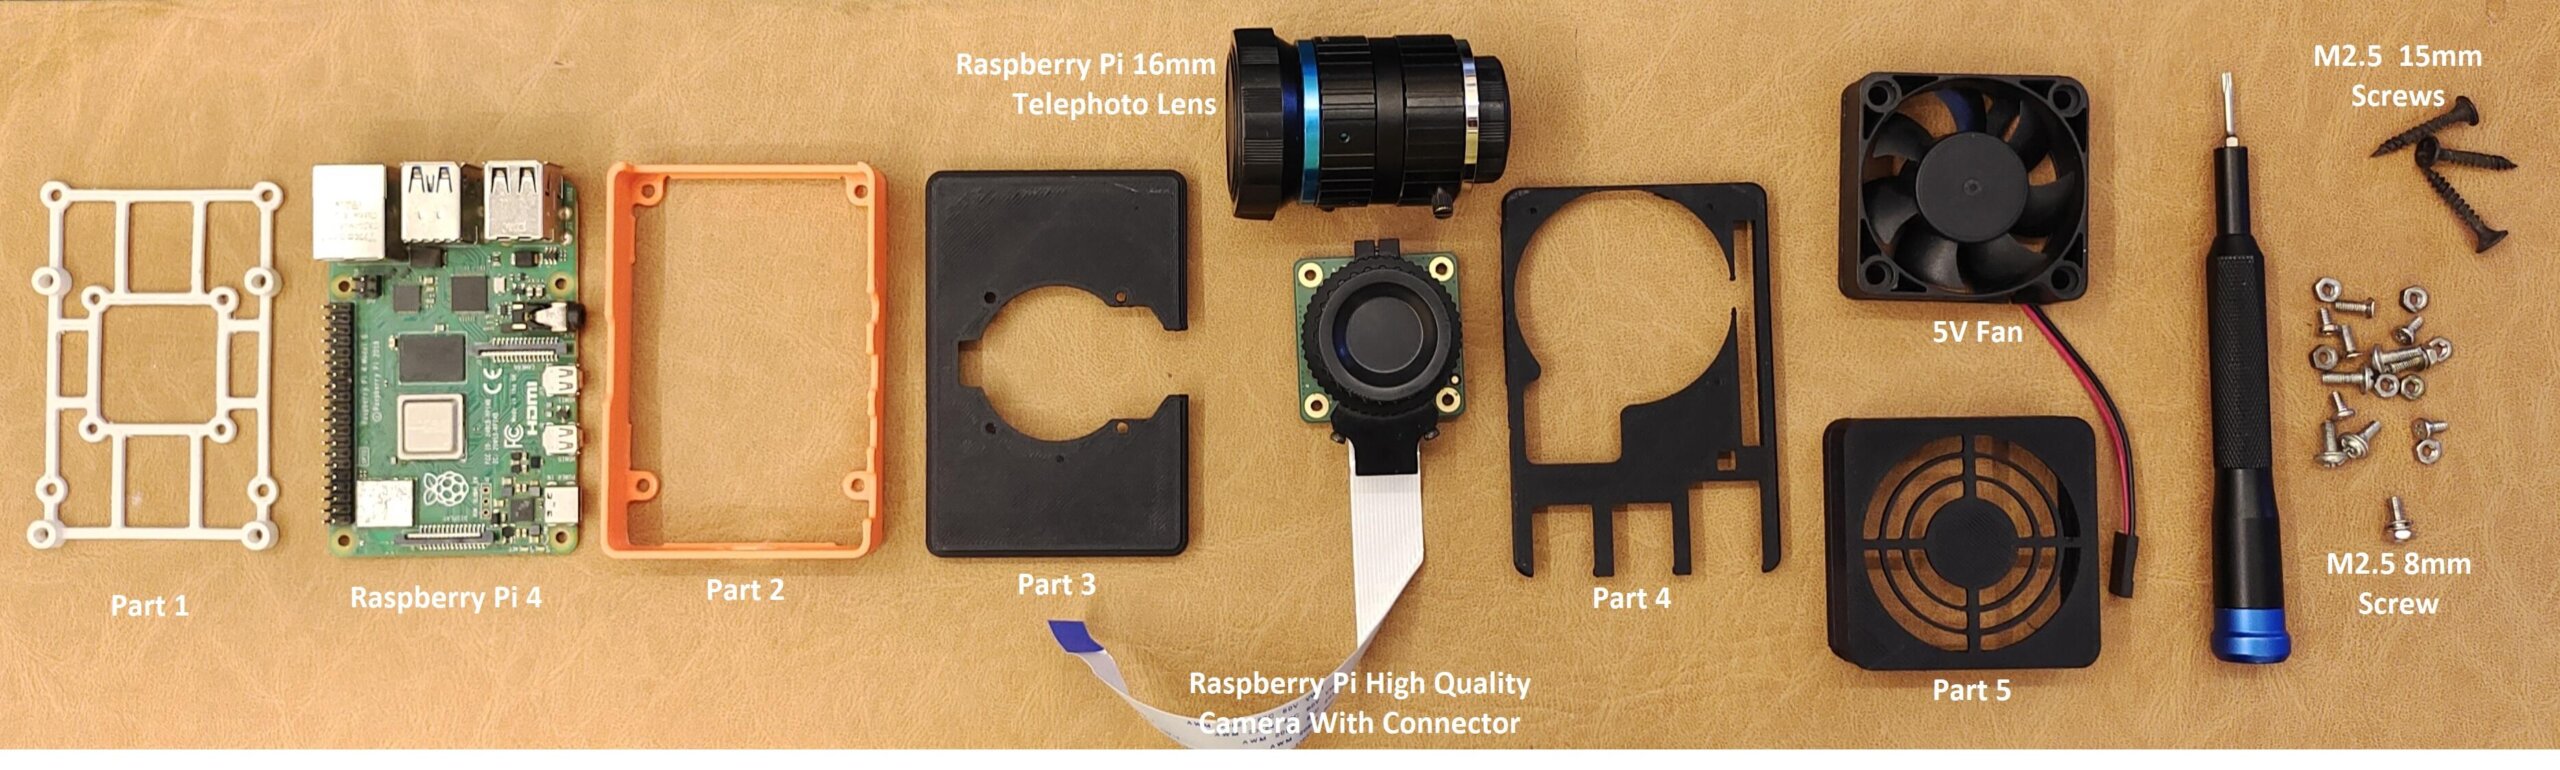
Components Required
- Raspberry Pi 4 ( Amazon )
- Raspberry Pi HQ Camera ( Amazon )
- 16mm Telephoto Lens ( Amazon ) or 6mm Wide-angle Lens ( Amazon )
- 5V Fan(50*50*15 mm) ( Amazon )
- M2.5 8mm & 5mm Screws ( Amazon )
Tools Used:
Step 1: Fusion 360 Design and 3D Printing File
- I have created the Raspberry Pi Camera case in Fusion 360 software.
- You can Modify The Design Model in Fusion 360 Software
3D Printed Enclosure
Parts are developed to 3D print without any support material. The original design source may be downloaded using the links below.
- 3D Print all the pieces are provided here Click For STL Files


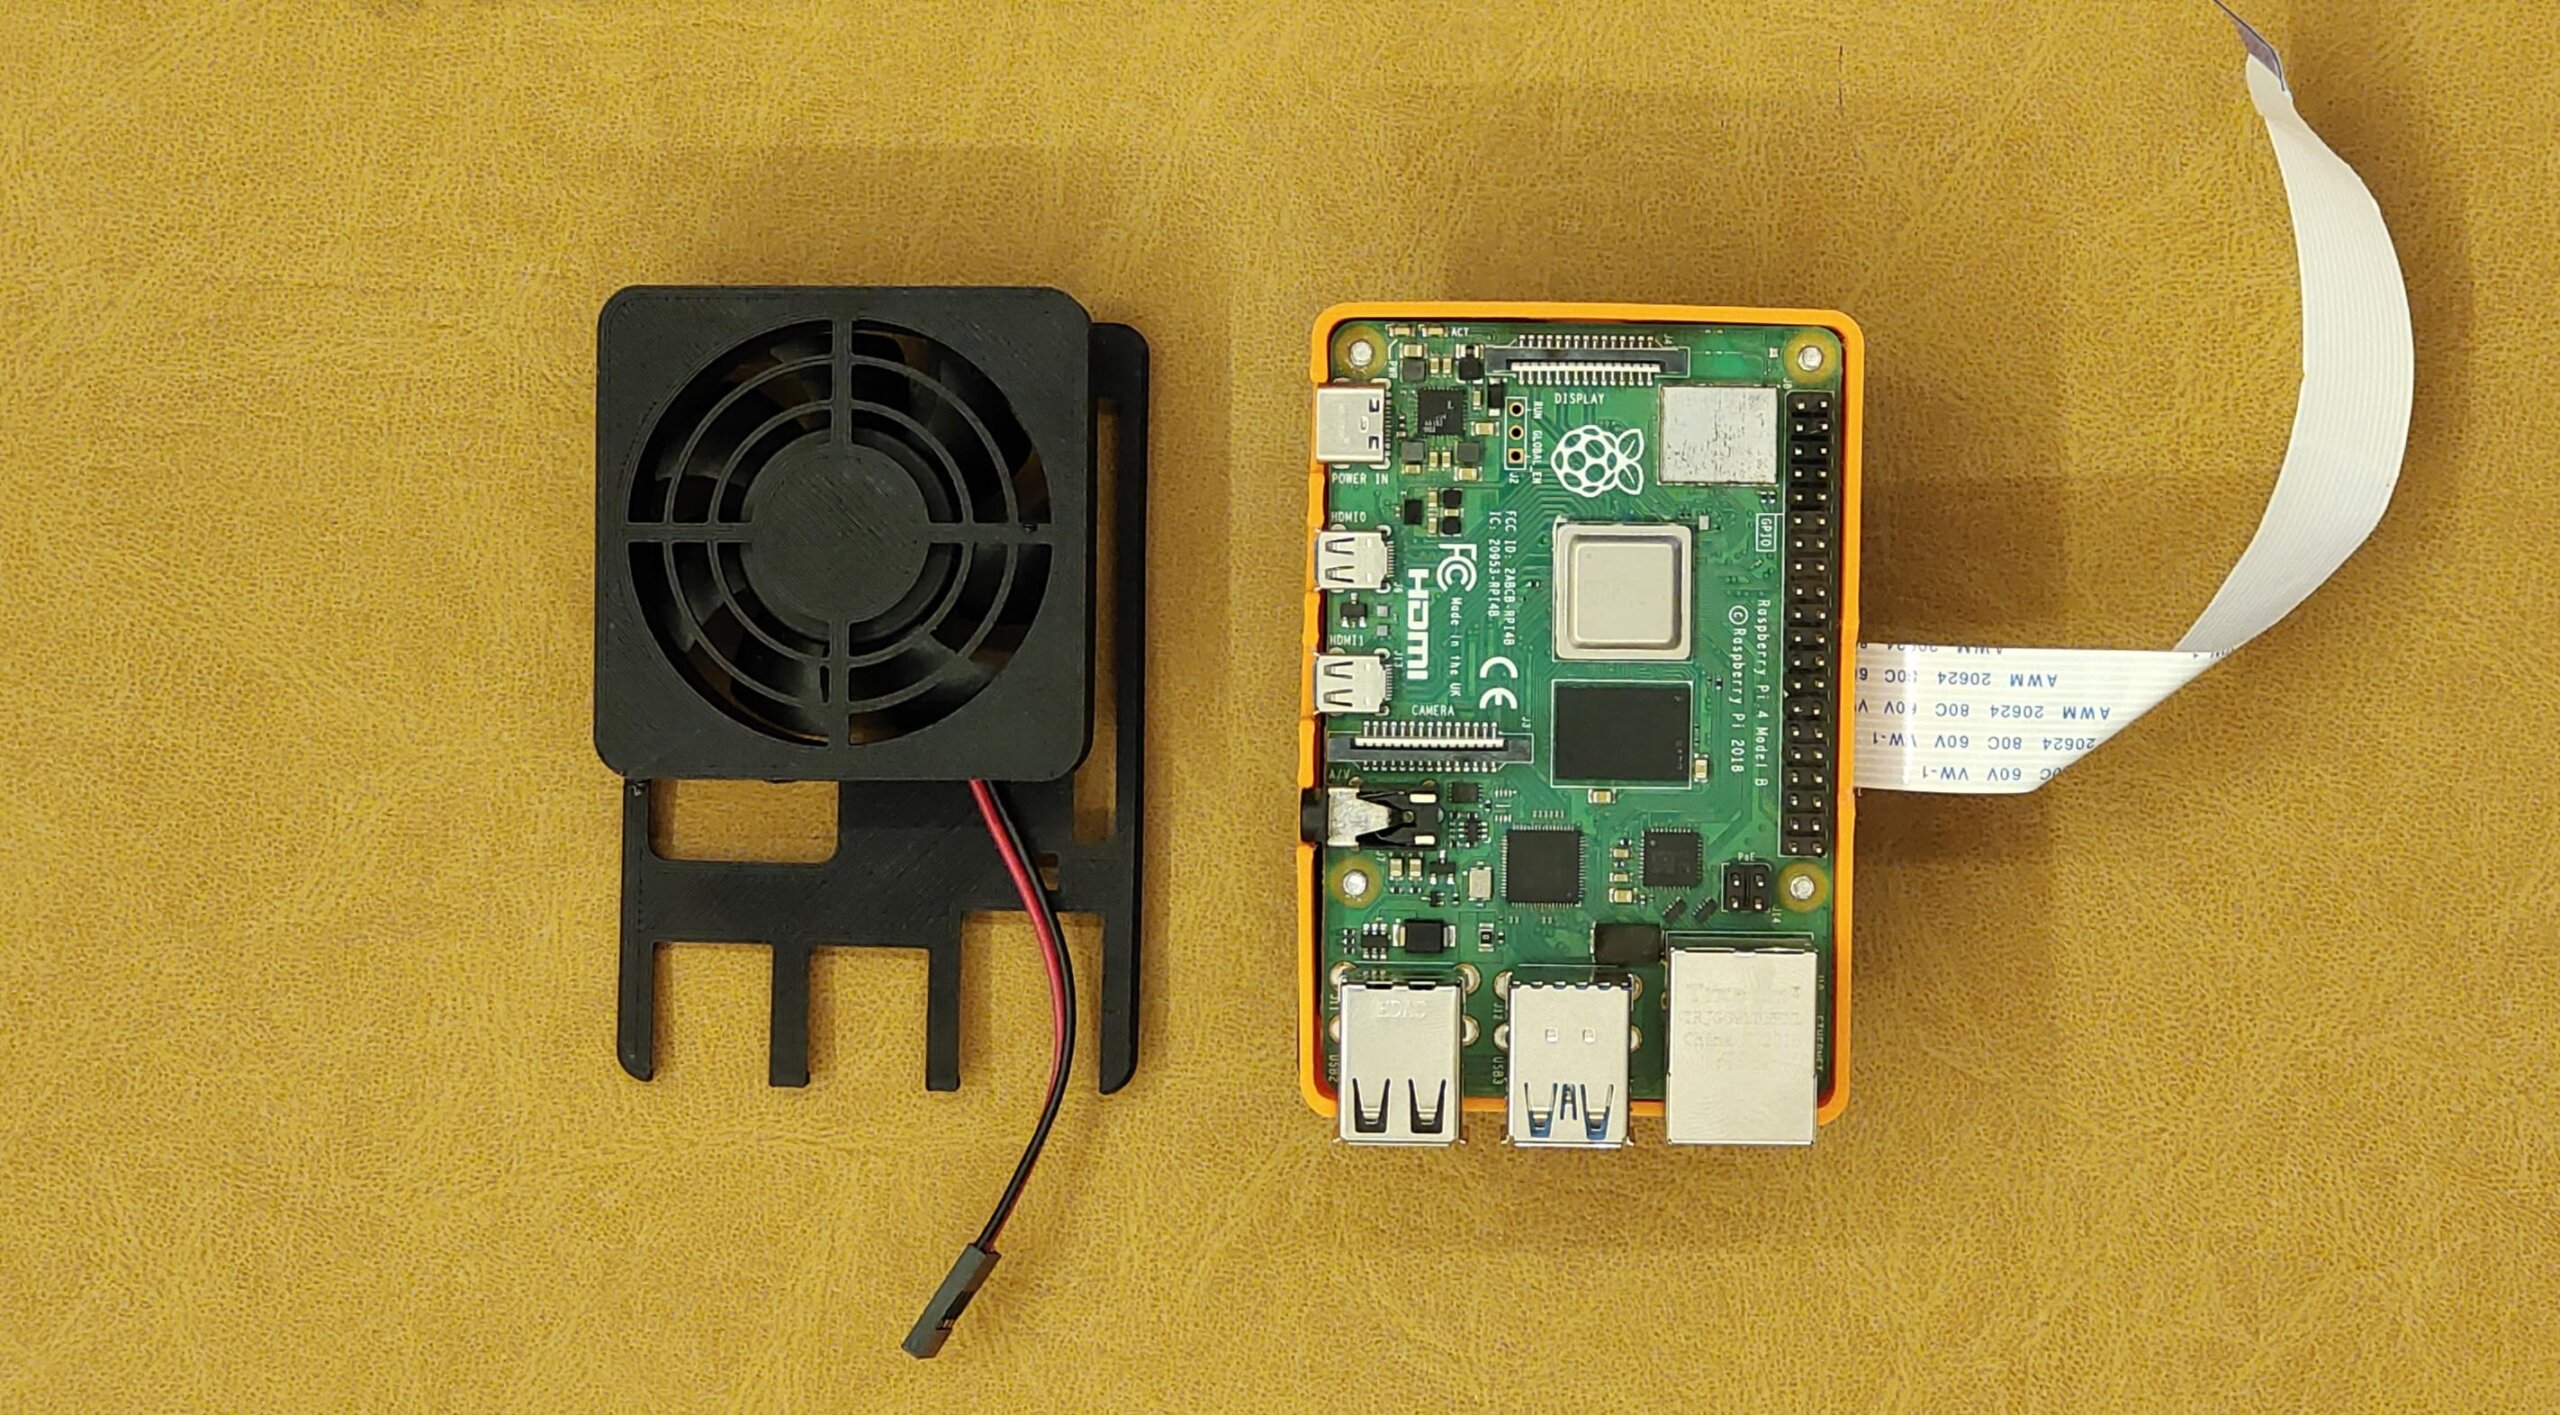
Step 2: Mount the Raspberry Pi
- Complete the 3D printed parts as displayed in pictures with the use of 8mm screws
- Place the Raspberry Pi board in the created 3D-printed enclosure and fix it with 8mm screws.


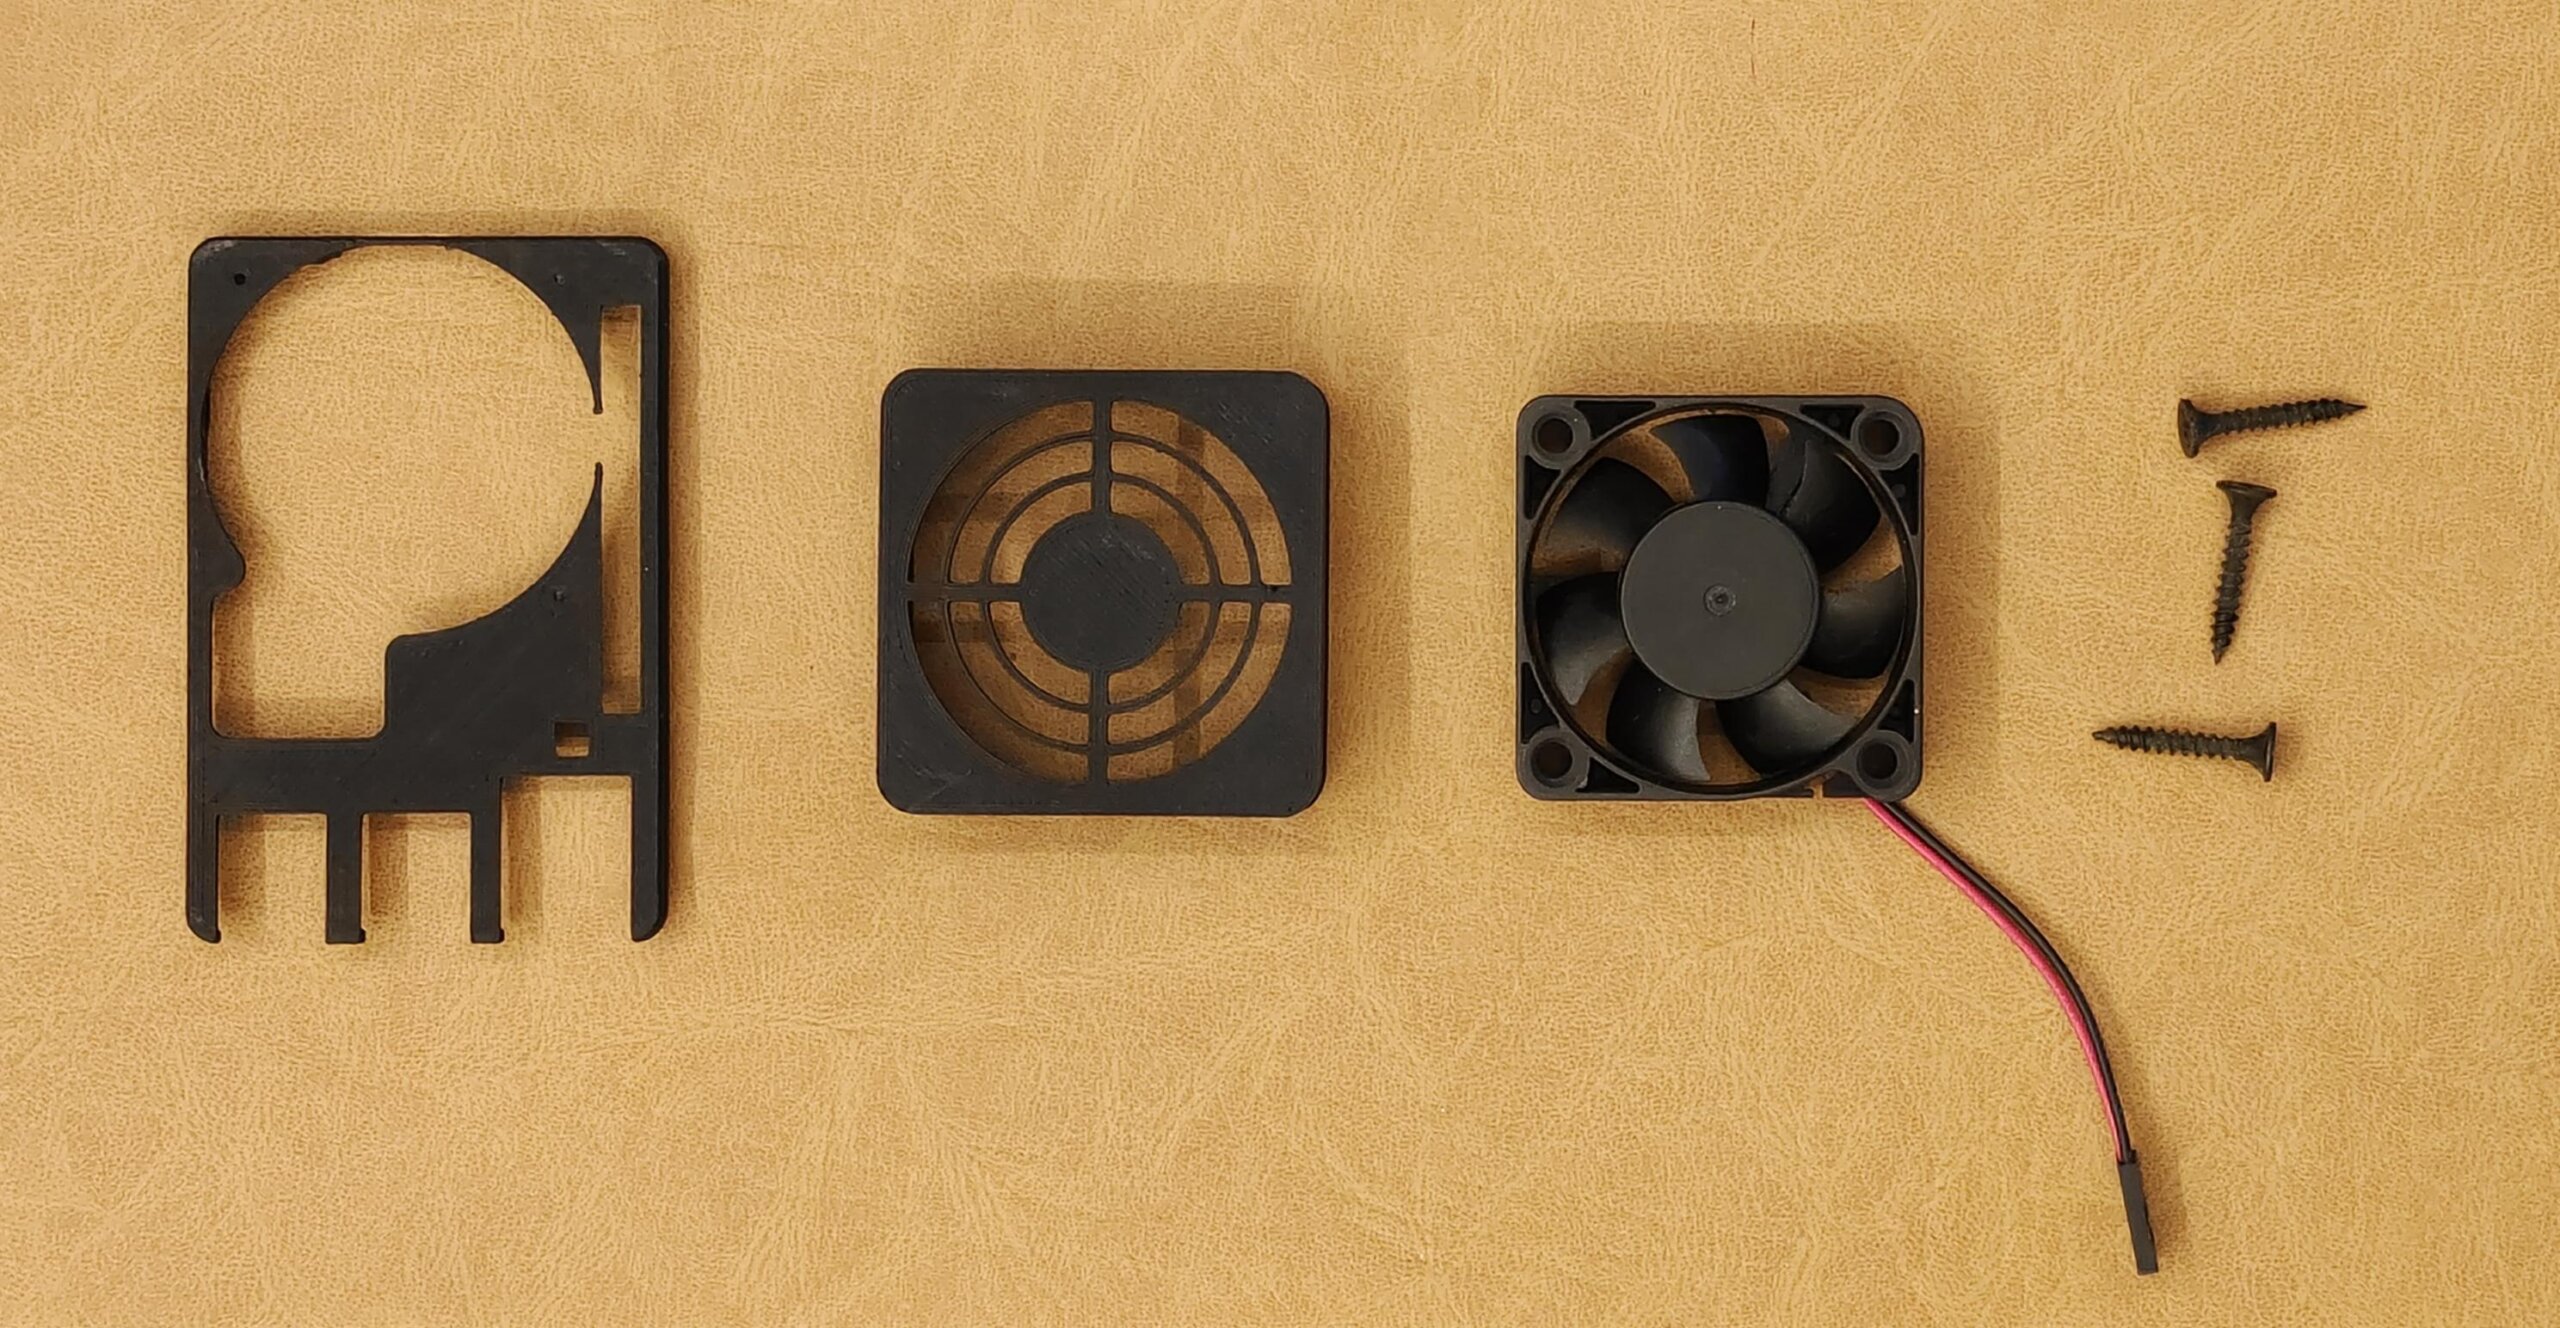
Step 3: Install the Cooling Fan
- Carry the 3d printed part and fix the camera module to it with the support of 5mm screws as shown.
- Insert the fan to one half of the enclosure, then connect the other side, parts should fit snugly together.
- Connect the 5v fan to part 4 using M2.5 15mm screws.
- Snap the camera assembly into the raspberry pi assembly.
Step 4: Install Front Frame
Insert the stripped cable and press down on the black tab to secure
Make sure the stripes face the correct direction based on the images above.
The ribbon cable is fitted via the top of the camera port on the rear cover.


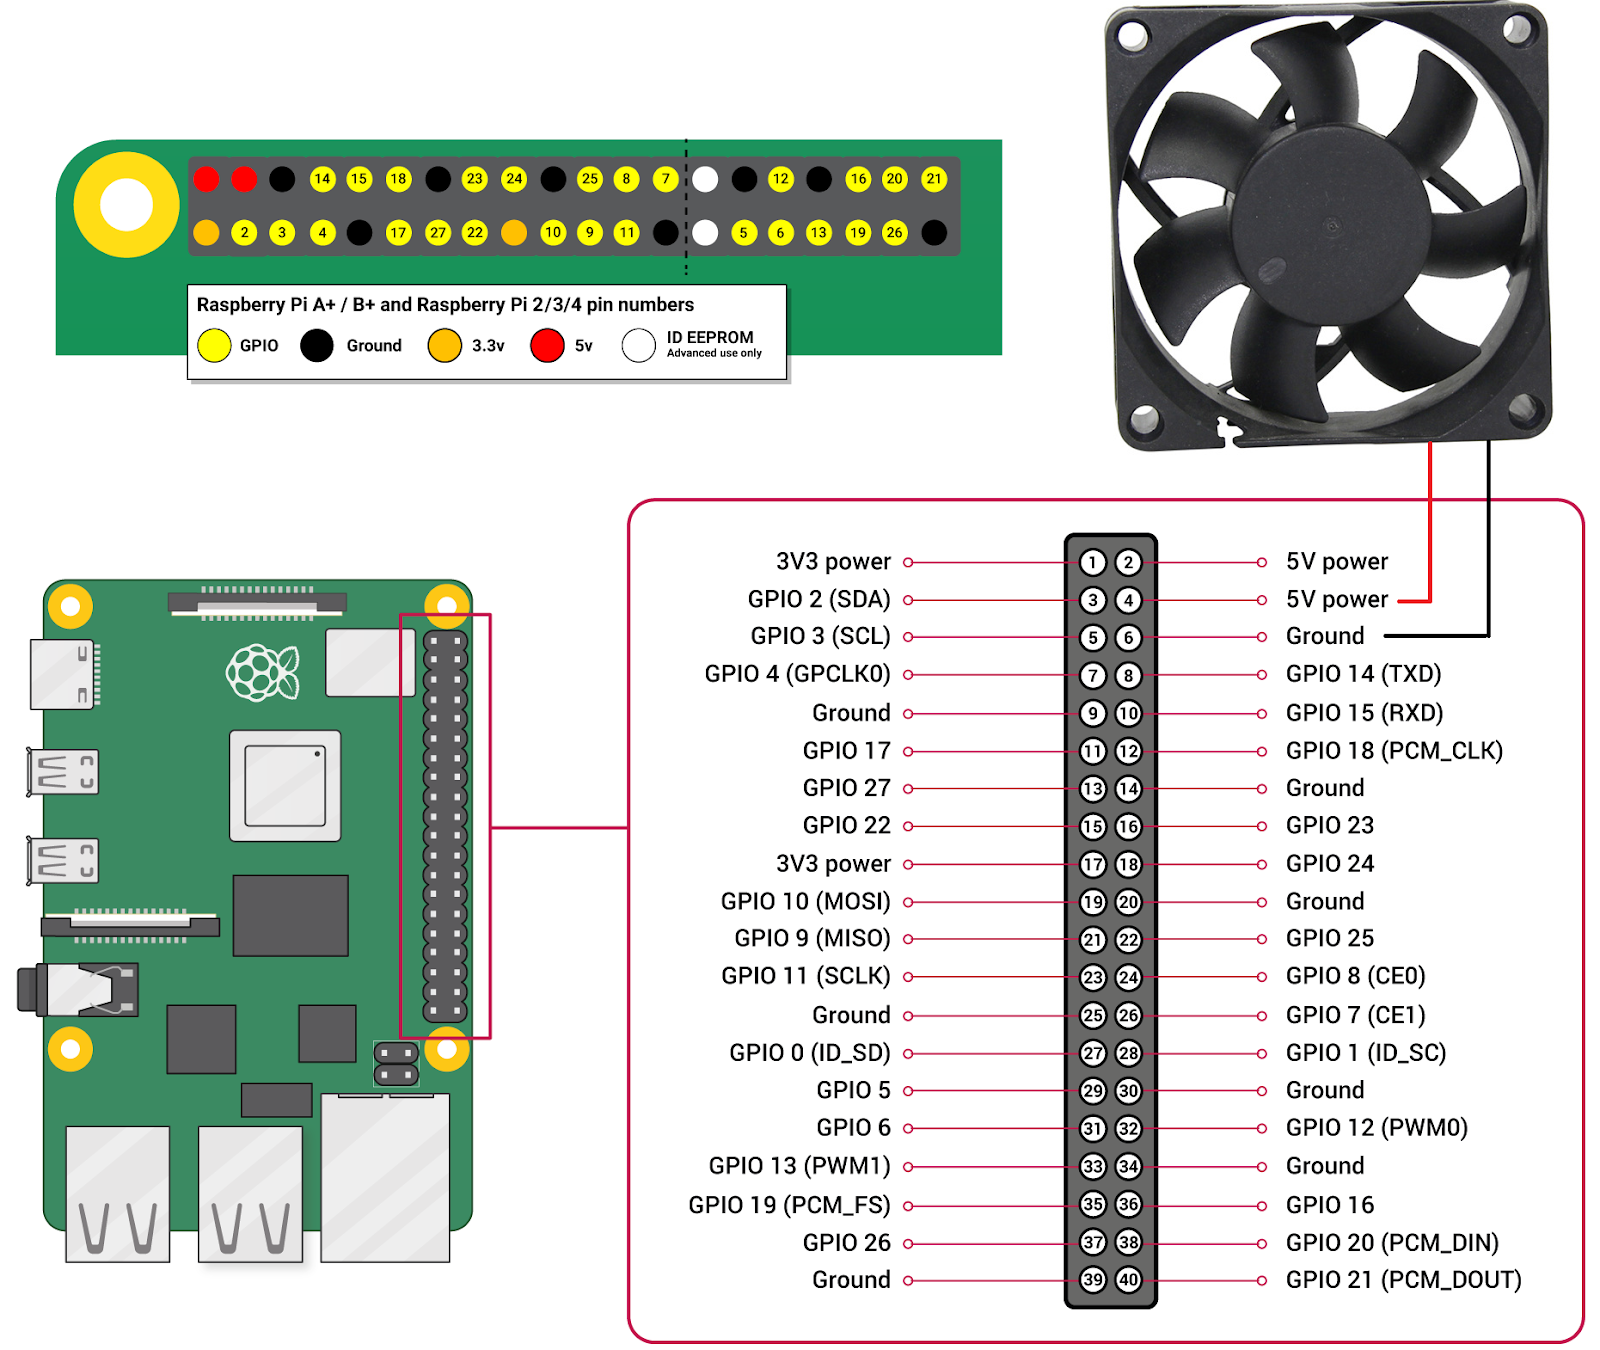
Step 5: Wiring and Final Assembling
Wiring
- Connect the 5V fan to GND and 5V DC
Step 6: Final Assembling
Now you can install the Camera Module and Lense to their respective slots. I have used hot glue and double-sided tape to mount all the components.
- Now put the Lens on the camera and you are good to go. And that’s it! The Raspberry Pi is ready to power up and start snapping pics.


Step 7: Install the Software and Do the Required Settings
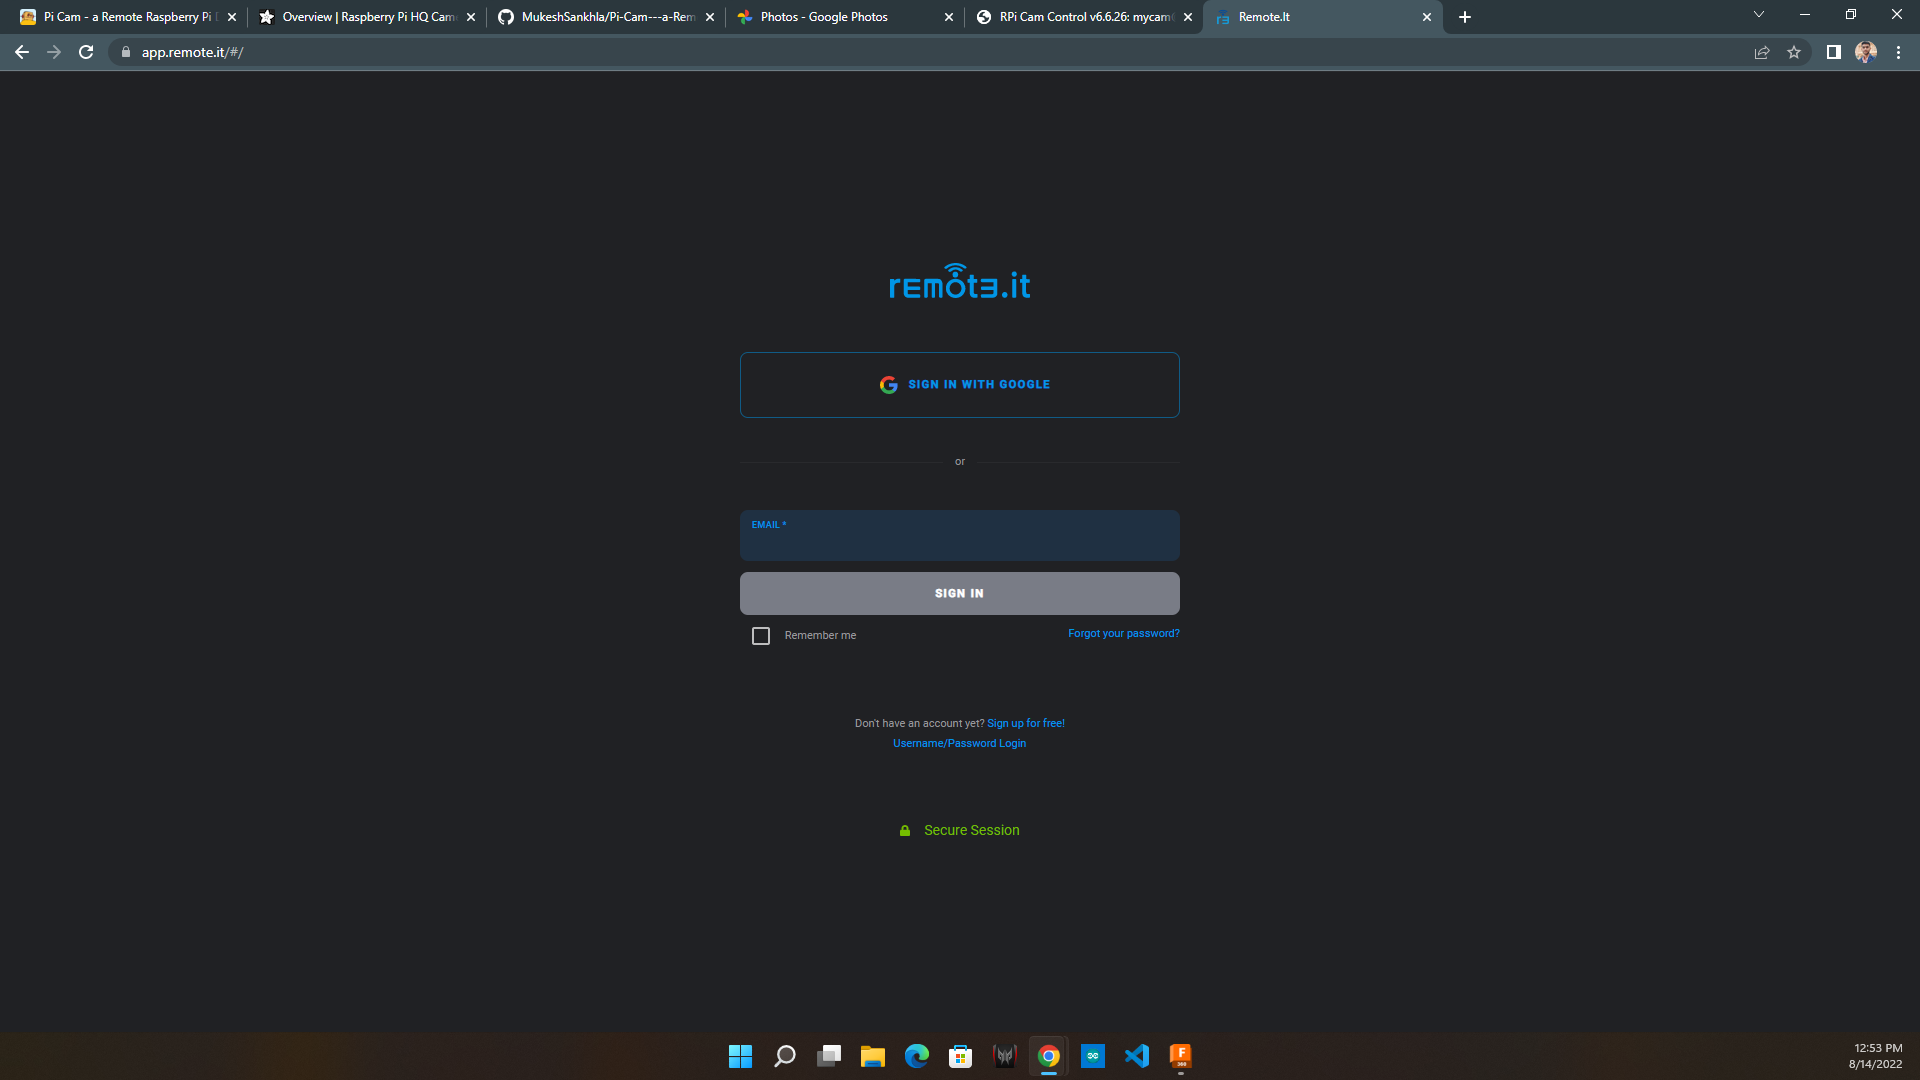
Create Account
- Create a remote.it account and log in with your email and password.
Step 8: Setting Up Remote VNC
How To Install VNC on Raspberry Pi | Remote Access Desktop – SSH and VNC
- First, install the Raspberry Pi OS on the memory and set up the system.
- Connect the system via HDMI to an external monitor.
- Enable SSH and VNC Viewer.
- Run the commands
|
1 2 |
sudo apt-get update sudo apt-get upgrade |
- If it requests any permission (Yes/No) type y and enter.
- Run the following command for installing Remote. it is a service on Raspberry Pi.
|
1 |
sudo apt install connectd |
- To launch the service run the following command
|
1 |
sudo connectd_installer |
- Now choose option 1 and log in with your email and password.
- After login, you will see the active services and different options to add remote services.
- You can select option 4 for starting remote VNC service and type the name for your service.
- After registering the service you can see the connected service with your given name you can connect it and launch it in VNC viewer with your Raspberry pi name and password.


Step 9: Setting Up Remote Camera
- First, enable the legacy camera by ordering the command and navigating to the legacy camera enable the option.
|
1 |
sudo raspi-config |
- Now install the raspberry pi camera web interface by ordering the commands.
|
1 2 3 4 |
sudo apt-get install git git clone https://github.com/silvanmelchior/RPi_Cam_Web_Interface.git cd RPi_Cam_Web_Interface ./install.sh |
- If you get an error while the ./install.sh command you can run the command
|
1 |
apt-get update --fix-missing |
- You will get the image 3 screen where you can save the settings as mine.
- Now again run the command and log in with the remote. it’s email and password.
|
1 |
sudo connectd_installer |
- Select option 2 since we are delivering HTTP port 80
- You can name your camera service
- After successful registration, you will find the service in your account with your given name.
- After connecting and launching the service you can record and download photos, videos and time-lapse.
- There are many settings in the web interface you can modify according to your need.


Step 10: Conclusion Raspberry Pi Camera


Creating your own Pi camera stream is a great start in the world of live camera stream projects. Using a Raspberry Pi carries down the cost quite while having a good amount of processing capacity. This tutorial is to get you started.
Here are some references Raspberry Pi Camera
- Adafruit RPi Camera Case
- RPi CCTV Camera
- Source- Pi Cam – a Remote Raspberry Pi Desktop/Camera/Server


