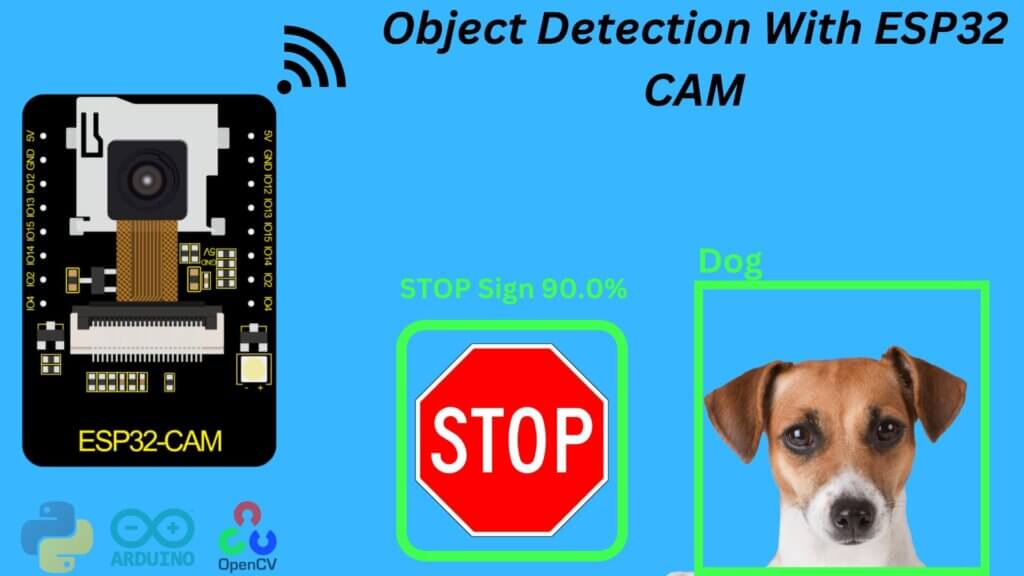
Hi everyone! This tutorial will cover how to perform ESP32-CAM Object detection Using OpenCV In Python. We’ll be covering what the ESP32-CAM is and how to set it up, and then dive right into object detection. With OpenCV, you can process images and videos to detect objects, faces, or even the steering angle of a self-driving car.
We’ll use the Arduino IDE to program the ESP32-CAM and Python program for OpenCV to build a face detection and recognition project.
Here we explore how to use OpenCV in your projects using ESP32 Cam. OpenCV is a powerful library for image processing and computer vision that provides tools and functions for analyzing images and video streams.
Required Materials
- ESP32 Camera module
- FTDI Module
- Micro-USB Cable
- Jumper Wires
ESP32 CAM Module
The ESP32-CAM combines an ESP32-S module and an OV2640 2-megapixel camera. ESP32 Camera is designed for applications such as automation, security systems, and the Internet of Things (IoT) that require image or video processing.
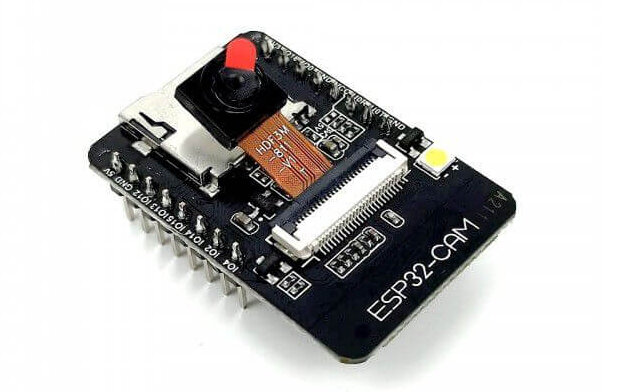
The ESP32-CAM module features of ESP32 Cam module, which can capture images and video up to a resolution of 1600 x 1200 pixels.
The ESP32 cam is based on a 32-bit CPU, which also contains a combined Wi-Fi and Bluetooth/BLE. As well as being built in 520 KB SRAM, there is also external 4Mb PSRAM. This module contains GPIO Pins that have UART, SPI, I2C, PWM, ADC, DAC, and much more support.
Check ESP32 CAM Tutorial with Arduino IDE – This tutorial provides a step-by-step guide to getting started with the ESP32-CAM module using the Arduino IDE
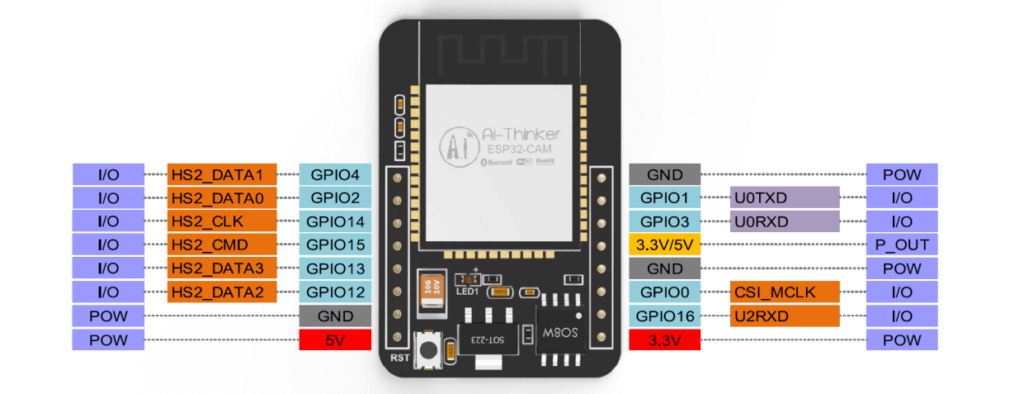
ESP32 CAM Pinout
ESP32 Cam has 16 GPIO (general-purpose input/output) pins with the PWM, I2C, SPI, and UART functions.
Connection Between ESP32 Cam & USB-To-TTL
The ESP32-CAM module does not have a USB input, so for its initial configuration/programming, it is necessary to use a USB Converter for serial. ESP32-CAM module can be programmed using the FTDI USB to serial converter. there are many FTDI modules available based on different chips, like CP2102, CP2104, FT232RL, CH340G, and much more.
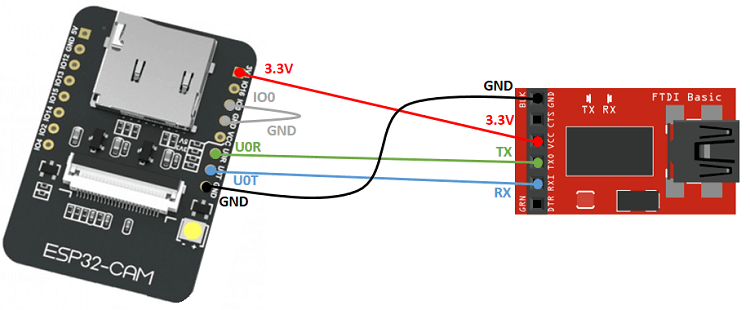
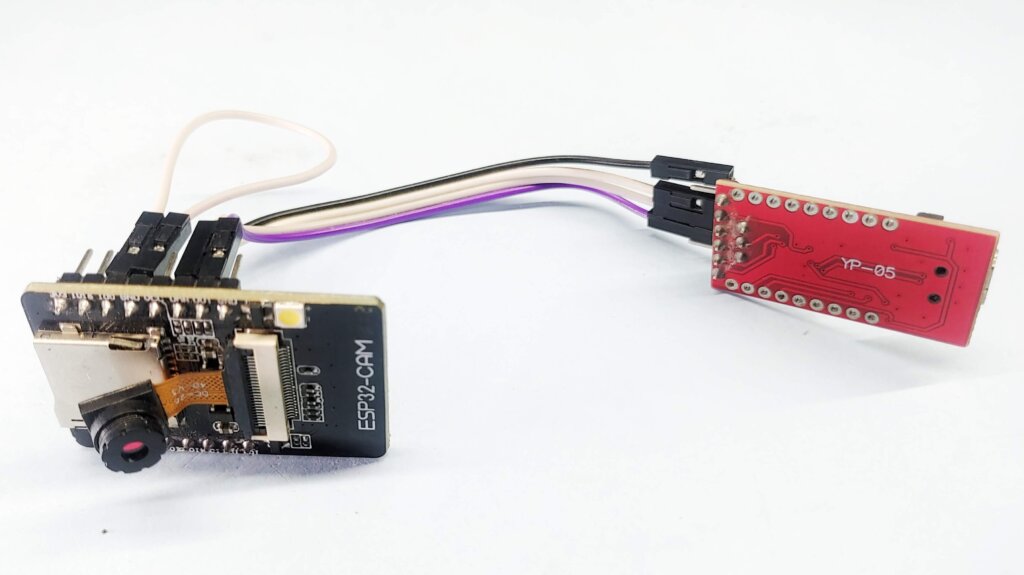
Here are the Circuit connections you will need to make between an FTDI module and an ESP32-CAM module for programming.
Make the connections according to the table and schematic below.
| FTDI Module | ESP32-CAM Module |
|---|---|
| GND | GND |
| 3.3V | 3.3V |
| TX | RX (U0R) |
| RX | TX (U0T) |
| GND | GPIO0 |
Note – Make sure to check your connections before programming the ESP32-CAMERA module.
Arduino IDE configuration for ESP32-CAM
We already show how to program the ESP32 module with the Arduino IDE so check our previous post.
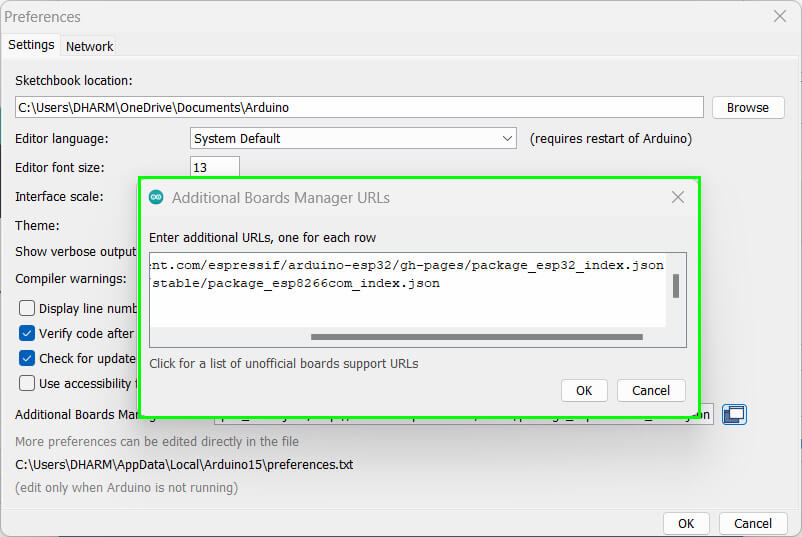
In the field Additional URLs for Board Manager enter the link https://raw.githubusercontent.com/espressif/arduino-esp32/gh-pages/package_esp32_index.json and then click on OK.
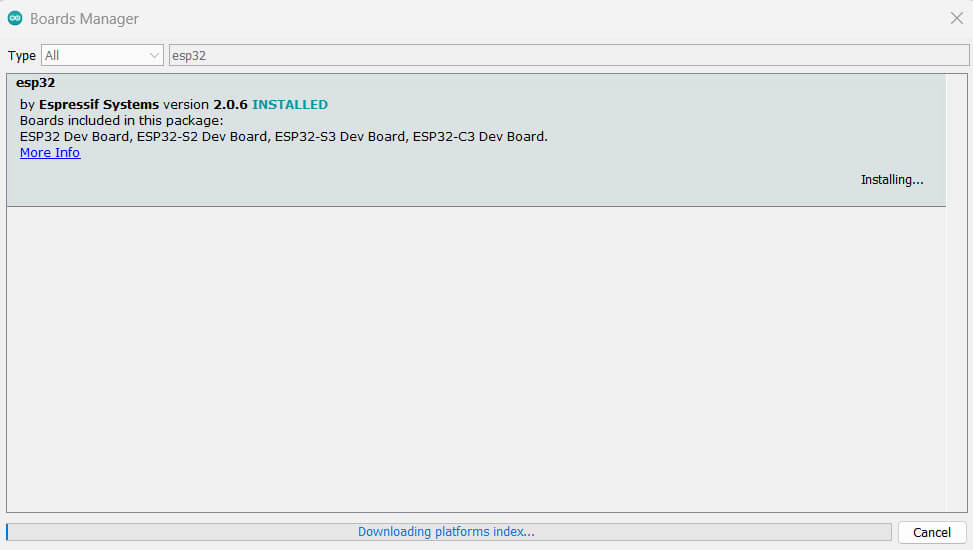
After a few seconds, the ESP32 boards will be available in your ide board manager.
Software and Libraries
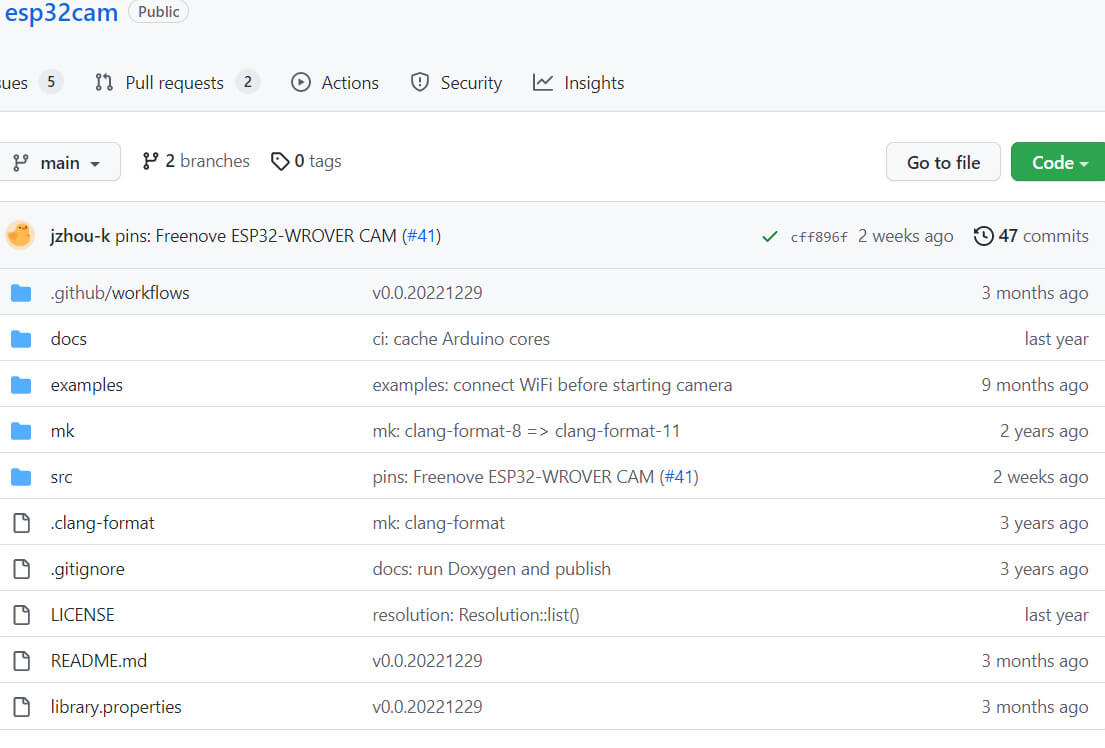
Download the ESP32 Libraries from the ESP32-CAM GitHub repository. You can download the ZIP file by clicking on “Clone or download” & selecting “Download ZIP”.
Clone this repository under $Admin/Arduino/libraries directory.
Download the full code for – ESP32 Cam Object Detection
Arduino Code – ESP32-CAM Object Detection With OpenCV
Here’s an example code for object detection and identification using the ESP32-CAM module in Arduino IDE:
At Arduino IDE go to Tools > Board. Select ESP32 Wrover Module.
|
1 2 3 4 5 6 7 8 9 10 11 12 13 14 15 16 17 18 19 20 21 22 23 24 25 26 27 28 29 30 31 32 33 34 35 36 37 38 39 40 41 42 43 44 45 46 47 48 49 50 51 52 53 54 55 56 57 58 59 60 61 62 63 64 65 66 67 68 69 70 71 72 73 74 75 76 77 78 79 80 81 82 83 84 85 86 87 88 89 90 91 |
#include <WebServer.h> #include <WiFi.h> #include <esp32cam.h> //THIS PROGRAM SENDS IMAGE IF IT IS PLACED IN WEB IP, BUT IF IT IS PLACED IN PYTHON IT SENDS VIDEO THROUGH THE ITERATIONS. . . (IF IT WORKS IN PYTHON) const char* WIFI_SSID = "ESP Repeater"; const char* WIFI_PASS = "77777777"; WebServer server(80); //server on port 80 static auto loRes = esp32cam::Resolution::find(320, 240); //low resolution static auto hiRes = esp32cam::Resolution::find(800, 600); //high resolution //static auto hiRes = esp32cam::Resolution::find(640, 480); //high resolution (for fps rates) (IP CAM APP) void serveJpg() //capture image .jpg { auto frame = esp32cam::capture(); if (frame == nullptr) { Serial.println("Capture Fail"); server.send(503, "", ""); return; } Serial.printf("CAPTURE OK %dx%d %db\n", frame->getWidth(), frame->getHeight(), static_cast<int>(frame->size())); server.setContentLength(frame->size()); server.send(200, "image/jpeg"); WiFiClient client = server.client(); frame->writeTo(client); //and send to a client (in this case it will be python) } void handleJpgLo() //allows to send low resolution image { if (!esp32cam::Camera.changeResolution(loRes)) { Serial.println("SET-LO-RES FAIL"); } serveJpg(); } void handleJpgHi() //allows to send high resolution image { if (!esp32cam::Camera.changeResolution(hiRes)) { Serial.println("SET-HI-RES FAIL"); } serveJpg(); } void setup() { Serial.begin(115200); Serial.println(); { using namespace esp32cam; Config cfg; cfg.setPins(pins::AiThinker); cfg.setResolution(hiRes); cfg.setBufferCount(2); cfg.setJpeg(80); bool ok = Camera.begin(cfg); Serial.println(ok ? "CAMARA OK" : "CAMARA FAIL"); } WiFi.persistent(false); WiFi.mode(WIFI_STA); WiFi.begin(WIFI_SSID, WIFI_PASS); //connect to the WiFi network while (WiFi.status() != WL_CONNECTED) { delay(500); } Serial.print("http://"); Serial.print(WiFi.localIP()); Serial.println("/cam-lo.jpg");//to connect IP low res Serial.print("http://"); Serial.print(WiFi.localIP()); Serial.println("/cam-hi.jpg");//to connect high res IP server.on("/cam-lo.jpg",handleJpgLo);//send to the server server.on("/cam-hi.jpg", handleJpgHi); server.begin(); } void loop() { server.handleClient(); } |
Set these two parameters according to your Wi-Fi settings.
|
1 2 3 |
const char* WIFI_SSID = "SSID"; const char* WIFI_PASS = "Pass"; |
Note – Remove the jumper connected between GPIO0 & GND in ESP32 Cam After uploading the code.
Open the Serial Monitor with the baud rate of 115200 Press the ESP32-CAM Reset button and wait for the IP to appear on the serial monitor. Wait for a few seconds and then hit reset again. As you can see I got my IP and it is shown in the image.

Python Code & Libriries
Here is an example code for object detection and identification using the ESP32-CAM Object Detection Using OpenCV In Python.
We need to install OpenCV. We are going to use the Python programming language to make this tutorial work, so let’s get started.
To install OpenCV
Install OpenCV and the important Python libraries on your laptop. You can use pip to install these libraries. Run the below commands in your terminal:
|
1 |
pip install opencv-python |
Once OpenCV installation is completed then you can run the following two lines of code to check whether cv2 has been installed or not
|
1 2 3 4 |
$ python >>> import cv2 >>> cv2.__version__ '4.7.0' |
Install the necessary libraries
- pip install numpy
A data set, which identifies the objects in the image using the object detection language. specifies the location of multiple objects in the image
- classification
- localization
1. Famous algorithm for object detection:
- SSD-MobileNetv2, SSD-MobileNetv3
2. Famous dataset for object detection:
- COCO
Here is the way to import those files
|
1 2 |
configPath = 'ssd_mobilenet_v3_large_coco_2020_01_14.pbtxt' weightsPath = 'frozen_inference_graph.pb' |
Please kindly download the file here. Thanks, configPath, weightPath
Be sure to download the algorithm. pre-trained object detection model frozen_inference_graph.pb and its configuration file ssd_mobilenet_v3_large_coco_2020_01_14.pbtxt from the TensorFlow Object Detection.
Note – Put them in the same directory as your Python script.
Coco.names
The file ‘coco.names‘ This file contains the names of the 90+ objects that the YOLOv3 model is trained to detect.
To use this file in your object detection code, you can simply extract the contents of the file and store them in a list or directory, depending on your needs. Here’s an example.
Here is the list below
- Person
- Bicycle
- Car
- Motorcycle
- Airplane
- Bus
- Train
- Truck
- Boat
- Traffic Light
- Fire Hydrant
- Street Sign
- Stop Sign
- Parking Meter
- Bench
- Bird
- Cat
- Dog
- Horse
- Sheep
- Cow
- Elephant
- Bear
- Zebra
- Giraffe
- Hat
- Backpack
- Umbrella
- Shoe
- Eye Glasses
- Handbag
- Tie
- Suitcase
- Frisbee
- Skis
- Snowboard
- Sports Ball
- Kite
- Baseball Bat
- Baseball Glove
- Skateboard
- Surfboard
- Tennis Racket
- Bottle
- Plate
- Wine Glass
- Cup
- Fork
- Knife
- Spoon
- Bowl
- Banana
- Apple
- Sandwich
- Orange
- Broccoli
- Carrot
- Hot Dog
- Pizza
- Donut
- Cake
- Chair
- Couch
- Potted Plant
- Bed
- Mirror
- Dining Table
- Window
- Desk
- Toilet
- Door
- Tv
- Laptop
- Mouse
- Remote
- Keyboard
- Cell Phone
- Microwave
- Oven
- Toaster
- Sink
- Refrigerator
- Blender
- Book
- Clock
- Vase
- Scissors
- Teddy Bear
- Hair Drier
- Toothbrush
- Hair Brush
Set classFile in code like below.
|
1 2 |
classNames = [] classFile = 'coco.names' |
Python code – ESP32-CAM Object detection Using OpenCV
Now open a Thonny IDE or Python code editor, such as Idle. Copy and paste the below code.
We are using the urllib.request library to retrieve the frames from the URL of the ESP32-CAM module video stream.
|
1 2 3 4 5 6 7 8 9 10 11 12 13 14 15 16 17 18 19 20 21 22 23 24 25 26 27 28 29 30 31 32 33 34 35 36 37 38 39 40 41 42 43 44 45 46 47 48 49 50 51 52 53 |
import cv2 #opencv import urllib.request #to open and read URL import numpy as np #OBJECT CLASSIFICATION PROGRAM FOR VIDEO IN IP ADDRESS url = 'http://192.168.1.6/cam-hi.jpg' #url = 'http://192.168.1.6/' winName = 'ESP32 CAMERA' cv2.namedWindow(winName,cv2.WINDOW_AUTOSIZE) #scale_percent = 80 # percent of original size #for image processing classNames = [] classFile = 'coco.names' with open(classFile,'rt') as f: classNames = f.read().rstrip('\n').split('\n') configPath = 'ssd_mobilenet_v3_large_coco_2020_01_14.pbtxt' weightsPath = 'frozen_inference_graph.pb' net = cv2.dnn_DetectionModel(weightsPath,configPath) net.setInputSize(320,320) #net.setInputSize(480,480) net.setInputScale(1.0/127.5) net.setInputMean((127.5, 127.5, 127.5)) net.setInputSwapRB(True) while(1): imgResponse = urllib.request.urlopen (url) # here open the URL imgNp = np.array(bytearray(imgResponse.read()),dtype=np.uint8) img = cv2.imdecode (imgNp,-1) #decodificamos img = cv2.rotate(img, cv2.ROTATE_90_CLOCKWISE) # vertical #img = cv2.cvtColor(img, cv2.COLOR_BGR2GRAY) #black and white classIds, confs, bbox = net.detect(img,confThreshold=0.5) print(classIds,bbox) if len(classIds) != 0: for classId, confidence,box in zip(classIds.flatten(),confs.flatten(),bbox): cv2.rectangle(img,box,color=(0,255,0),thickness = 3) #mostramos en rectangulo lo que se encuentra cv2.putText(img, classNames[classId-1], (box[0]+10,box[1]+30), cv2.FONT_HERSHEY_COMPLEX, 1, (0,255,0),2) cv2.imshow(winName,img) # show the picture #wait for ESC to be pressed to end the program tecla = cv2.waitKey(5) & 0xFF if tecla == 27: break cv2.destroyAllWindows() |
Note – Make sure to replace <ESP32-CAM-IP-ADDRESS> it with the IP address of your ESP32-CAM module.
|
1 |
url = 'http://192.168.1.6/cam-hi.jpg' |
Working- Object detection and identification using ESP32-CAM
Using the provided code can be a useful reference if you want to build another project that requires object detection. You can simply just copy the code and customize it as per your need.
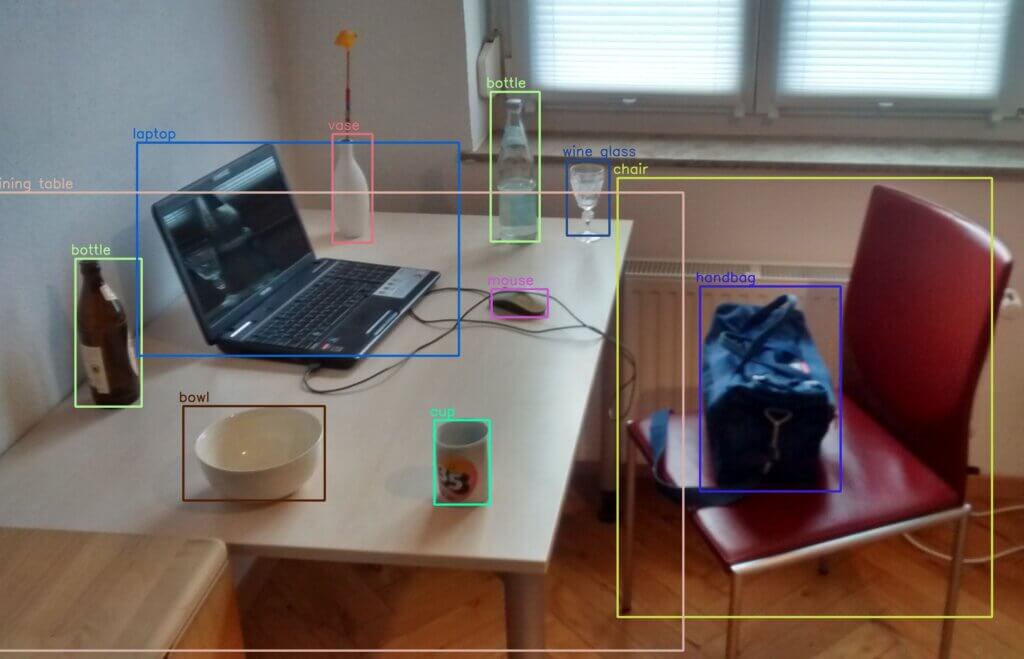
Object detection and identification using ESP32-CAM and OpenCV is a powerful combination for creating computer vision applications.
Check Out More ESP32 CAM projects


