IoT patient health monitoring system using ESP32 aims at reducing the tasks of doctors, nurses, and health professionals to monitor and track various health parameters of patients in real timeIn this tutorial we’re going to build IOT Based Patient Health Monitoring System Project Using ESP32.
The system uses an ESP32 board, which integrates Wi-Fi and Bluetooth connectivity, making it a great solution for IoT applications. this system is real-time Data of a patient’s health sent to the Webserver using Internet connectivity.
The purpose of this project is to collect real-time data and send patients’ health data to a Web server, where the real-time health status of the patient is.
Thank You, PCBWay:
This project is successfully completed because of the support and help from PCBWay. Guys if you have a PCB project, please see their website and get exciting bargains and coupons.
PCBway is the best prototype PCB company offering great PCB boards at lower prices If you sign-up using this link you will get beginner and sign-up coupon rewards. https://www.pcbway.com
Required Materials
- ESP32 board
- MAX30100 Sensor
- DS18b20 Sensor
- DHT11 sensor
- Jumper wires
- 4.7ohm resistor
- Breadboard
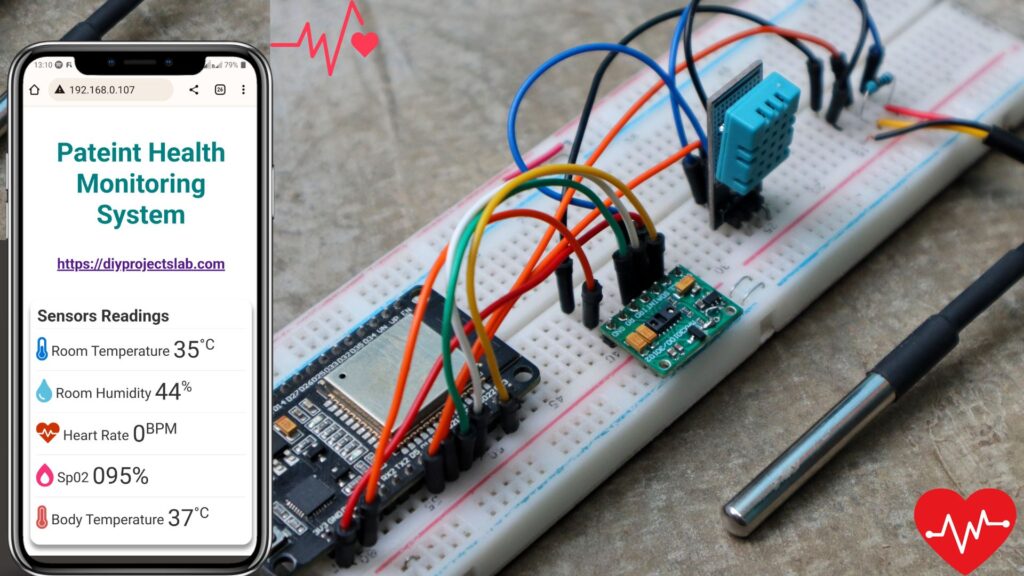
The system contains sensors such pulse oximeter, DHT11 humidity sensor, and DS18B20 temperature sensor to measure the patient’s heart rate, environmental temperature, and humidity levels.
ESP32 board with built-in Wi-Fi capabilities, operates as the main controller to collect, process, and transmit sensor data. This data can be shown accessed remotely through a mobile or web application.
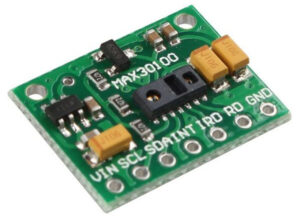
MAX30100 Heart Rate Pulse Oximeter Sensor
The MAX30100 is an extremely popular sensor module used for heart rate monitoring and pulse oximetry measurements. It integrates two sensors, an infrared (IR) LED and a photodetector, to measure the absorption of red and infrared light by the blood vessels in the finger or other body parts. This allows for the calculation of heart rate and oxygen saturation (SpO2) levels.
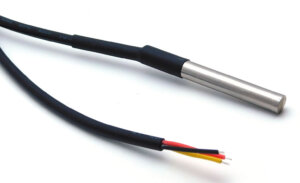
DS18B20 Temperature Sensor
The DS18B20 temperature sensor is a digital temperature sensor that measures the temperature of its surrounding environment. It is commonly used in various applications where accurate and reliable temperature measurements are necessary and a simple interface.
Through its special 1-Wire interface, DS18B20 allows multiple temperature sensors to be connected to a single pin on the microcontroller.
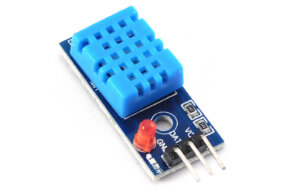
DHT11 Temperature and Humidity Sensor Module
DHT11 is a basic, low-cost digital temperature and humidity sensor. the module provides accurate measurements of ambient temperature and relative humidity. DHT11 sensor comes with NTC to measure temperature and an 8-bit microcontroller to output the values of temperature and humidity as serial data.
Wiring Diagram – ESP32 IoT Patient Health Monitoring System
The wiring diagram is very straightforward. You have to All sensor pins with ESP32 pins as per the schematic diagram. The schematic diagram is shown below.
Pin Mapping
| MAX30100 | ESP32 |
| SDA | GPIO21 |
| SCL | GPIO22 |
| INT | GPIO19 |
| Vcc | 3.3V |
| GND | GND |
| DS18B20 | ESP32 |
| Vcc | 3.3V |
| GND | GND |
| Signal | GPIO5 |
| DHT22 | ESP32 |
| VCC | 3.3V |
| GND | GND |
| Signal | GPIO18 |
Software and Libraries
1. Preparing Arduino IDE for ESP32 Board
To upload the Arduino code to the ESP32 board, you have to follow this Getting Started With ESP32 – Setting up Arduino IDE for ESP32
2. Install the Libraries
Now you have to import the all libraries onto your Arduino IDE.
Download following libraries
Source Code – ESP32 IoT Patient Health Monitoring System
After installing all the necessary libraries, copy the code provided for the IoT Patient Health Monitoring System project using ESP32.
|
1 2 3 4 5 6 7 8 9 10 11 12 13 14 15 16 17 18 19 20 21 22 23 24 25 26 27 28 29 30 31 32 33 34 35 36 37 38 39 40 41 42 43 44 45 46 47 48 49 50 51 52 53 54 55 56 57 58 59 60 61 62 63 64 65 66 67 68 69 70 71 72 73 74 75 76 77 78 79 80 81 82 83 84 85 86 87 88 89 90 91 92 93 94 95 96 97 98 99 100 101 102 103 104 105 106 107 108 109 110 111 112 113 114 115 116 117 118 119 120 121 122 123 124 125 126 127 128 129 130 131 132 133 134 135 136 137 138 139 140 141 142 143 144 145 146 147 148 149 150 151 152 153 154 155 156 157 158 159 160 161 162 163 164 165 166 167 168 169 170 171 172 173 174 175 176 177 178 179 180 181 182 183 184 185 186 187 188 189 190 191 192 193 194 195 196 197 198 199 200 201 202 203 204 205 206 207 208 209 210 211 212 213 214 215 216 217 218 219 220 221 222 223 224 225 226 227 228 229 230 231 232 233 234 235 236 237 238 239 240 241 242 243 244 245 246 247 248 249 250 |
#include <WiFi.h> #include <WebServer.h> #include <Wire.h> #include "MAX30100_PulseOximeter.h" #include <OneWire.h> #include <DallasTemperature.h> #include "DHT.h" #define DHTTYPE DHT11 #define DHTPIN 18 #define DS18B20 5 #define REPORTING_PERIOD_MS 1000 float temperature, humidity, BPM, SpO2, bodytemperature; const char* ssid = "ESP Repeater"; // Enter SSID here const char* password = "antivirus"; //Enter Password here DHT dht(DHTPIN, DHTTYPE);; PulseOximeter pox; uint32_t tsLastReport = 0; OneWire oneWire(DS18B20); DallasTemperature sensors(&oneWire); WebServer server(80); void onBeatDetected() { Serial.println("Beat!"); } void setup() { Serial.begin(115200); pinMode(19, OUTPUT); delay(100); // Initialize DHT sensor Serial.println(F("DHTxx test!")); dht.begin(); Serial.println("Connecting to Wi-Fi"); Serial.println(ssid); // Connect to Wi-Fi network WiFi.begin(ssid, password); // Wait for Wi-Fi connection while (WiFi.status() != WL_CONNECTED) { delay(1000); Serial.print("."); } Serial.println(""); Serial.println("WiFi connected!"); Serial.print("Got IP: "); Serial.println(WiFi.localIP()); // Set up HTTP server routes server.on("/", handle_OnConnect); server.onNotFound(handle_NotFound); // Start HTTP server server.begin(); Serial.println("HTTP server started"); // Initialize pulse oximeter Serial.print("Initializing pulse oximeter.."); if (!pox.begin()) { Serial.println("FAILED"); for (;;); } else { Serial.println("SUCCESS"); pox.setOnBeatDetectedCallback(onBeatDetected); } // Set LED current for pulse oximeter pox.setIRLedCurrent(MAX30100_LED_CURR_7_6MA); } void loop() { // Handle client requests server.handleClient(); // Update pulse oximeter pox.update(); // Request temperature readings from sensors sensors.requestTemperatures(); // Read temperature and humidity from DHT sensor float t = dht.readTemperature(); String Temperature_Value = String(t); float h = dht.readHumidity(); String Humidity_Value = String(h); // Store sensor readings temperature = t; humidity = h; BPM = pox.getHeartRate(); SpO2 = pox.getSpO2(); bodytemperature = sensors.getTempCByIndex(0); // Send sensor data at a fixed reporting period if (millis() - tsLastReport > REPORTING_PERIOD_MS) { Serial.print("Room Temperature: "); Serial.print(t); Serial.println("°C"); Serial.print("Room Humidity: "); Serial.print(h); Serial.println("%"); Serial.print("BPM: "); Serial.println(BPM); Serial.print("SpO2: "); Serial.print(SpO2); Serial.println("%"); Serial.print("Body Temperature: "); Serial.print(bodytemperature); Serial.println("°C"); Serial.println("*********************************"); Serial.println(); tsLastReport = millis(); } } void handle_OnConnect() { server.send(200, "text/html", SendHTML(temperature, humidity, BPM, SpO2, bodytemperature)); } void handle_NotFound(){ server.send(404, "text/plain", "Not found"); } String SendHTML(float temperature, float humidity, float BPM, float SpO2, float bodytemperature) { String html = "<!DOCTYPE html>"; html += "<html>"; html += "<head>"; html += "<title>Patient Health Monitoring</title>"; html += "<meta name='viewport' content='width=device-width, initial-scale=1.0'>"; html += "<link rel='stylesheet' href='https://cdnjs.cloudflare.com/ajax/libs/font-awesome/5.7.2/css/all.min.css'>"; html += "<link rel='stylesheet' type='text/css' href='styles.css'>"; html += "<style>"; html += "body { background-color: #fff; font-family: sans-serif; color: #333333; font: 14px Helvetica, sans-serif box-sizing: border-box;}"; html += "#page { margin: 20px; background-color: #fff;}"; html += ".container { height: inherit; padding-bottom: 20px;}"; html += ".header { padding: 20px;}"; html += ".header h1 { padding-bottom: 0.3em; color: #008080; font-size: 45px; font-weight: bold; font-family: Garmond, 'sans-serif'; text-align: center;}"; html += "h2 { padding-bottom: 0.2em; border-bottom: 1px solid #eee; margin: 2px; text-align: left;}"; html += ".header h3 { font-weight: bold; font-family: Arial, 'sans-serif'; font-size: 17px; color: #b6b6b6; text-align: center;}"; html += ".box-full { padding: 20px; border 1px solid #ddd; border-radius: 1em 1em 1em 1em; box-shadow: 1px 7px 7px 1px rgba(0,0,0,0.4); background: #fff; margin: 20px; width: 300px;}"; html += "@media (max-width: 494px) { #page { width: inherit; margin: 5px auto; } #content { padding: 1px;} .box-full { margin: 8px 8px 12px 8px; padding: 10px; width: inherit;; float: none; } }"; html += "@media (min-width: 494px) and (max-width: 980px) { #page { width: 465px; margin 0 auto; } .box-full { width: 380px; } }"; html += "@media (min-width: 980px) { #page { width: 930px; margin: auto; } }"; html += ".sensor { margin: 12px 0px; font-size: 2.5rem;}"; html += ".sensor-labels { font-size: 1rem; vertical-align: middle; padding-bottom: 15px;}"; html += ".units { font-size: 1.2rem;}"; html += "hr { height: 1px; color: #eee; background-color: #eee; border: none;}"; html += "</style>"; //Ajax Code Start html += "<script>\n"; html += "setInterval(loadDoc,1000);\n"; html += "function loadDoc() {\n"; html += "var xhttp = new XMLHttpRequest();\n"; html += "xhttp.onreadystatechange = function() {\n"; html += "if (this.readyState == 4 && this.status == 200) {\n"; html += "document.body.innerHTML =this.responseText}\n"; html += "};\n"; html += "xhttp.open(\"GET\", \"/\", true);\n"; html += "xhttp.send();\n"; html += "}\n"; html += "</script>\n"; //Ajax Code END html += "</head>"; html += "<body>"; html += "<div id='page'>"; html += "<div class='header'>"; html += "<h1>Pateint Health Monitoring System</h1>"; html += "<h3><a href='https://diyprojectslab.com'>https://diyprojectslab.com</a></h3>"; html += "</div>"; html += "<div id='content' align='center'>"; html += "<div class='box-full' align='left'>"; html += "<h2>Sensors Readings</h2>"; html += "<div class='sensors-container'>"; //For Temperature html += "<div class='sensors'>"; html += "<p class='sensor'>"; html += "<i class='fas fa-thermometer-half' style='color:#0275d8'></i>"; html += "<span class='sensor-labels'> Room Temperature </span>"; html += (int)temperature; html += "<sup class='units'>°C</sup>"; html += "</p>"; html += "<hr>"; html += "</div>"; //For Humidity html += "<div class='sensors'>"; html += "<p class='sensor'>"; html += "<i class='fas fa-tint' style='color:#5bc0de'></i>"; html += "<span class='sensor-labels'> Room Humidity </span>"; html += (int)humidity; html += "<sup class='units'>%</sup>"; html += "</p>"; html += "<hr>"; //For Heart Rate html += "<p class='sensor'>"; html += "<i class='fas fa-heartbeat' style='color:#cc3300'></i>"; html += "<span class='sensor-labels'> Heart Rate </span>"; html += (int)BPM; html += "<sup class='units'>BPM</sup>"; html += "</p>"; html += "<hr>"; //For Sp02 html += "<p class='sensor'>"; html += "<i class='fas fa-burn' style='color:#f7347a'></i>"; html += "<span class='sensor-labels'> Sp02 </span>"; html += (int)SpO2; html += "<sup class='units'>%</sup>"; html += "</p>"; html += "<hr>"; //For Body Temperature html += "<p class='sensor'>"; html += "<i class='fas fa-thermometer-full' style='color:#d9534f'></i>"; html += "<span class='sensor-labels'> Body Temperature </span>"; html += (int)bodytemperature; html += "<sup class='units'>°C</sup>"; html += "</p>"; html += "</div>"; html += "</div>"; html += "</div>"; html += "</div>"; html += "</div>"; html += "</body>"; html += "</html>"; return html; } |
Enter the auth code from step 1, SSID, and the password of your router.
|
1 2 |
const char* ssid = "ESP Repeater"; // Enter SSID here const char* password = "antivirus"; //Enter Password here |
Then upload the code.
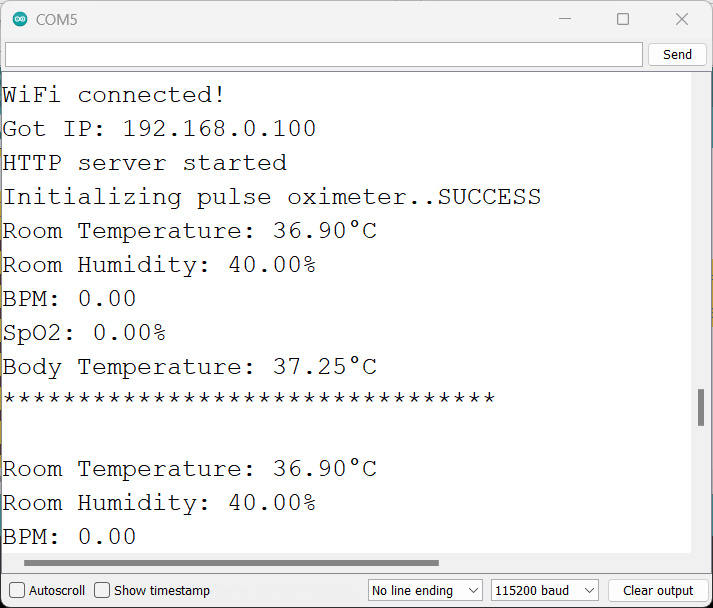
Af͏t͏e͏r ͏u͏p͏l͏o͏a͏d͏i͏n͏g ͏t͏h͏e ͏c͏o͏d͏e successfully, the serial monitor will display the ESP32’s attempts to connect to the Wi-Fi network and its IP address when the connection is established. ͏
Working
Now copy that IP address and open that IP address in any mobile or laptop browser.
- Open a web browser (such as Chrome, Firefox, or Safari).
- Paste the copied IP address into the address bar of the web browser.
- Press Enter to navigate to the IP address.
After you access the IP address in the web browser, you can view the information on room temperature, room humidity, heart rate, blood oxygen level, and body temperature, as you have implemented in the code.





2 Comments
Do you have the same project with ESP32 mini C3:
You can use same code with ESP32 mini C3 🙂