In this tutorial, we’ll Interface DHT11 or dht22 Humidity Temperature Sensor With Arduino. The Dht11 sensor is used to measure humidity and temperature. We’ll be using the Arduino board to read the sensor data and display it on the serial monitor.
Required Material
- Arduino Uno ( Amazon / AliExpress)
- DHT11 Sensor ( Amazon / AliExpress)
- 16×2 LCD Module ( Amazon / AliExpress)
- OLED DIsplay ( Amazon / AliExpress)
- Jumper wires ( Amazon / AliExpress)
DHT11 Sensor
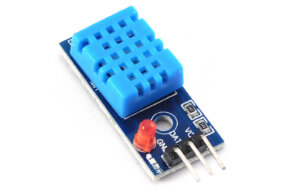
The DHT11 temperature and humidity sensor is an affordable sensor. It measures both temperature and humidity This sensor takes temperature measurements from -40º to 80º celsius and measures air humidity in the ranges from 0 to 100%. The accuracy of the sensor for temperature measurement is approximately 0.5º celsius and for humidity is 2%. dht11 sensor is generally used in weather stations and other similar projects.
DHT11 Specifications
- Operating Voltage: 3.5V to 5.5V
- Operating current: 0.3mA (measuring) 60uA (standby)
- Output: Serial data
- Temperature measurement Range: 0°C to 50°C
- Humidity measurement Range: 20% to 90%
- Resolution: Temperature and Humidity both are 16-bit
- Accuracy: ±1°C and ±1%
DHT11 Pinout
- 1. VCC external 3.3V-5V
- 2. GND external GND
- 3 . DO Digital output interface
Applications:
- Weather station
- Humidity controller
- Test & detection device
Note: Complete details can be found in the DHT11 datasheet
Interface DHT11/22 Humidity Temperature Sensor With Arduino
This module uses a capacitive DHT11 humidity sensor and a thermistor to calculate the surrounding air and produce a digital signal sent to the data pin. The sensor communicates with the Arduino through a serial interface.
When DHT11 starts up, MCU will send a low-level signal and then keep the signal at a high level for 50us. After that, the detection of the condition of the external environment will start.
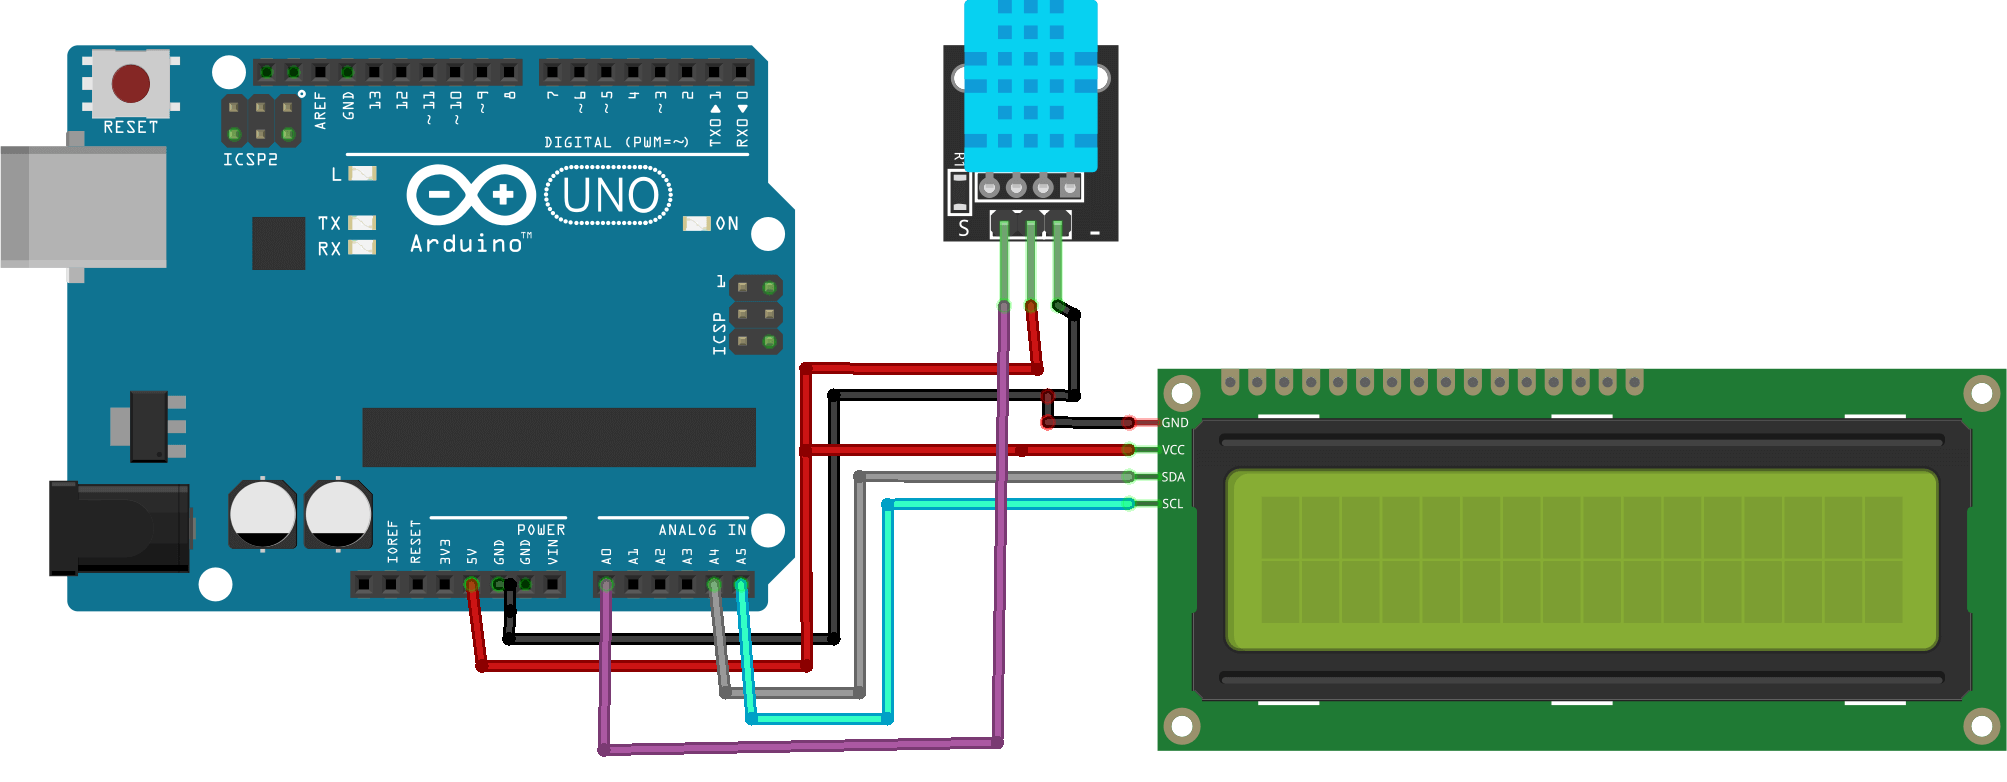
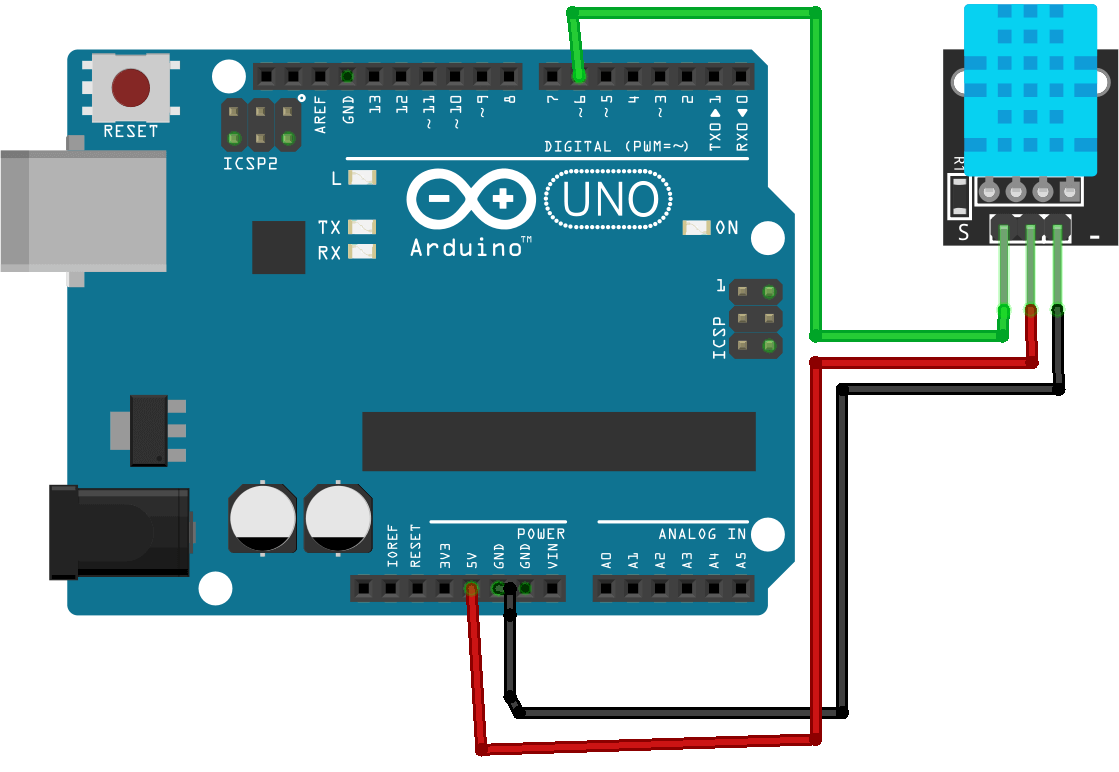
Schematic Diagram Dht11 Sensor With Arduino
Source code Dht11 Sensor With Arduino
|
1 2 3 4 5 6 7 8 9 10 11 12 13 14 15 16 17 18 19 20 21 22 23 |
#include <dht11.h> #define DHT11PIN 4 dht11 DHT11; void setup() { Serial.begin(9600); } void loop() { Serial.println(); int chk = DHT11.read(DHT11PIN); Serial.print("Humidity (%): "); Serial.println((float)DHT11.humidity, 2); Serial.print("Temperature (C): "); Serial.println((float)DHT11.temperature, 2); delay(1000); } |
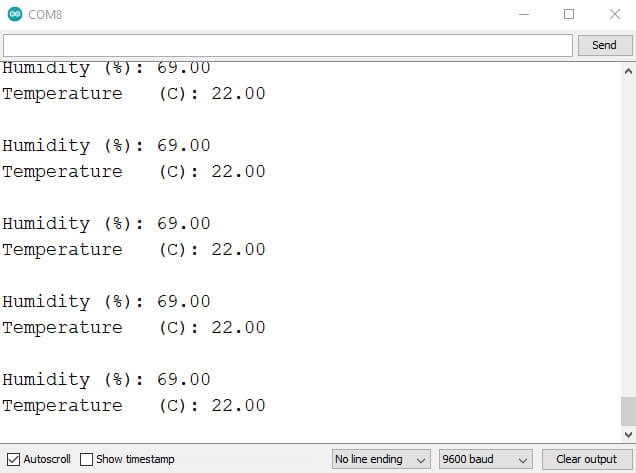
Working – Dht11 Sensor With Arduino
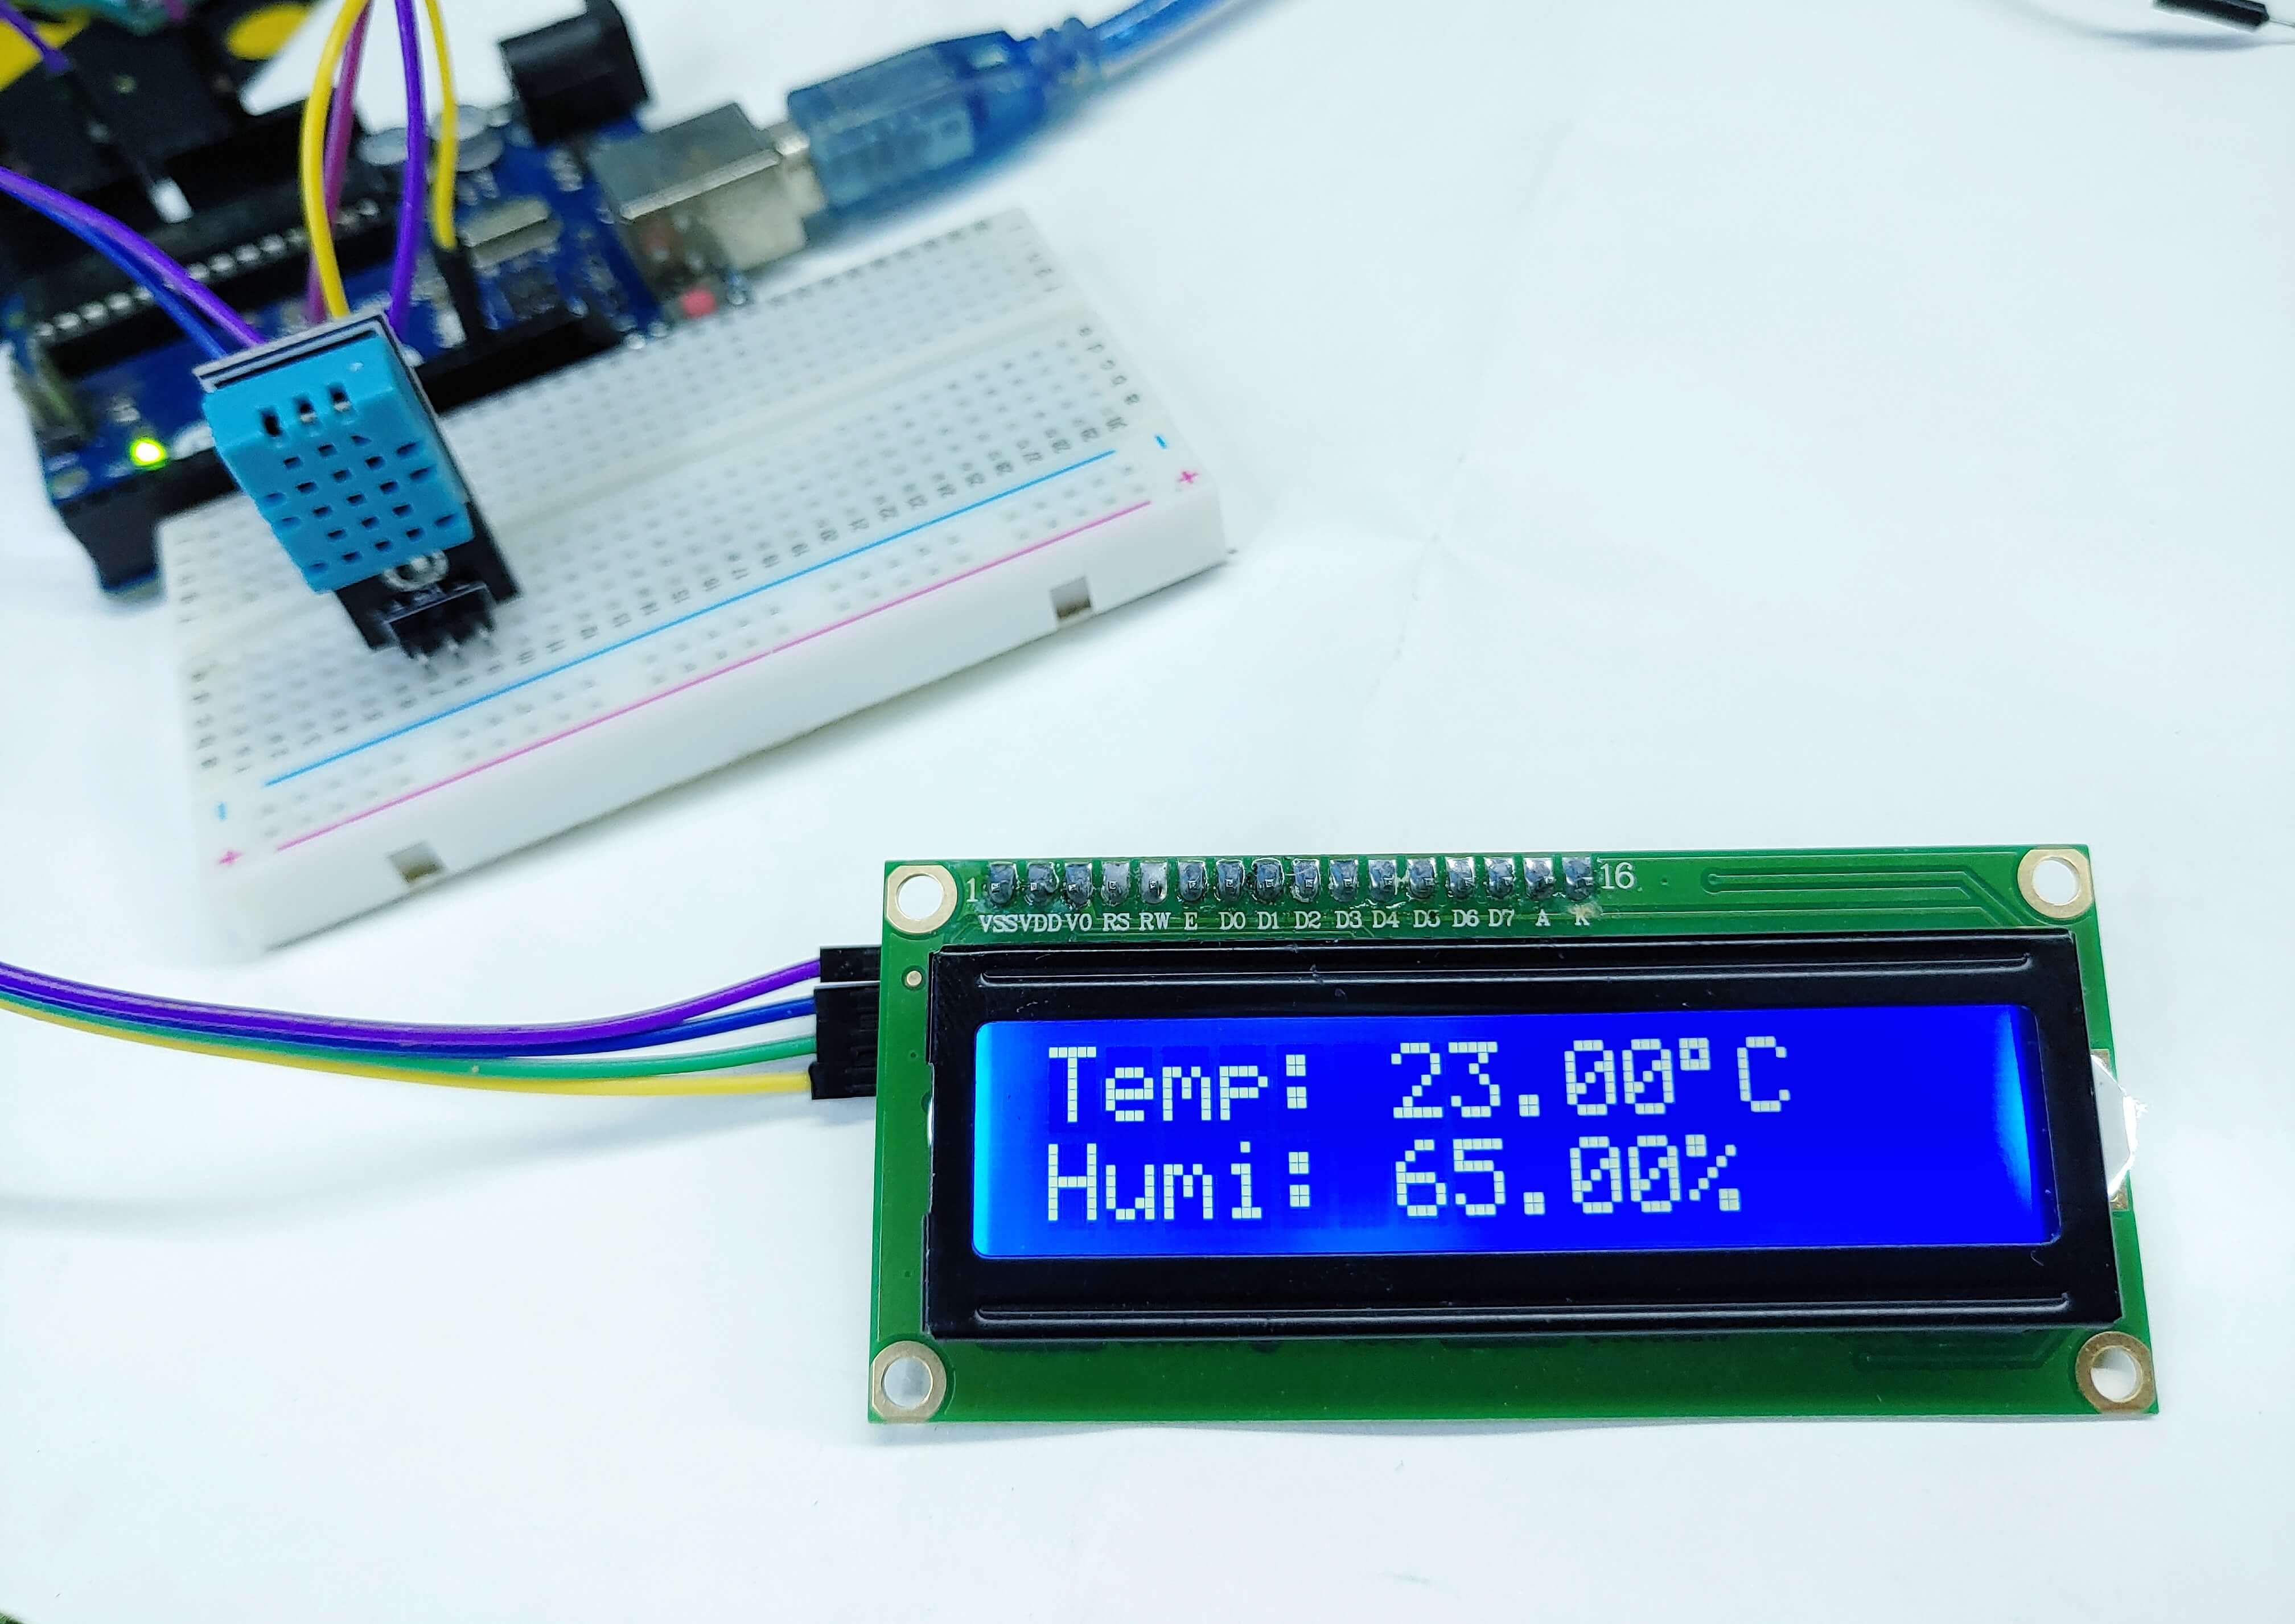
Interface DHT11/22 Sensor & 16X2 I2C Display with Arduino
Source Code – DHT11 Sensor & 16X2 I2C Display with Arduino
|
1 2 3 4 5 6 7 8 9 10 11 12 13 14 15 16 17 18 19 20 21 22 23 24 25 26 27 28 29 30 31 32 33 34 35 36 37 38 39 40 41 42 43 44 45 46 47 |
//For the LCD I2C #include <Wire.h> #include <LCD.h> #include <LiquidCrystal_I2C.h> LiquidCrystal_I2C lcd(0x27, 2, 1, 0, 4, 5, 6, 7, 3, POSITIVE); //I2C pins declaration //For DHT11 #include <DHT.h> #define DHTPIN A0 //where DHT middle pin is connected to #define DHTTYPE DHT11 DHT dht(DHTPIN, DHTTYPE); float humi; float temp; void setup() { //Initializing LCD lcd.begin(16,2); //Defining 16 columns and 2 rows of lcd display lcd.backlight(); //To Power ON the back light lcd.setCursor(0,0); //Defining positon to write from first row, first column. lcd.clear(); //start sensor reading dht.begin(); } void loop() { showTempHumi(); delay(2 000); } void showTempHumi(){ humi = dht.readHumidity(); temp = dht.readTemperature(); lcd.clear(); lcd.print("Temperature: "); lcd.print(temp,2); lcd.print(char(223)); lcd.print("C"); lcd.setCursor(0,1); lcd.print("Humidity: "); lcd.print(humi,2); lcd.print("%"); } |
Working – DHT11 Sensor & 16X2 I2C Display with Arduino
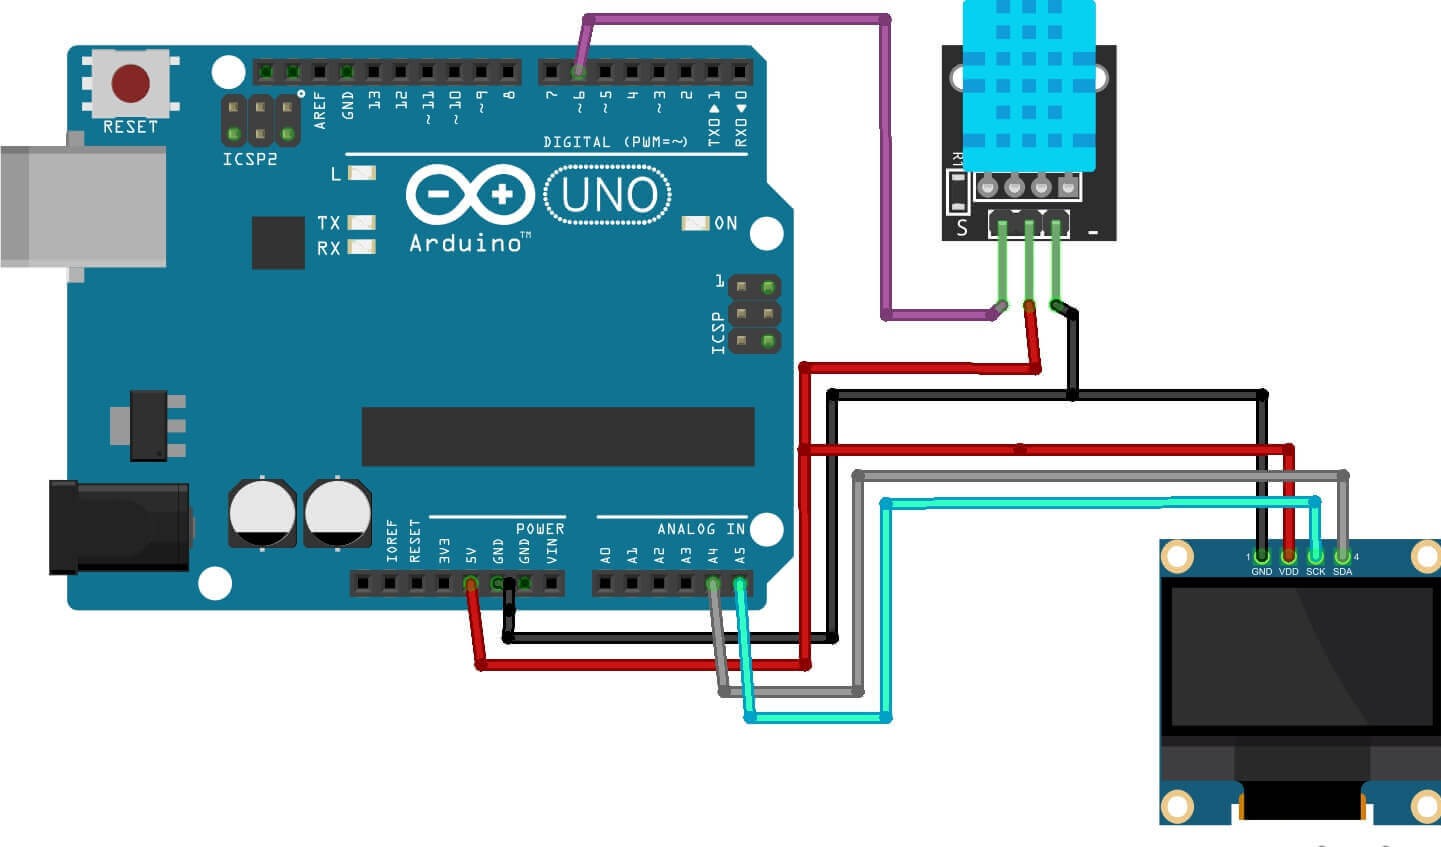
Interface DHT11 Sensor & I2C OLED Display With Arduino
Source Code – DHT11 Sensor & I2C OLED Display With Arduino
|
1 2 3 4 5 6 7 8 9 10 11 12 13 14 15 16 17 18 19 20 21 22 23 24 25 26 27 28 29 30 31 32 33 34 35 36 37 38 39 40 41 42 43 44 45 46 47 48 49 |
#include <SPI.h> #include <Wire.h> #include <Adafruit_GFX.h> #include <Adafruit_SSD1306.h> #include <SimpleDHT.h> // for DHT11, // VCC: 5V or 3V // GND: GND // DATA: 2 int pinDHT11 = 6; SimpleDHT11 dht11(pinDHT11); #define screen_width 128 // OLED display width, in pixels #define screen_height 64 // OLED display height, in pixels #define OLED_RESET 4 Adafruit_SSD1306 display(screen_width, screen_height); void setup () { Serial.begin(9600); Serial.println("TEMPERATURE AND HUMIDITY"); display.begin(SSD1306_SWITCHCAPVCC, 0x3C); display.clearDisplay(); } void loop () { byte temperature = 0; byte humidity = 0; int err = SimpleDHTErrSuccess; if ((err = dht11.read(&temperature, &humidity, NULL)) != SimpleDHTErrSuccess) { Serial.print("Read DHT11 failed, err="); Serial.println(err);delay(1000); return; } Serial.print((int)temperature); Serial.print(" *C, "); Serial.print((int)humidity); Serial.println(" H"); // DHT11 sampling rate is 1HZ. display.clearDisplay(); display.setTextSize(1); display.setTextColor(SSD1306_WHITE); display.setCursor(0, 0); display.print(" TEMP. & HUMIDITY"); display.setCursor(0, 25); display.print(" TEMPERATURE : "); display.setCursor(90, 25); display.print((int)temperature); display.setCursor(0, 50); display.print(" HUMIDITY : "); display.setCursor(90, 50); display.print((int)humidity); display.display(); } |
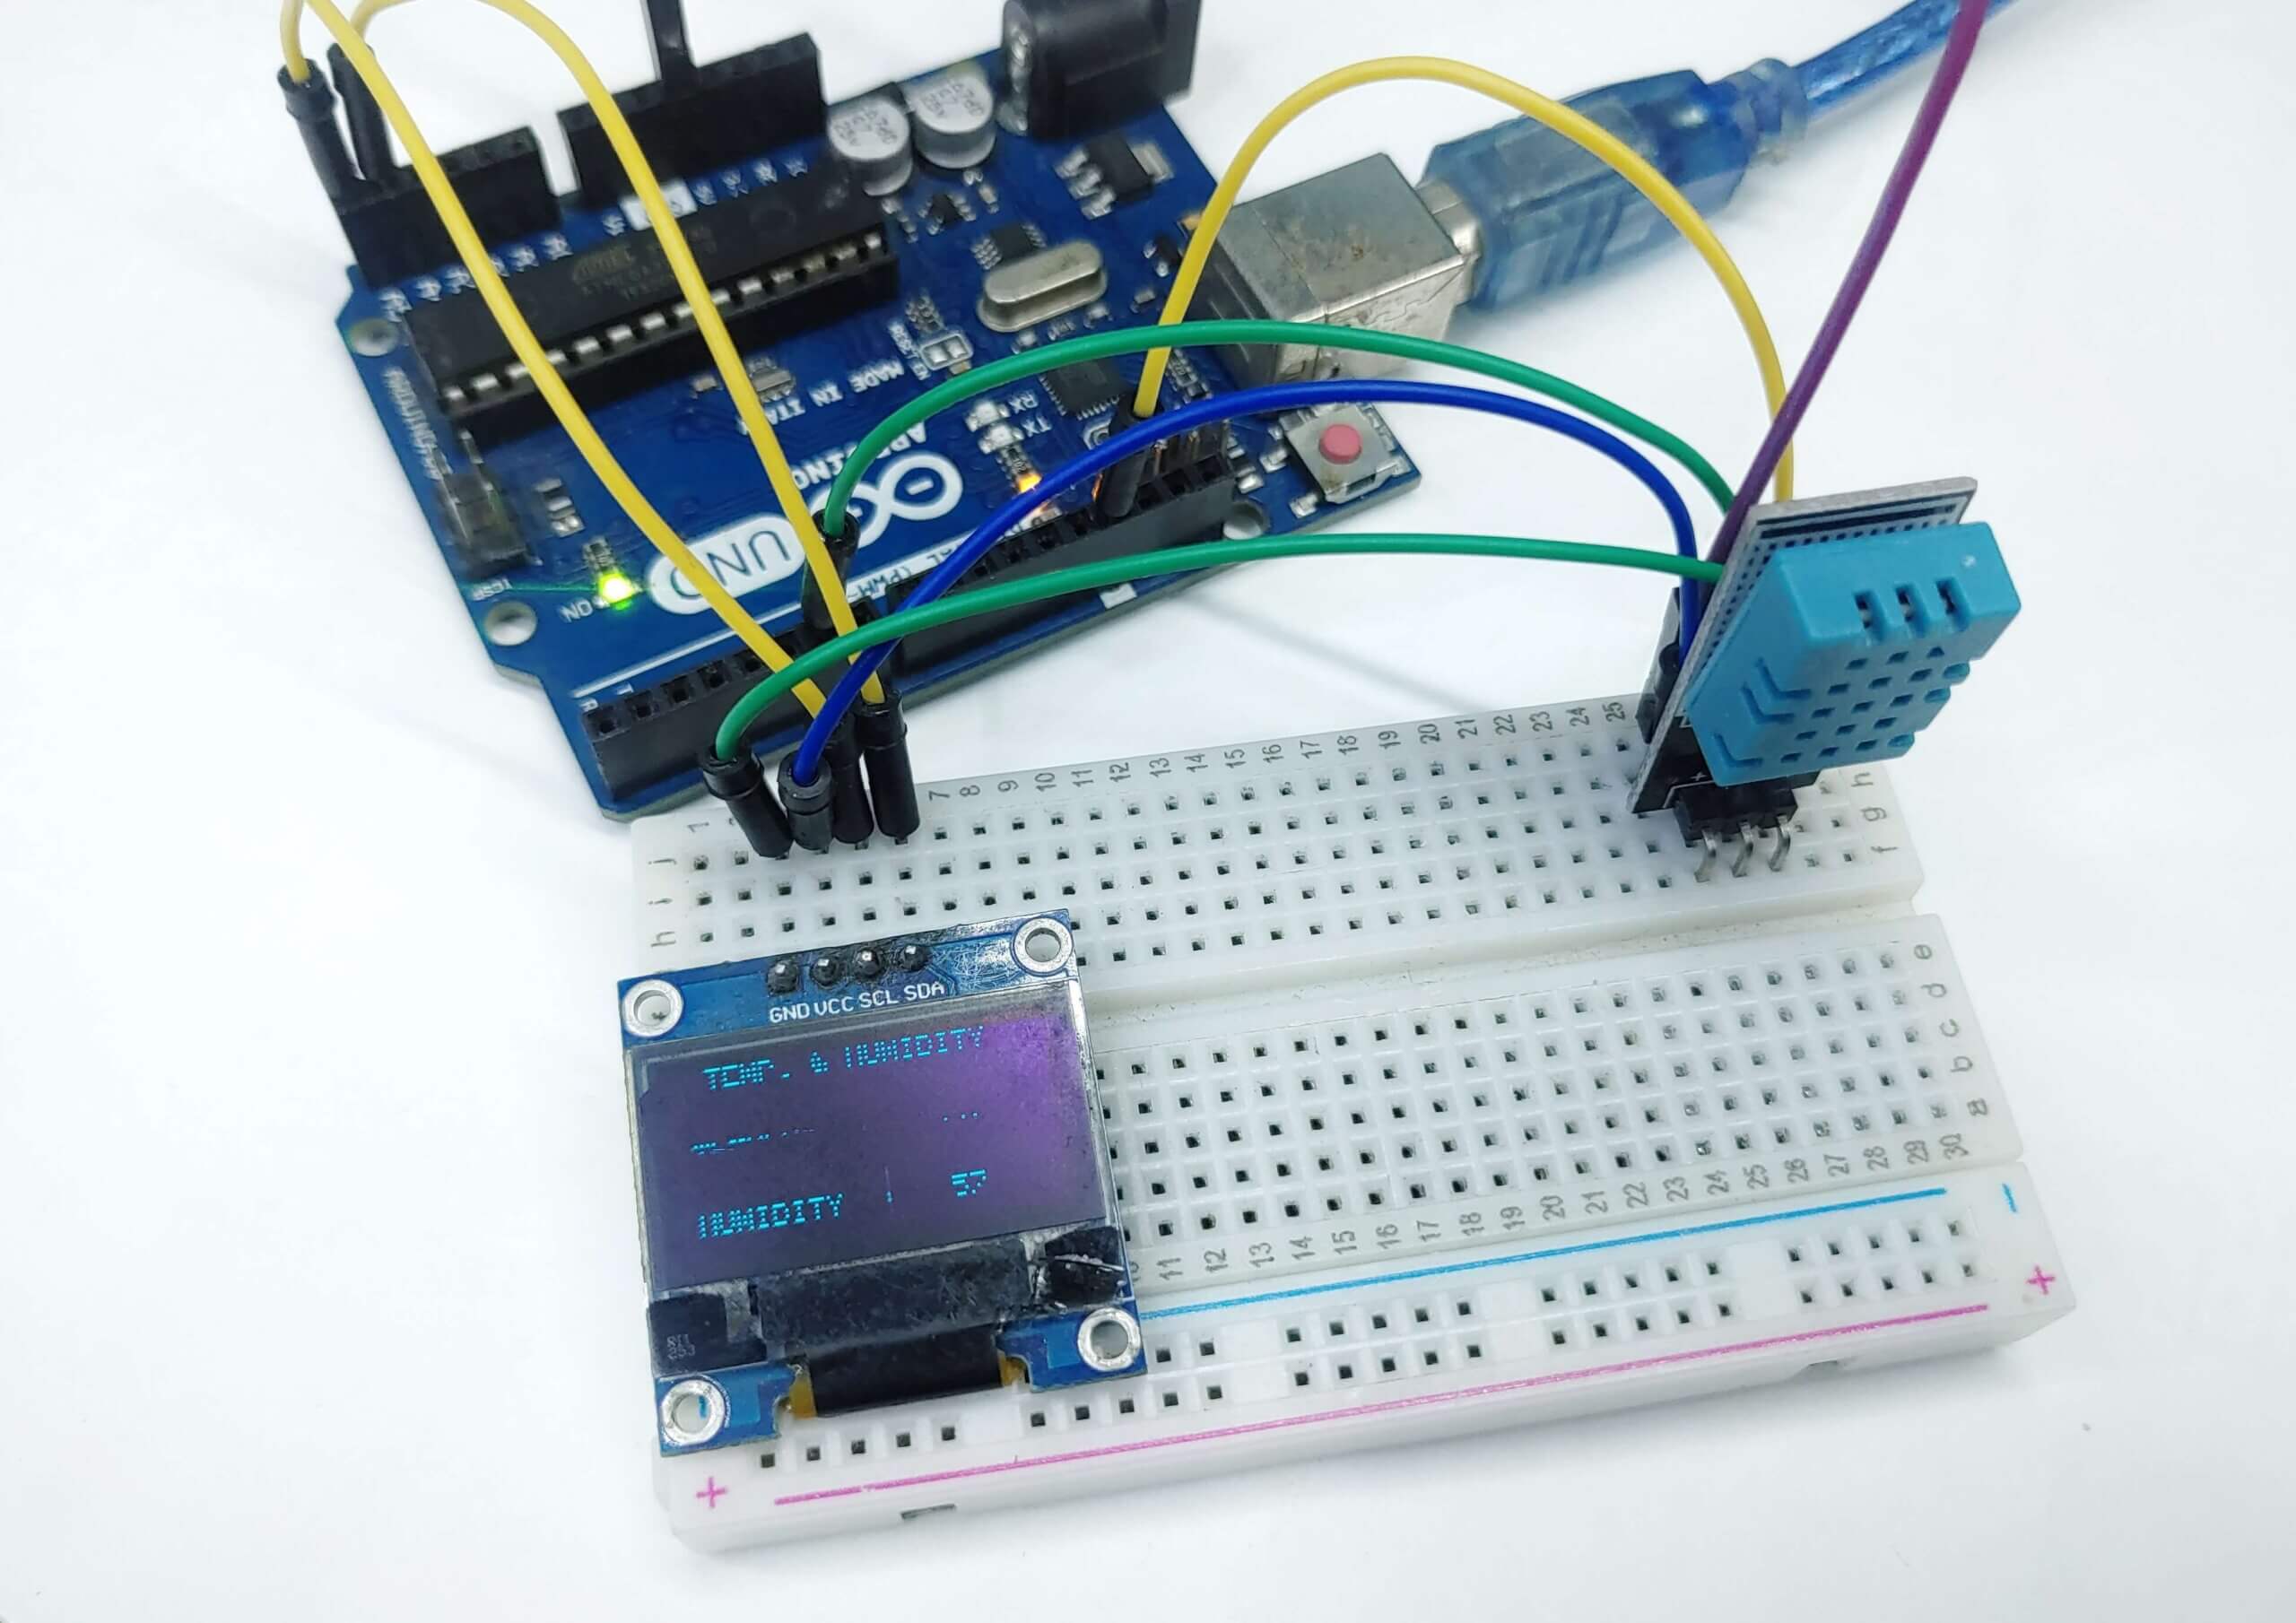
Working – DHT11 Sensor & I2C OLED Display With Arduino
Conclusion
The DHT11 temperature and humidity sensor can be used with Arduino. If you follow the steps in this tutorial, you will be able to build your project by using this sensor to calculate temperature and humidity indoors

