IoT RFID Attendance System Based On ESP8266 microcontroller and using an RFID reader to track attendance. The information is then sent to a PHP web application which stores it in a database. This system is excellent for schools, offices, or any other institution where attendance is required to be tracked.
The ESP8266 is a popular IoT platform that supports a great variety of sensors and devices. In this project, we’ll use an ESP8266 development board and an MFRC522 RFID reader to build an attendance system that can be used to track the attendance of workers or students. Also, check the RFID Door Lock With Raspberry Pi Pico Using Micropython
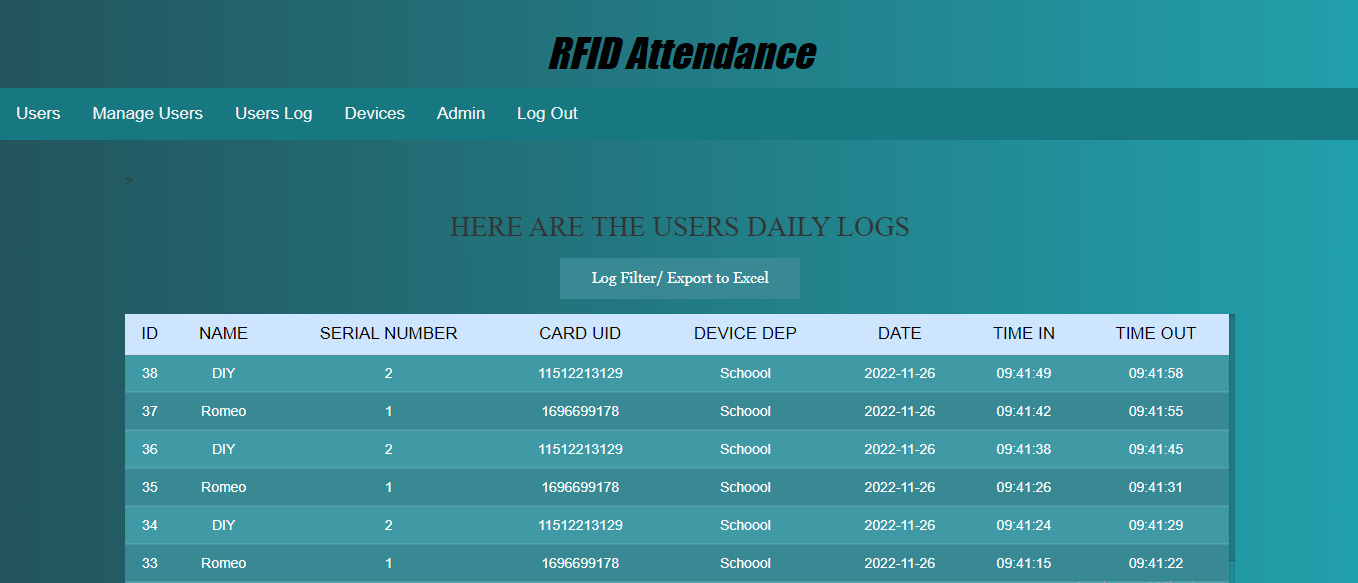
The website – coded in PHP – has a database that registers the attendance of users including all the details like incoming, and outgoing timings and personal information. The data can also be downloaded in Excel sheet format.
Features:
- Sign-in systems
- Add students, units, courses
- Maintain Attendance Registers
- Add Member, Group
- Download Excel, Filter systems
Required Components:
- ESP8266 or ESP32
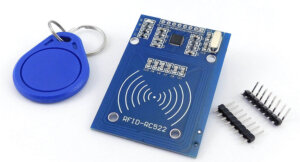
- MFRC522 RFID module
- RFID Tags or Cards
- Breadboard
- Jumper wire
Required Software:
Required Code & Libraries
RC522 RFID Module
RFID is a technology that uses radio waves to communicate with machines, usually for the purpose of tracking and identification. RFID is used in a variety of applications, including contactless pay, access control, and product management.
The RC522 RFID module is a famous choice for many RFID applications. It is a low-cost, easy-to-use module compatible with a wide range of RFID tags.
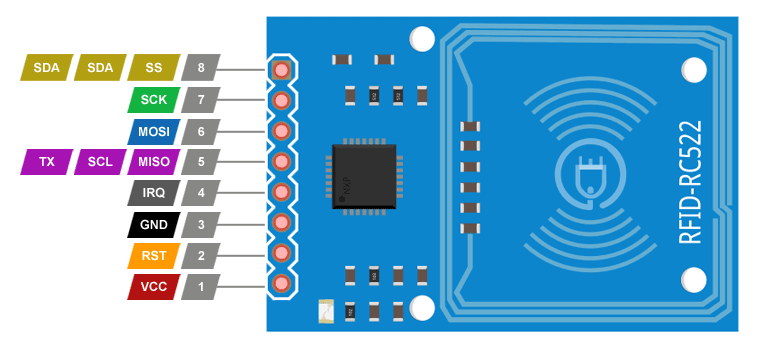
RC522 RFID Pinout
Pin Name Details
1. 3.3V Power Supply
2. RST Reset
3. GND Ground Pin
4. IRO Not Connected
5. MISO Serial Communication
6. MOSI Serial Communication
7. SCK TX/RX
8. SDA TX/RX
Nodemcu ESP8266
WiFi Module ESP8266 is a low-cost Wi-Fi module with GPIO pins to connect with different peripherals. This makes it excellent for connecting your projects to the internet. It’s based on the popular ESP8266 SoC and provides a cheap and easy way to add Wi-Fi connectivity to your projects.
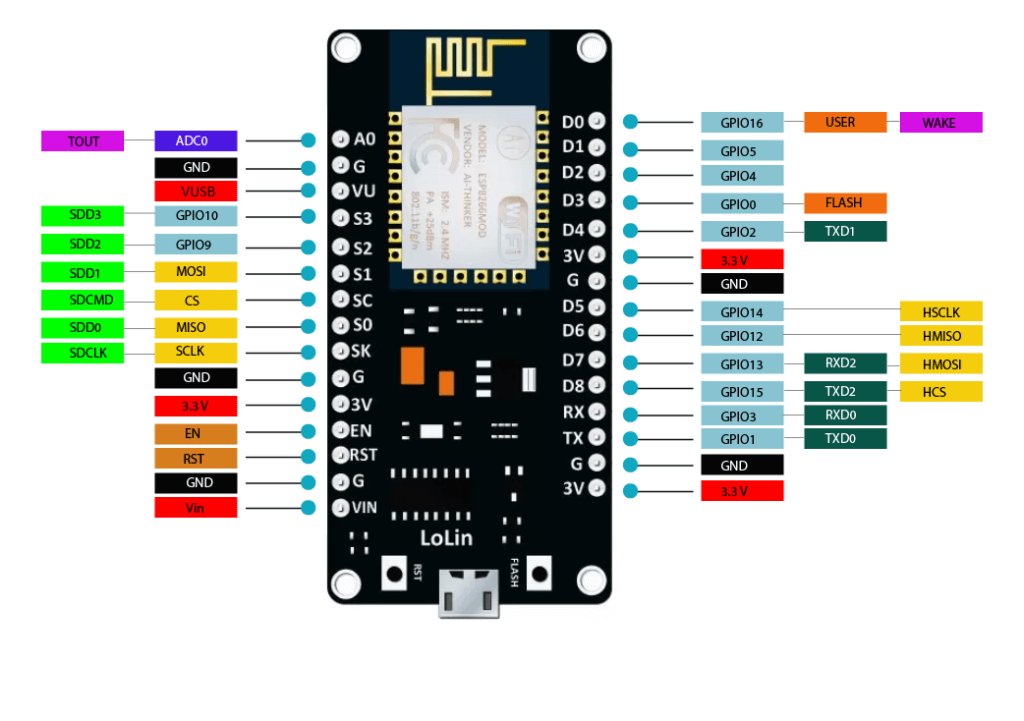
ESP8266 Pinout
Specifications of NodeMCU:
- 11 b/g/n Wi-Fi Direct (P2P), soft-AP
- Integrated TCP/IP protocol stack
- CP2102 Serial / USB Chip
- +19.5dBm output power in 802.11b mode
- 4MB Flash Memory
- Integrated low-power 32-bit CPU
- SDIO 1.1 / 2.0, SPI, UART
- Dimensions – 49 x 24.5 x 13mm
Features:
- Open-source IoT Platform
- Easily Programmable
- Low Cost & Simple to Implement
- WI-FI enabled
How it works:
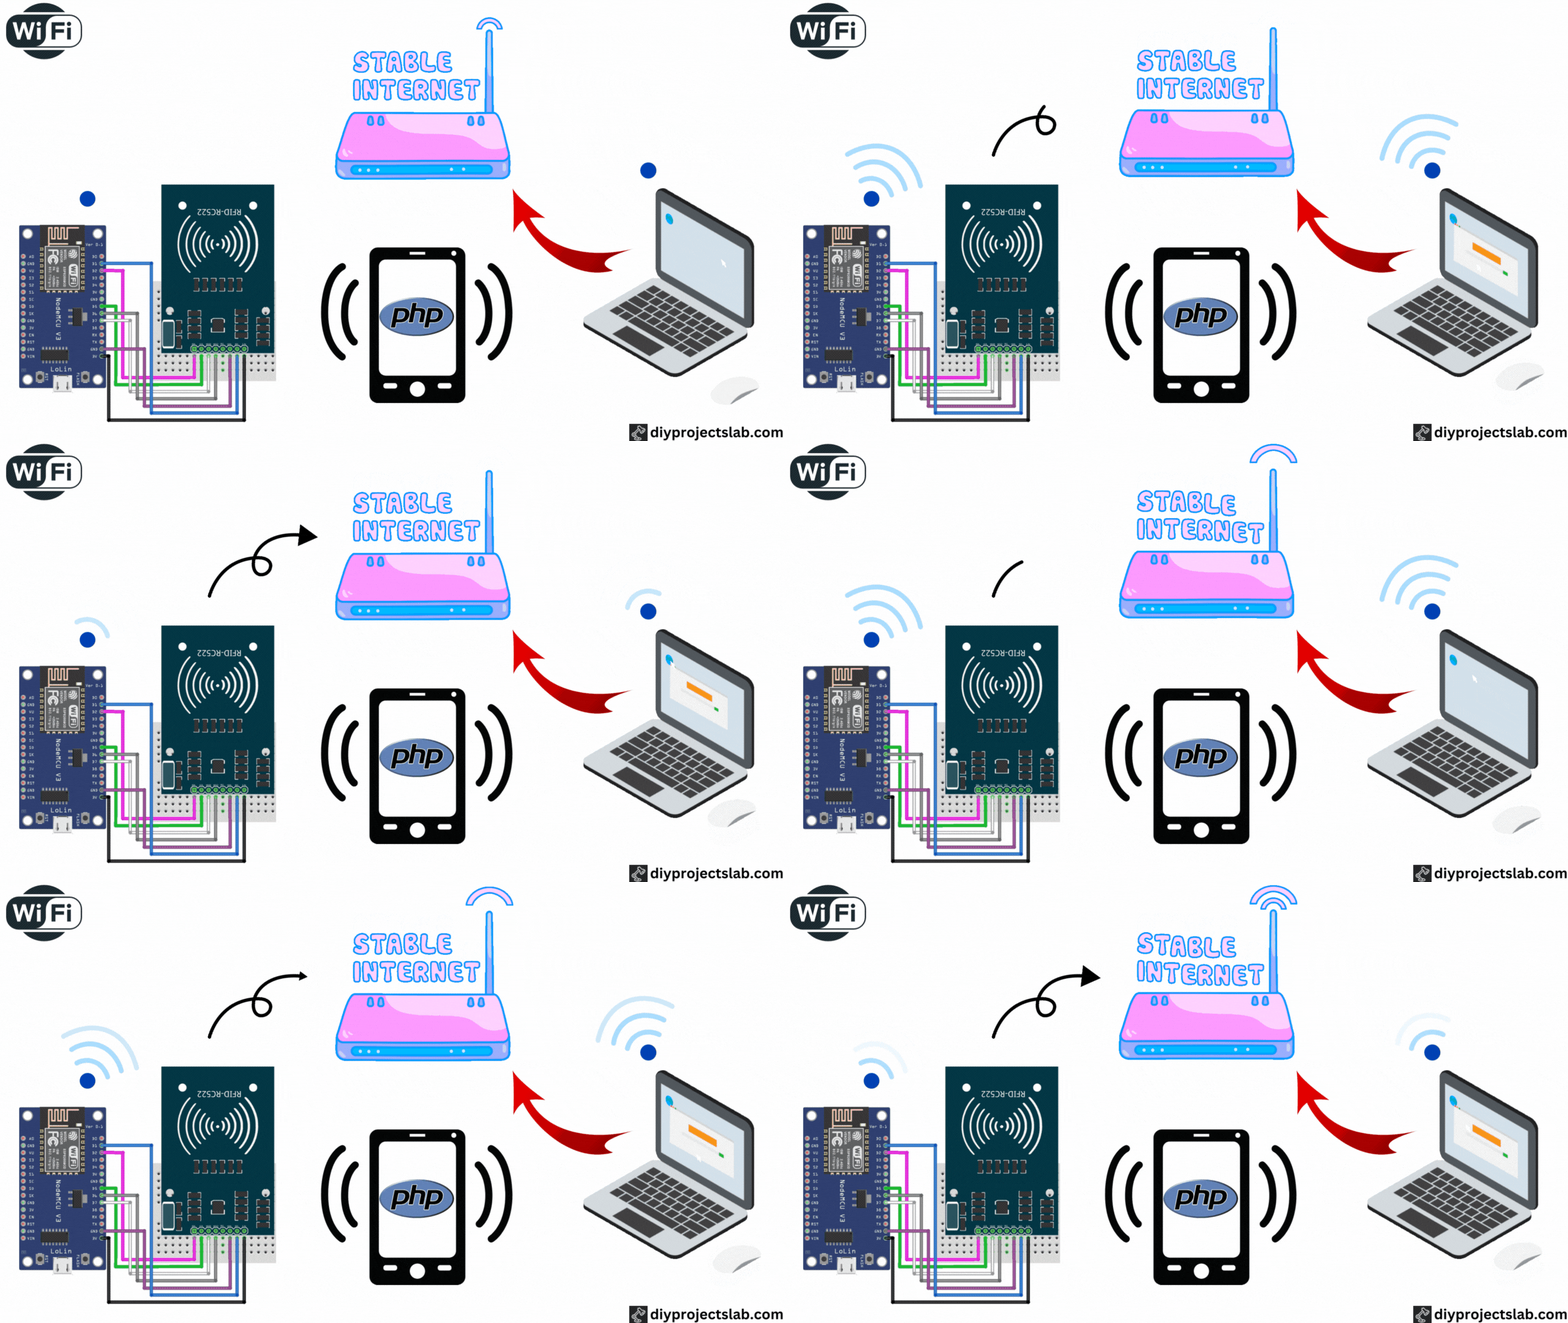
This is the diagram of our project IoT RFID Attendance System Based On ESP8266 When the person with the right RFID card swipes his/her RFID tag, the coming time will be automatically stored in the database. Usually, when the exact somebody swipes his/her RFID tag again, the system will save it as his/her going Time.
This is the easy network topology created to run this task over a Local Area Network. ESP8266 and the Computer server are connected to the exact Router.
Hardware Connection – IoT RFID Attendance System Based On ESP8266
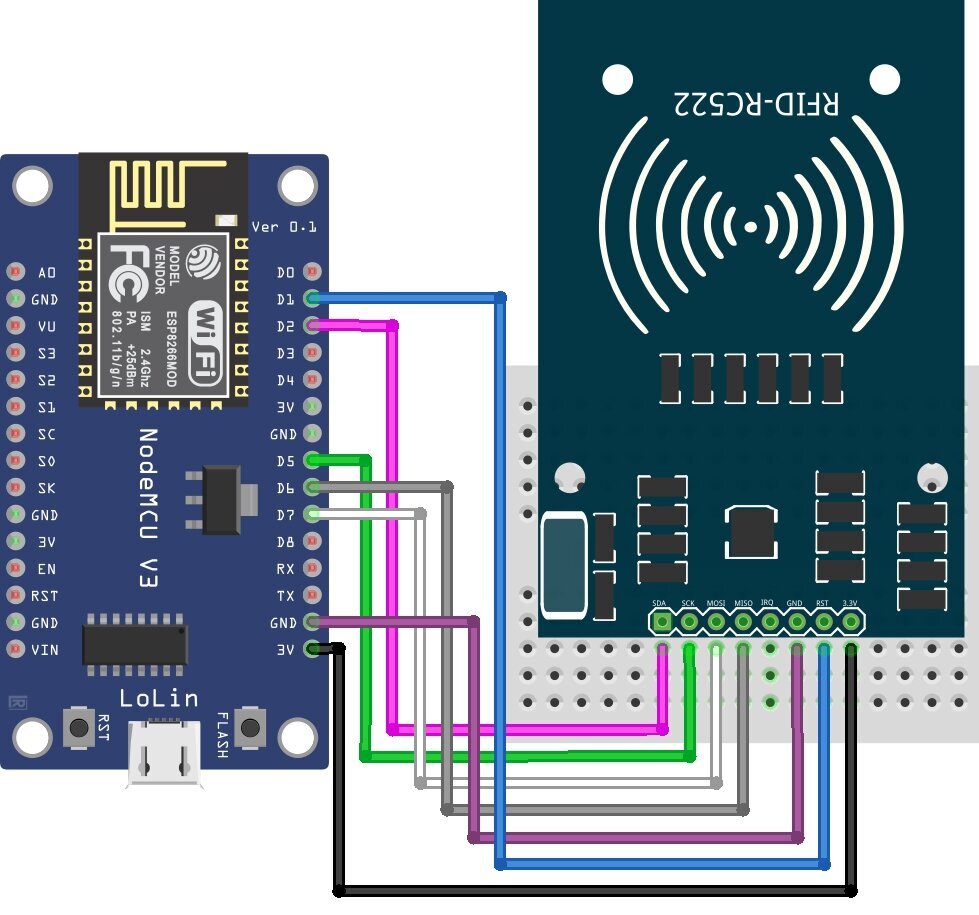
The below circuit diagram shows how an RFID Module is interfaced with NodeMCU ESP8266 12E Board. Make the circuit by following the schematic diagram shown in the below photo. I have already described the connection points per component. To make it more straightforward, I have organized a breadboard circuit for you.
Nodemcu Esp8266/esp12e RFID MFRC522/ Rc522
- D2 <———-> SDA/SS
- D5 <———-> SCK
- D7 <———-> MOSI
- D6 <———-> MISO
- GND <———-> GND
- D1 <———-> RST
- 3V/3V3 <———-> 3.3V
How to Run a simple local HTTP server
So, it’s a good idea to run the server on a local host machine, Then you can connect your app to this server by using this local IP. Really, we can deploy this PHP Web App on Hosting Server. But, You will require a Public IP from Your Broadband connections to transmit data to the hosting server.
Installing XAMPP and Setting Up Web Interface
For the web interface, we require PHP installed on our PC so firstly we must to install apache and MySQL in our system for this firstly Download and install Xampp from here: Download XAMPP (according to your OS) Please check How to Install XAMPP on Windows
Deploying our PHP Web App
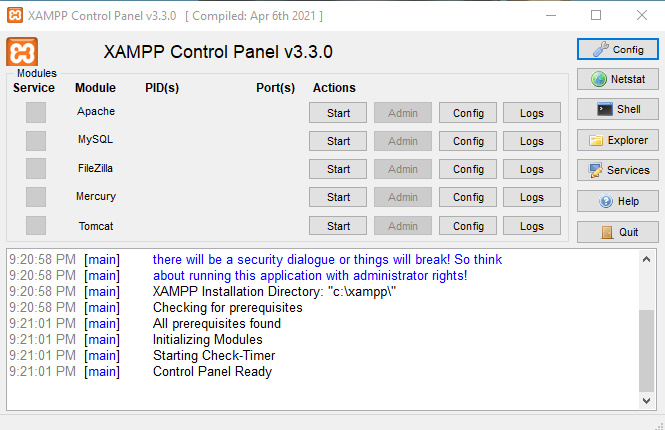
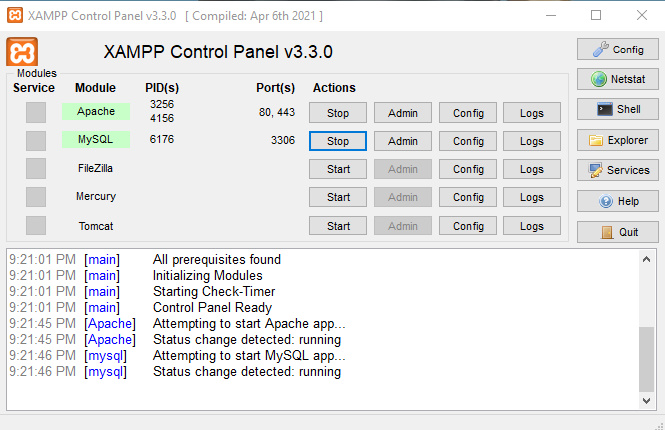
After installing XAMPP, please activate the xamppapache/mysql services from the XAMPP management panel
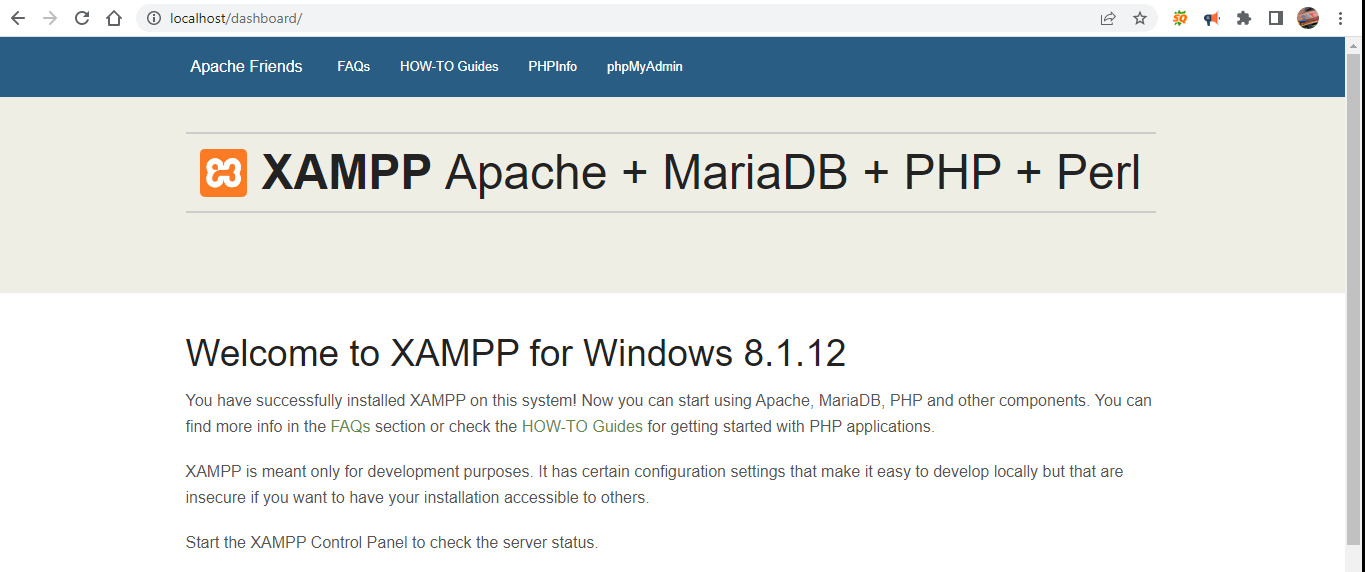
How to test xampp is working fine?
Open your browser and type: http://localhost
You will notice the down picture if everything is okay otherwise please repeat the overhead steps.
Copy and Paste the RFID attendance Zip Folder
- Download the Arduino IDE Program code from here.
- Extract the downloaded file.
- Copy the rfidattendance folder (Main Project folder).
- Paste the folder in C:\>XAMPP->htdocs->rfidattendance
Creating DATABASE
Now let’s attach the database to the ESP8266 RFID attendance system.
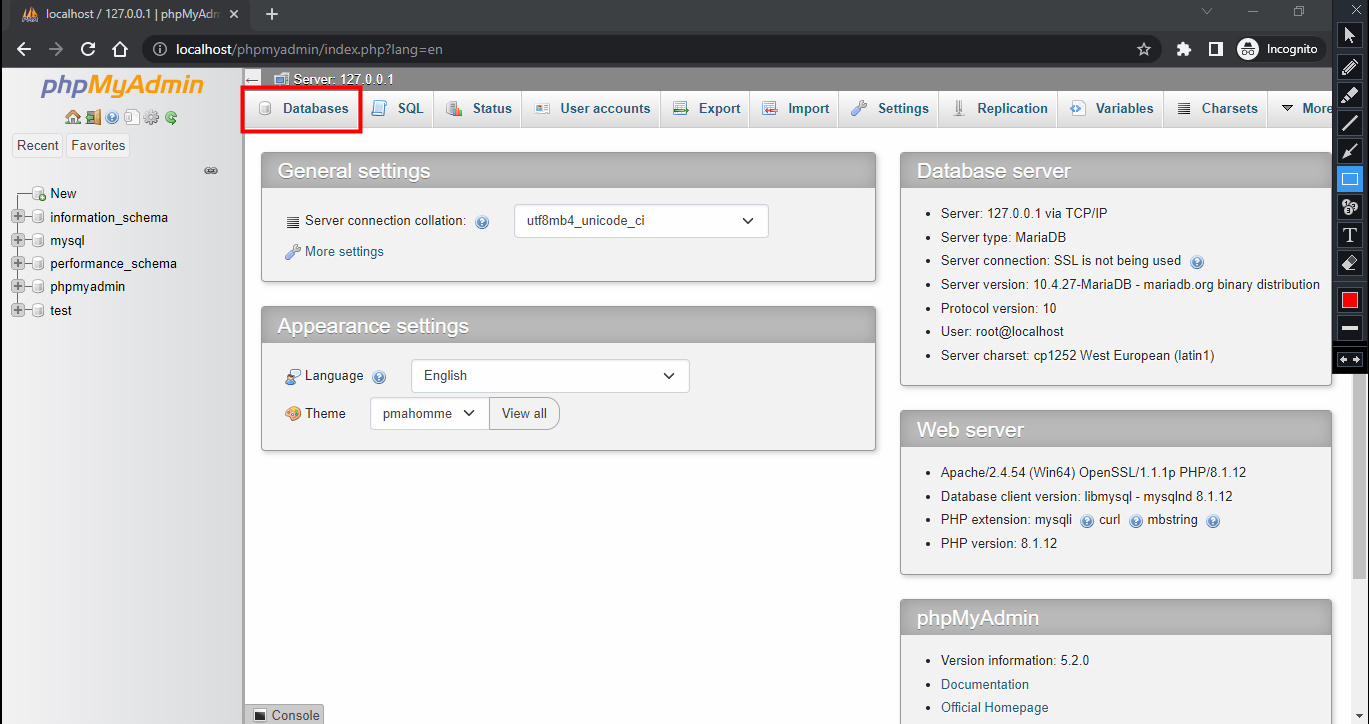
- Now open the MySQL using browser: http://localhost/phpmyadmin
- Then click on the database tab.
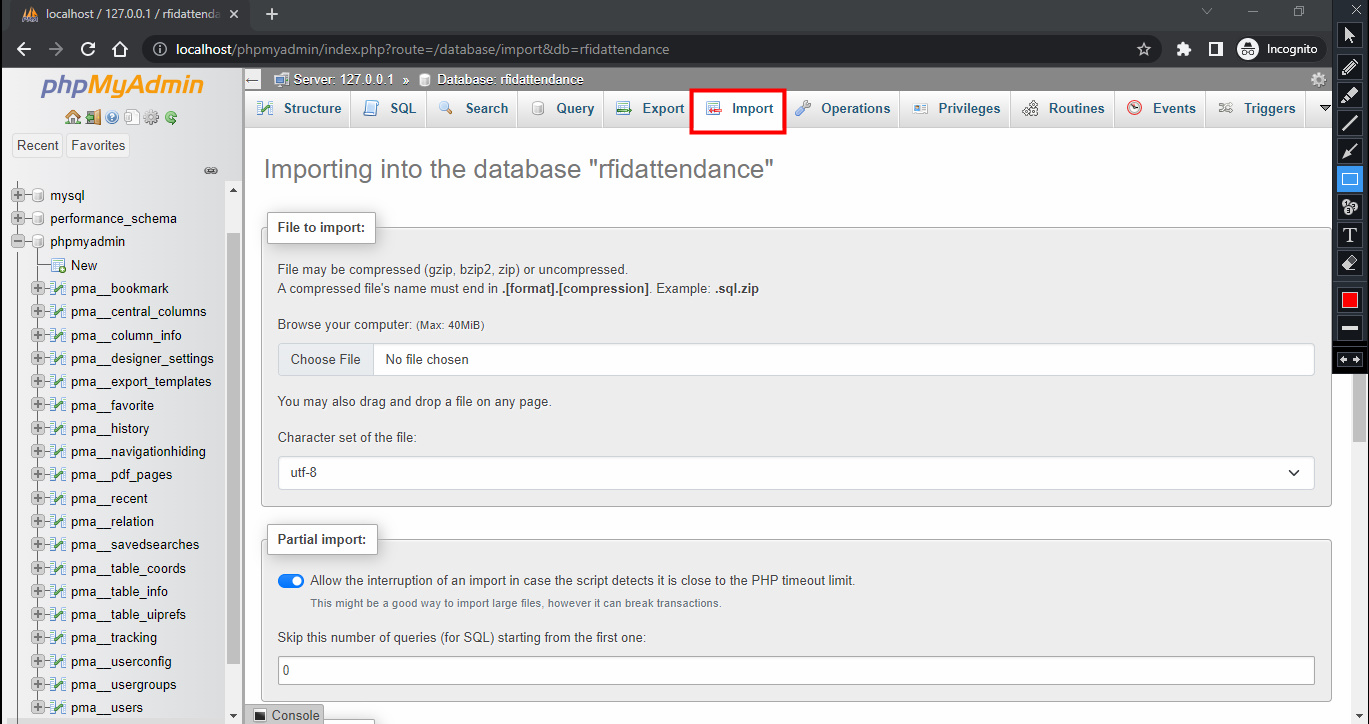
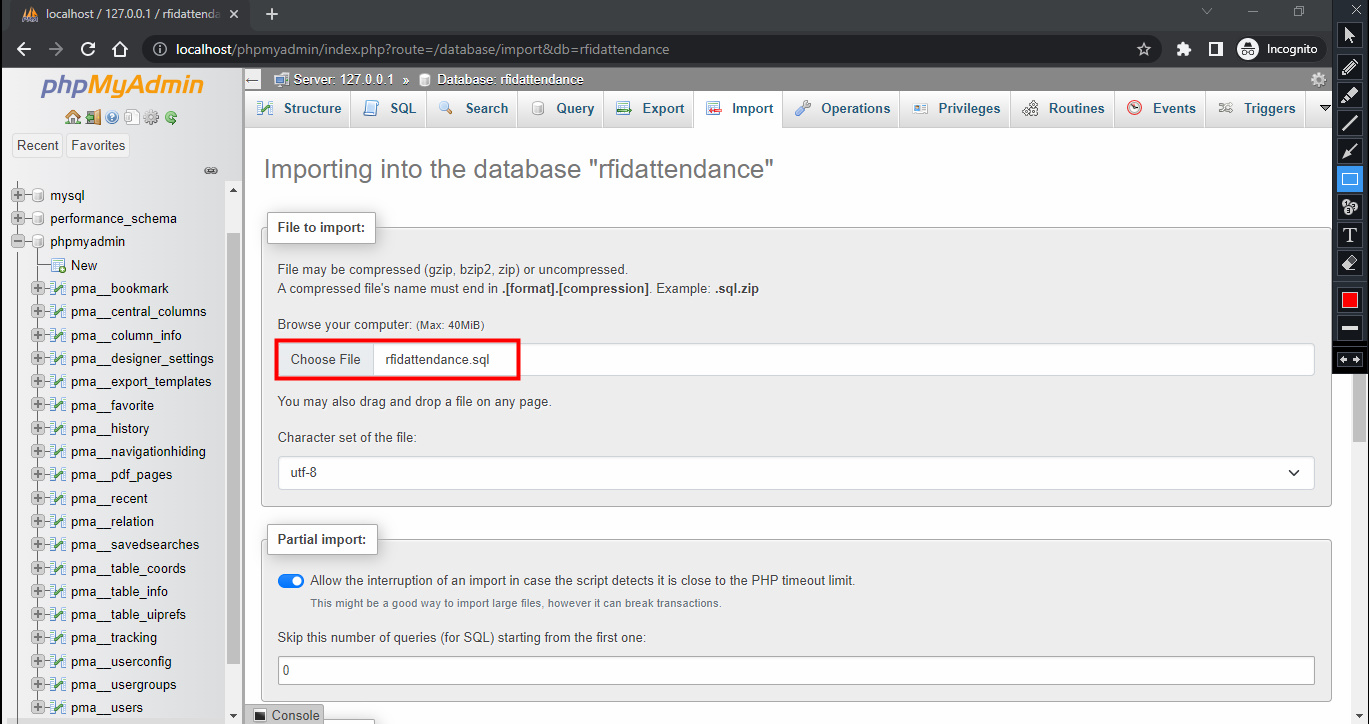
- Make a database name “rfidattendance” & then click on the import tab button
- Click on the browse file and then select the “rfidattendance.sql” file found inside the rfidattendance folder.
Run Web Application
After creating a database, open a browser. Now we’re prepared to run web application :
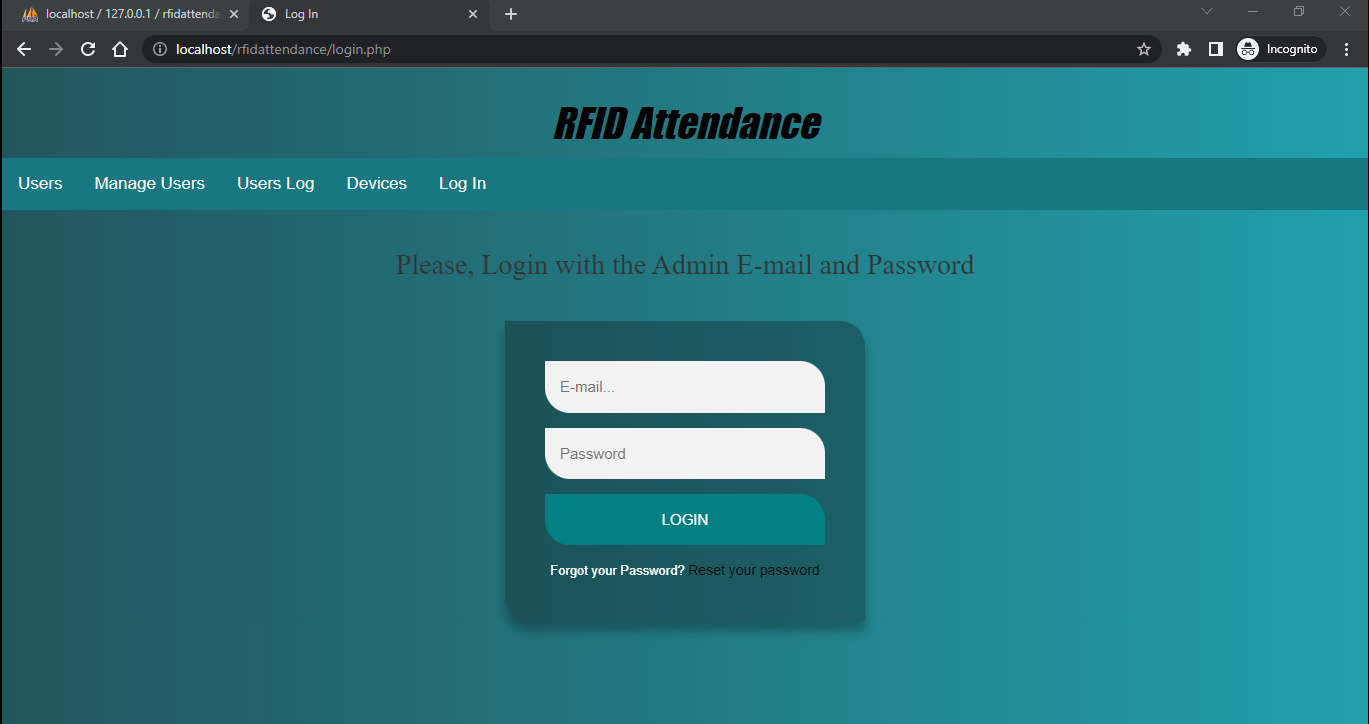
http://localhost/(your folder name)/ or and go to the URL “http://localhost/rfidattenddance/”. Now, the admin login panel will be shown.
Here you’ll see the picture shown below if everything is going well:
-
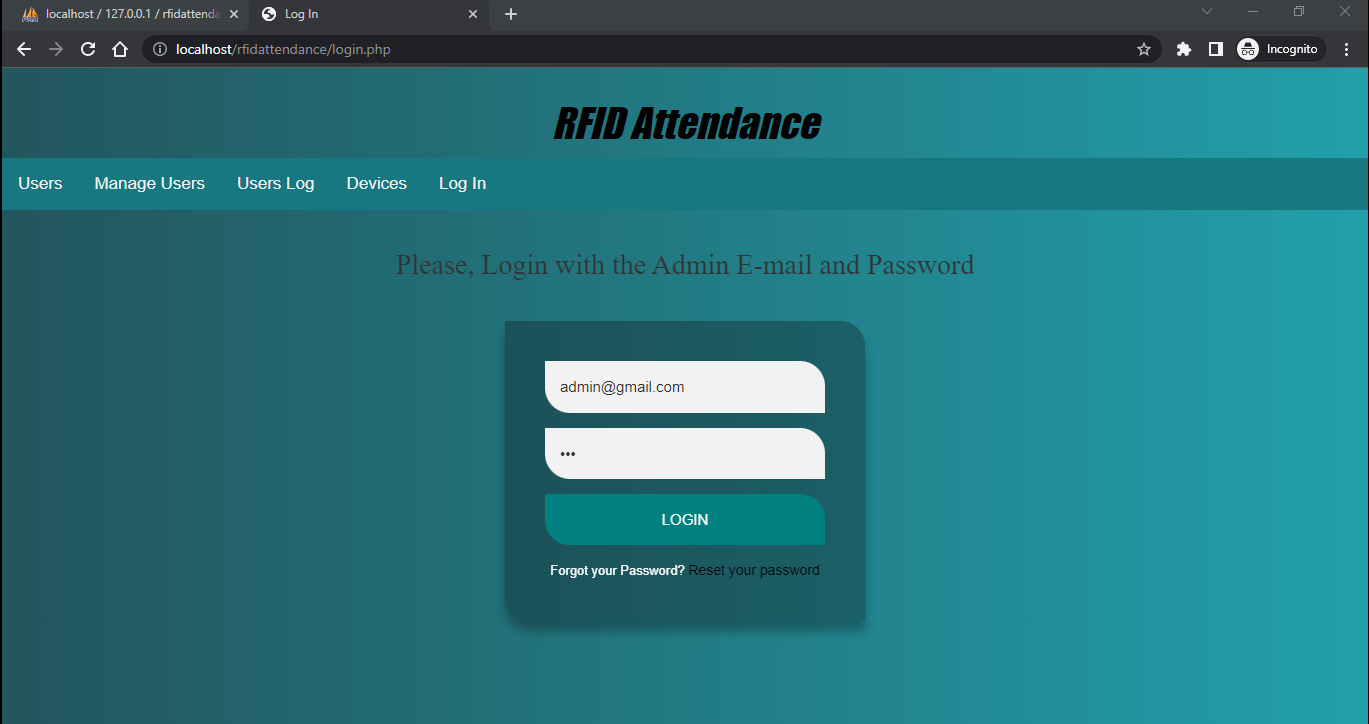
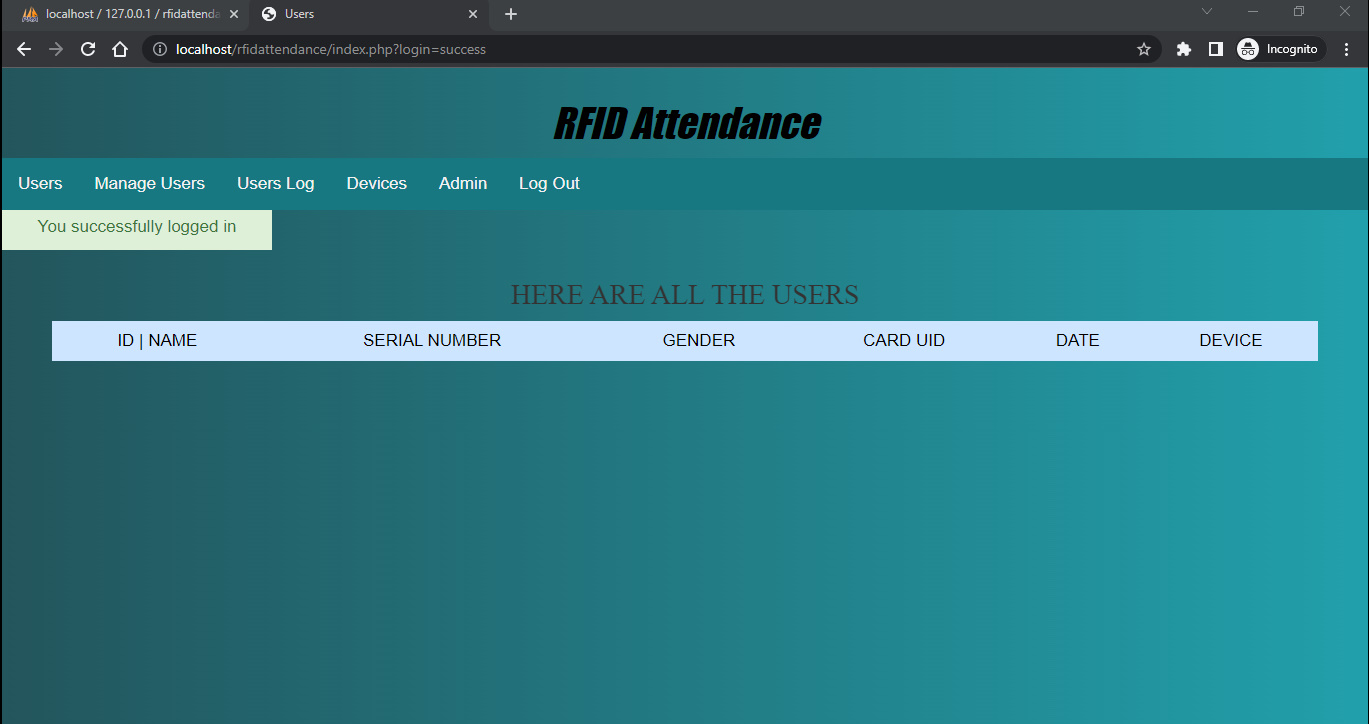
- Enter the admin email and password to join the system.
- The default admin credentials are E-mail= “admin@gmail.com”, and password= “123”
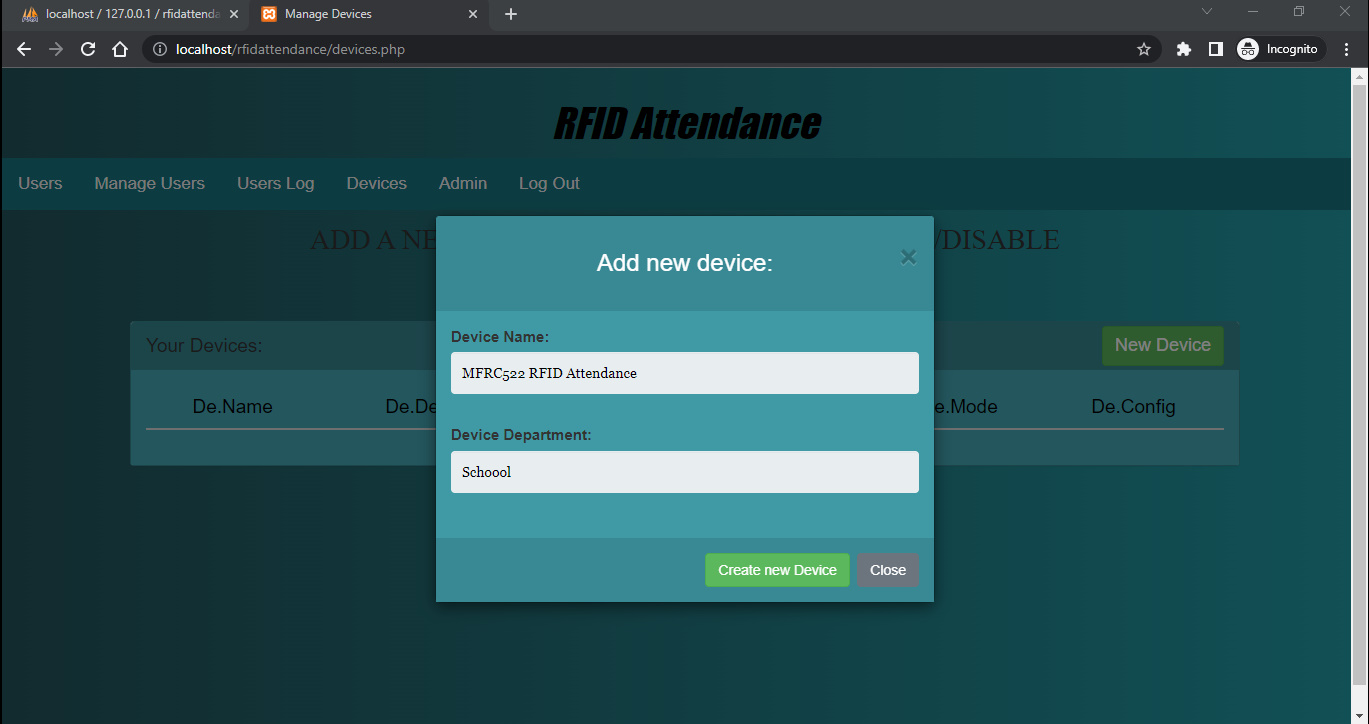
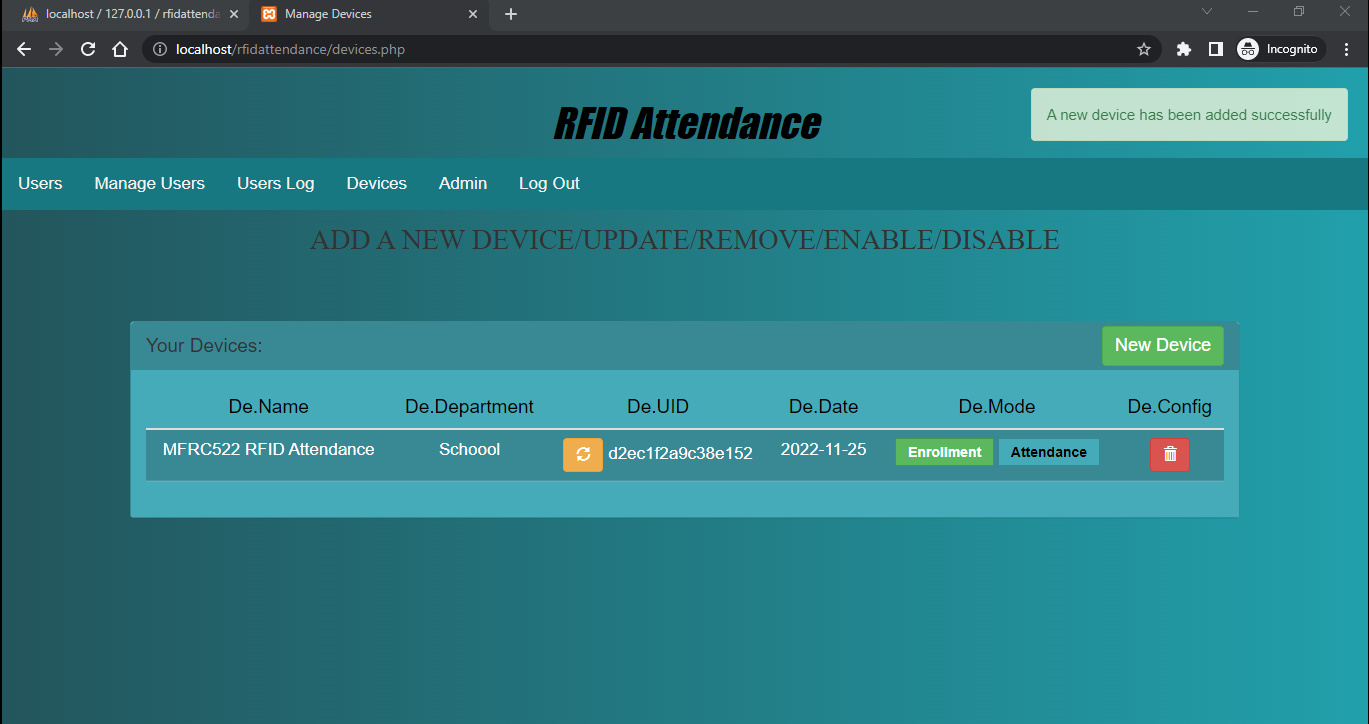
Add Device
Click on the device and add the device name & device department then create new device
after creating the device you can see the below image copy of the DE. UID token code.
Setting up Arduino IDE For ESP8266
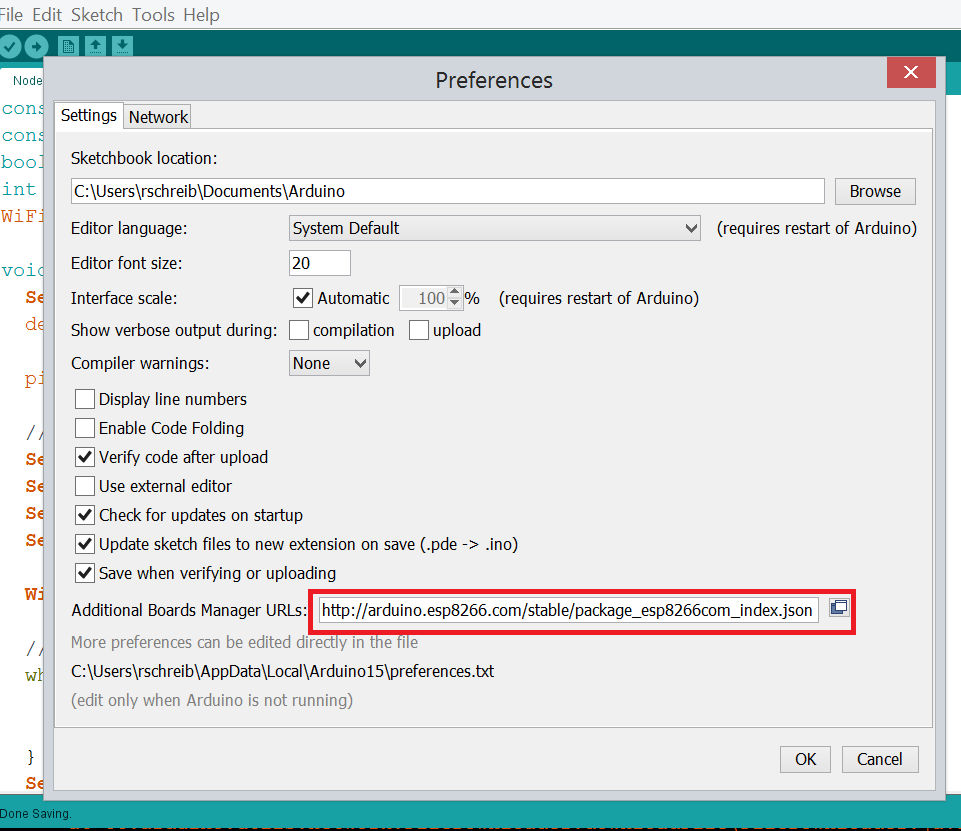
We will first need to install the ESP8266 board in the Arduino IDE. To do this, go to File > Preferences and add the following URL to the Additional Board Manager URLs field:
http://arduino.esp8266.com/stable/package_esp8266com_index.json
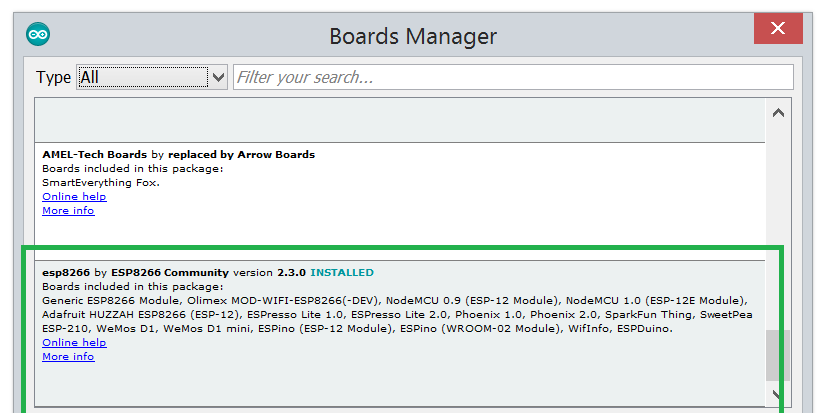
Once you have done that, open the Boards Manager by going to Tools > Board > Boards Manager. Search for ESP8266 and install the esp8266 platform.
NOTE:- Install version 2.3.0 of ESP266 board
Close and restart your Arduino IDE, and Plug in your NodeMcu to your computer. ‘
Selecting Port and Board
- Next, we will need to select the ESP8266 board that we are using. For this guide, we will be using the ESP8266-12E. To do this, go to Tools > Board and select the ESP8266-12e board.
- Go to Tools -> Port and select the COM Port of your NodeMCU.
Source Code/Program
Below is the source code for IoT RFID Attendance System Based On ESP8266
First, install the MFRC522 library to your Arduino Libraries folder – Download the RFID Library
Extract the MFRC522 library to your Arduino Libraries folder. The libraries folder can be found in C:\Program Files (x86)\Arduino.
Make Sure to change the wifi SSID, password and token from this line below
|
1 2 3 |
const char *ssid = "Romeo"; const char *password = "hackster"; const char* device_token = "565587yjhfgd65665"; |
Source Code
|
1 2 3 4 5 6 7 8 9 10 11 12 13 14 15 16 17 18 19 20 21 22 23 24 25 26 27 28 29 30 31 32 33 34 35 36 37 38 39 40 41 42 43 44 45 46 47 48 49 50 51 52 53 54 55 56 57 58 59 60 61 62 63 64 65 66 67 68 69 70 71 72 73 74 75 76 77 78 79 80 81 82 83 84 85 86 87 88 89 90 91 92 93 94 95 96 97 98 99 100 101 102 103 104 105 106 107 108 109 110 111 112 113 114 115 116 117 118 119 120 121 122 123 124 125 126 127 |
#include <SPI.h> #include <MFRC522.h> //NodeMCU-------------------------- #include <ESP8266WiFi.h> #include <ESP8266HTTPClient.h> //************************************************************************ #define SS_PIN D2 //D2 #define RST_PIN D1 //D1 //************************************************************************ MFRC522 mfrc522(SS_PIN, RST_PIN); // Create MFRC522 instance. //************************************************************************ /* Set these to your desired credentials. */ const char *ssid = "Romeo"; const char *password = "hackster"; const char* device_token = "565587yjhfgd65665"; //************************************************************************ String URL = "http://192.168.0.112/rfidattendance/getdata.php"; //computer IP or the server domain String getData, Link; String OldCardID = ""; unsigned long previousMillis = 0; //************************************************************************ void setup() { delay(1000); Serial.begin(115200); SPI.begin(); // Init SPI bus mfrc522.PCD_Init(); // Init MFRC522 card //--------------------------------------------- connectToWiFi(); } //************************************************************************ void loop() { //check if there's a connection to Wi-Fi or not if(!WiFi.isConnected()){ connectToWiFi(); //Retry to connect to Wi-Fi } //--------------------------------------------- if (millis() - previousMillis >= 15000) { previousMillis = millis(); OldCardID=""; } delay(50); //--------------------------------------------- //look for new card if ( ! mfrc522.PICC_IsNewCardPresent()) { return;//got to start of loop if there is no card present } // Select one of the cards if ( ! mfrc522.PICC_ReadCardSerial()) { return;//if read card serial(0) returns 1, the uid struct contians the ID of the read card. } String CardID =""; for (byte i = 0; i < mfrc522.uid.size; i++) { CardID += mfrc522.uid.uidByte[i]; } //--------------------------------------------- if( CardID == OldCardID ){ return; } else{ OldCardID = CardID; } //--------------------------------------------- // Serial.println(CardID); SendCardID(CardID); delay(1000); } //************send the Card UID to the website************* void SendCardID( String Card_uid ){ Serial.println("Sending the Card ID"); if(WiFi.isConnected()){ HTTPClient http; //Declare object of class HTTPClient //GET Data getData = "?card_uid=" + String(Card_uid) + "&device_token=" + String(device_token); // Add the Card ID to the GET array in order to send it //GET methode Link = URL + getData; http.begin(Link); //initiate HTTP request //Specify content-type header int httpCode = http.GET(); //Send the request String payload = http.getString(); //Get the response payload // Serial.println(Link); //Print HTTP return code Serial.println(httpCode); //Print HTTP return code Serial.println(Card_uid); //Print Card ID Serial.println(payload); //Print request response payload if (httpCode == 200) { if (payload.substring(0, 5) == "login") { String user_name = payload.substring(5); // Serial.println(user_name); } else if (payload.substring(0, 6) == "logout") { String user_name = payload.substring(6); // Serial.println(user_name); } else if (payload == "succesful") { } else if (payload == "available") { } delay(100); http.end(); //Close connection } } } //********************connect to the WiFi****************** void connectToWiFi(){ WiFi.mode(WIFI_OFF); //Prevents reconnection issue (taking too long to connect) delay(1000); WiFi.mode(WIFI_STA); Serial.print("Connecting to "); Serial.println(ssid); WiFi.begin(ssid, password); while (WiFi.status() != WL_CONNECTED) { delay(500); } Serial.println(""); Serial.println("Connected With Wi-Fi"); Serial.print("IP address: "); Serial.println(WiFi.localIP()); //IP address assigned to your ESP delay(1000); } |
Add Student Data to RFID Attendance System
First, go to the device and click Enrollment.
then click manage user and Put the RFID Card into the reader and you will see the card UID print on the localhost web page you can edit (NAME, GENDER, Etc)
Conclusion
IoT RFID Attendance System can be used to take attendance of students in a classroom. It is based on ESP8266 and PHP MySQL. The system uses RFID tags to store attendance data. The data can be accessed by the educator via the web interface. The system is easy to use.





6 Comments
Nice sir pls message me sab number delete ho geyaaa ha prateek here
Cant export to Excel
the data UID card nat sent to web/localhost. but in serial monitor the data was sending.
Problem setting time zone
error araise when the panel is hosted in cloud
i found the following error : object not found
how can i handle that error?