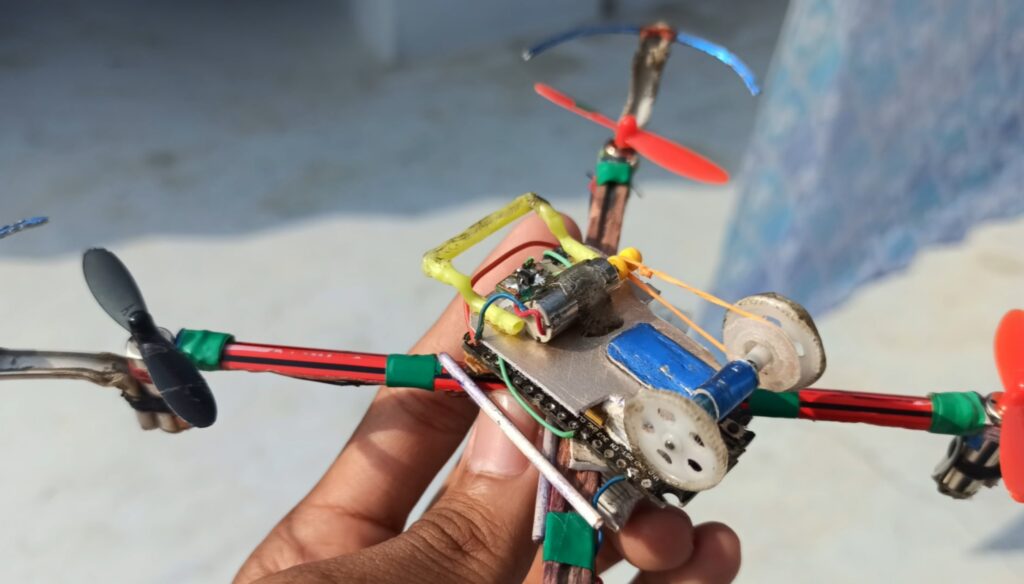
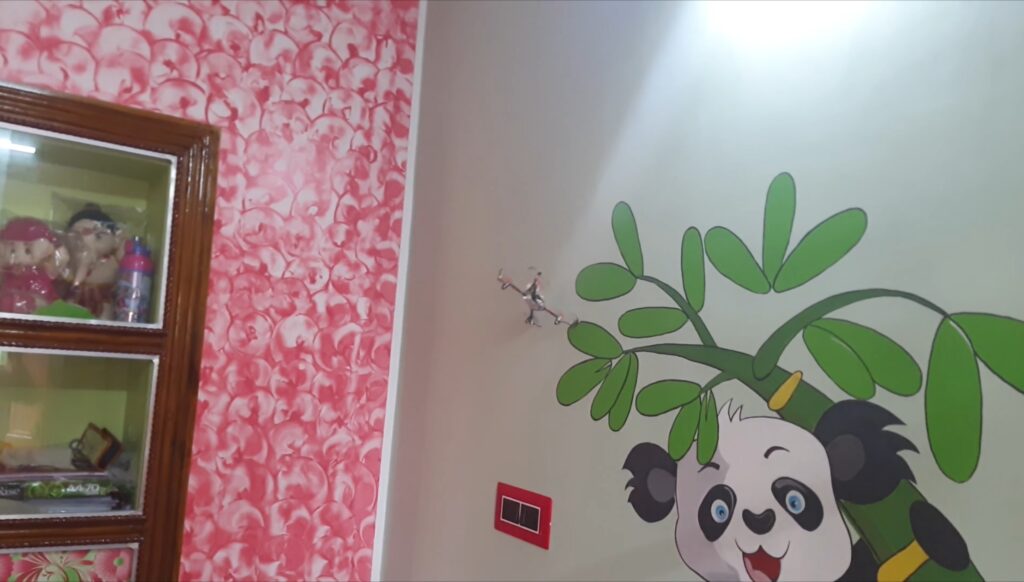
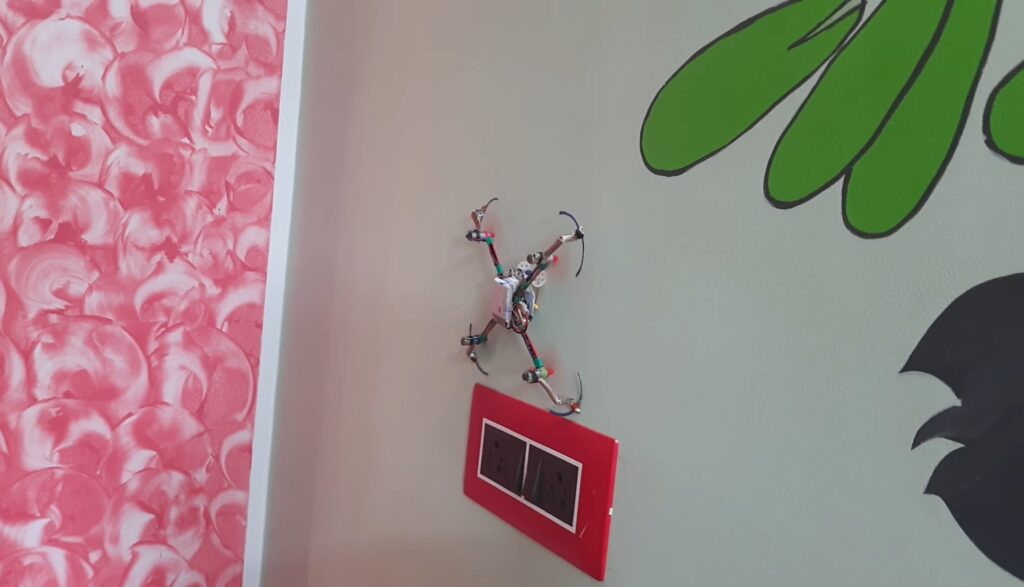
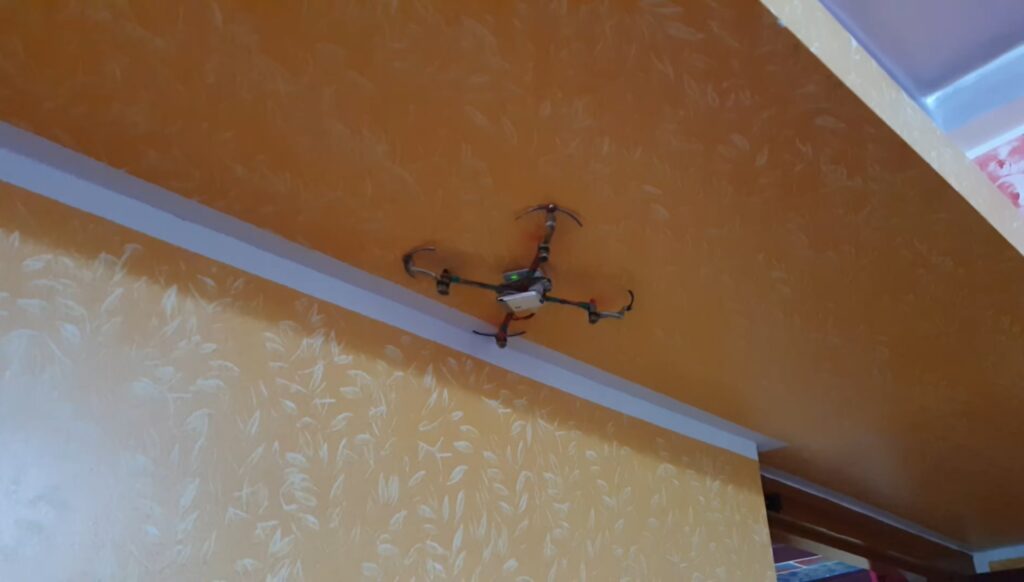
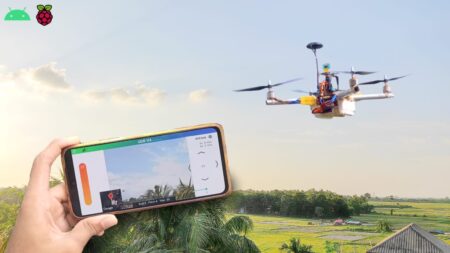
In this tutorial, I’m going to tell you how I made the ESP8266 Drone (This Drone Can Climb on Wall) and how it works.
Do you know what is the function of a drone, just can fly if I tell you that my drone can climb on a wall or go underwater like a submarine, You would think that this is making you crazy, so let’s not go, today we will show you by making it.
For a drone we need a flight controller but we don’t have much money for a flight controller So don’t worry already made my own flight controller if you haven’t seen my earlier project then go and see I have made a very cheap flight controller using ESP8266 in it I have given the link. ESP8266 Drone Guide
So here, I am sharing step-by-step build instructions for my ESP8266-based Drone.
Components Required
(let’s have a look at the main components of a drone)
- ESP8266 Module
- MPU6050 Module
- Brushed motors
- Propeller
- 500 mAh lipo3.7v
- Si2302 mosfet (5x)
A drone will consist of a frame, motors, propellers, an electric motor, a flight controller, battery, Here is a short summary of each part of a quadcopter.
Flight Controller: The flight controller (a.k.a FC) is the brain of the aircraft. it’s a circuit board with a range of sensors that detect the movement of the drone, as well as user commands. If you tell it to go forward, the flight controller will adjust the RPM of the rear motors so that it goes forward.
ESP8266 Module: To communicate with the drone we will need Bluetooth or wifi connection so we are using the Esp8266 Wi-Fi module because it has inbuilt Wi-Fi, and we can use it for communication.
ESP8266 Open-source, Interactive, Programmable, Low cost, Simple, Smart, Lowest cost WI-FI enabled hardware.
Talking about the range of the Drone. I have got around 70-meter range using my Samsung mobile acting as WiFi Hotspot and remote controller
Mpu6050: MPU6050 IMU, a low-cost device that contains both a gyroscope and accelerometer. We will use the MPU-6050 with an Esp8266 module to build a Drone. Learn more About MPU-6050 and Arduino.
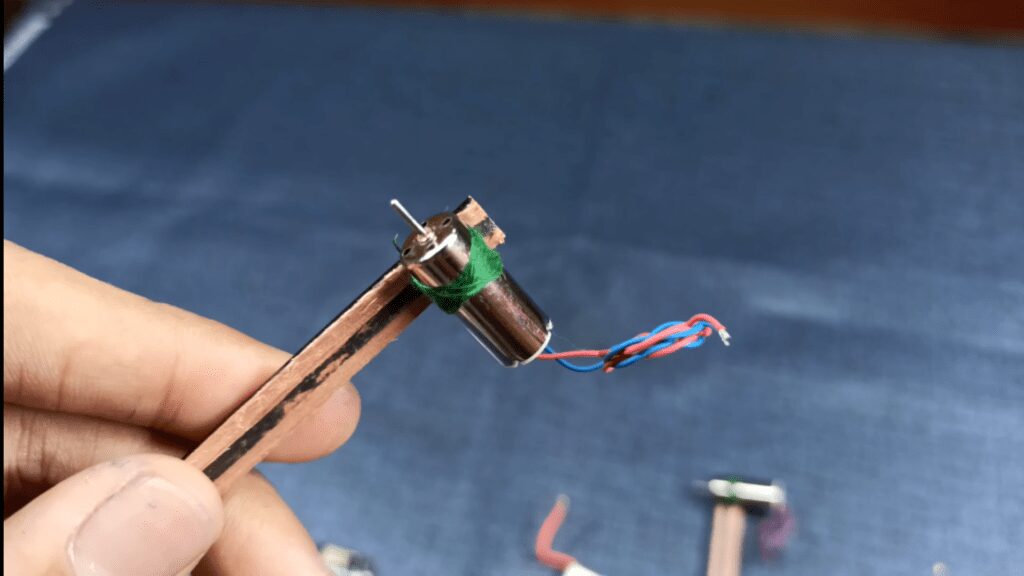
Coreless motors: Coreless motors are Mini motors used in Quadcopter and Drones, These motors are coreless which means they do not have a metal core in the rotor, Coreless motors can achieve higher RPM with less load. These motors are suitable for micro drones, quadcopters, or Mini projects.
Propellers: There’s no challenge without drone propellers, The purpose of your propeller is to generate thrust and torque to keep your drone flying
.
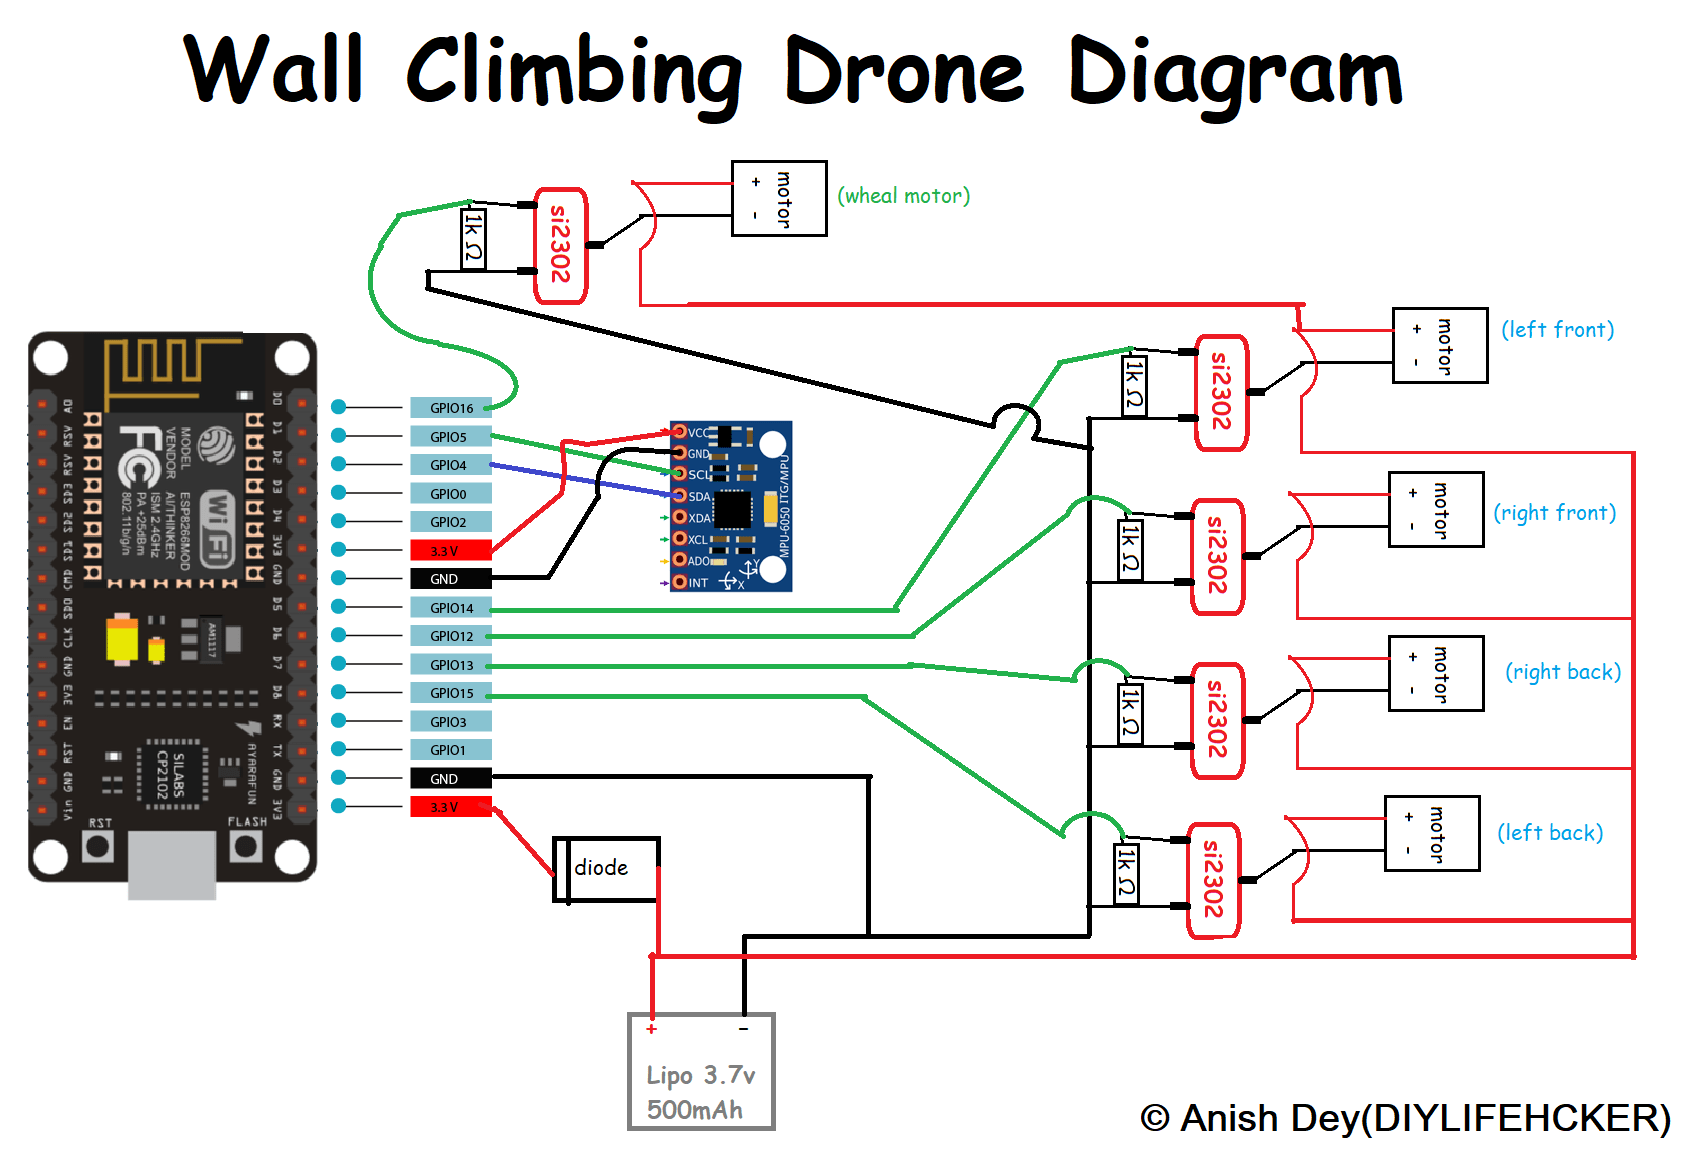
Schematic for Esp8266 Drone Flight Controller
ESP12e (ESP8266) Based receiver control module Schematic:
Make the Circuit: Make the circuit by following the schematic diagram given in the above picture, I have already explained the connection details of each component
Build Frame
Frame: The frame provides the structure and rigidity and it’s where all the components will be mounted. Chose wooden pencils then I gave it the shape of your quadcopter.
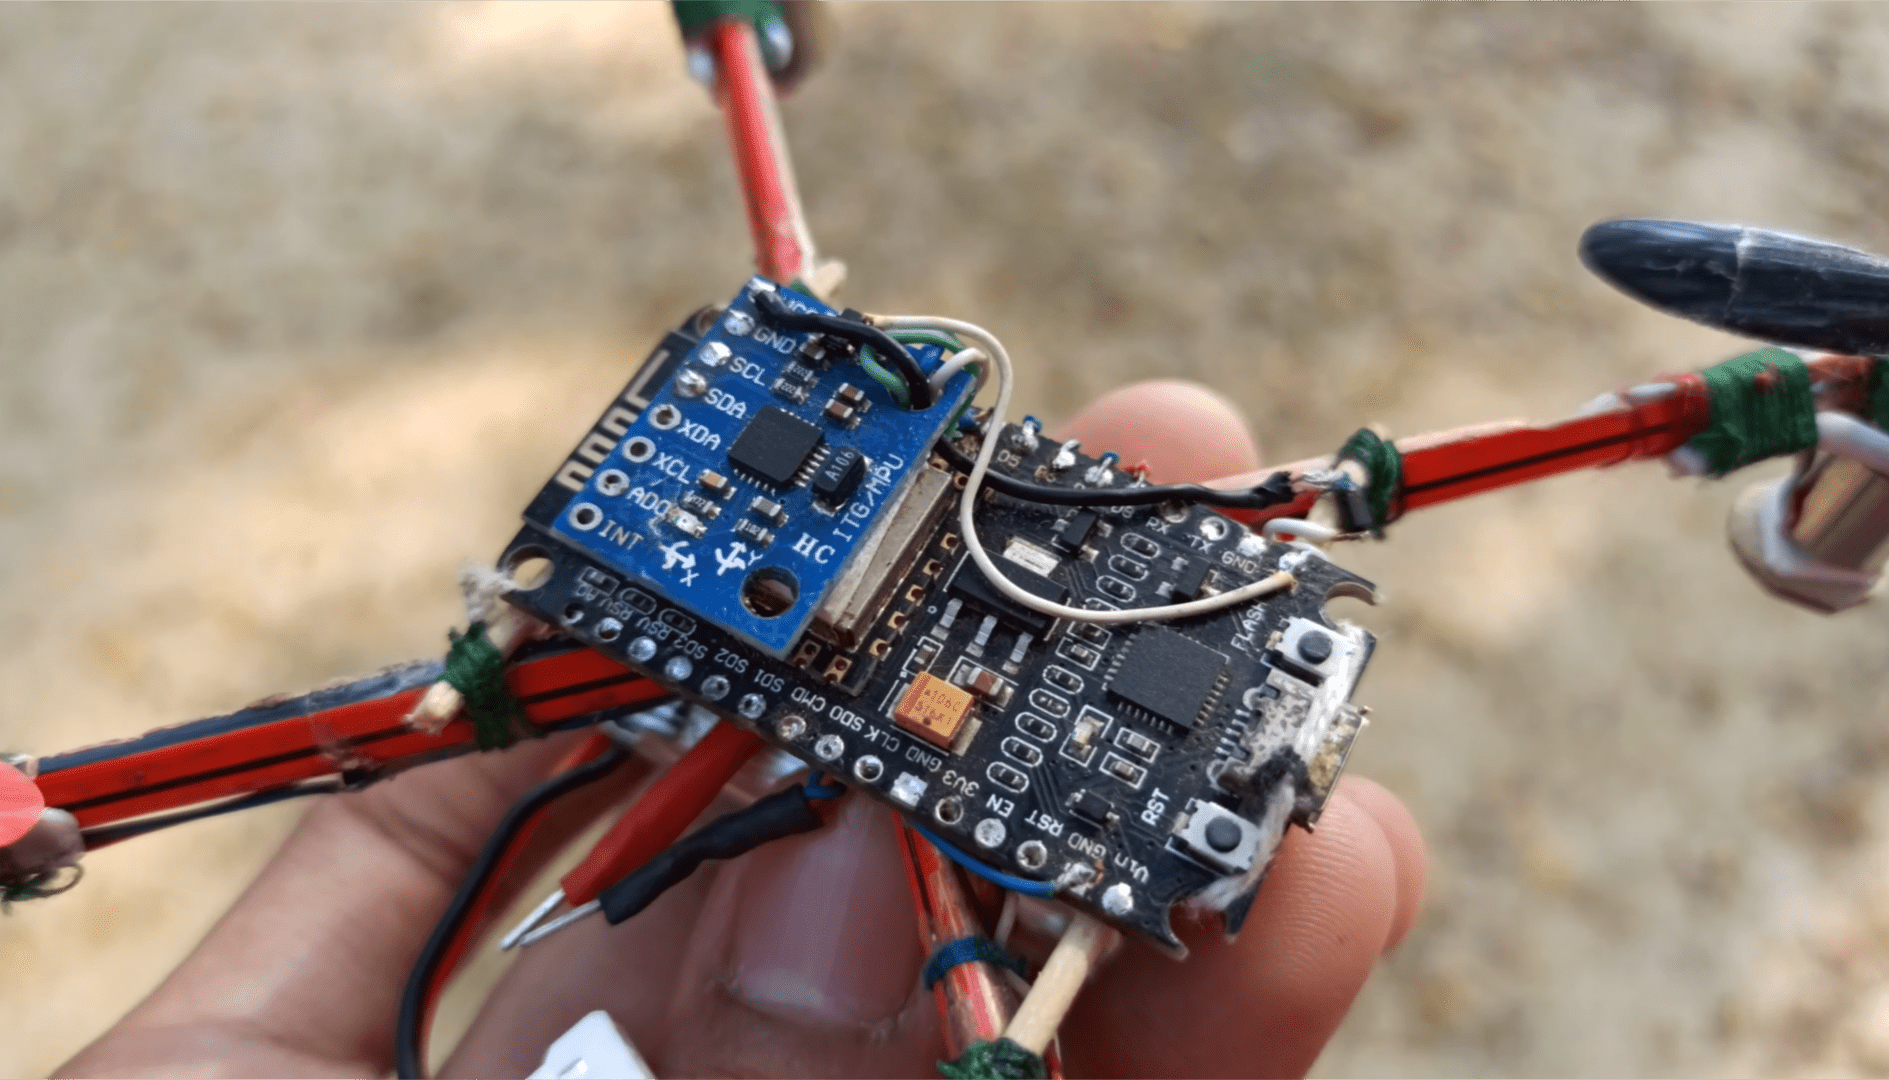
Assembling the frame and mounting the ESP8266 flight controller, The first thing we need to do is assemble the frame. I used a pencil for the frame if you have a 3d printer then you can print a good frame.
Software for ESP8266 Drone
Using Arduino IDE: If you want to edit (i.e. SSID and password of WiFi network – Android Hotspot in this case)
- This is the best method to follow.
- Install Arduino IDE
- Install ESP8266 Boards
- Install ESP8266WiFi.h library
- Copy the code and put your own Wi-Fi SSID and password in code
|
1 2 3 4 5 6 7 8 9 10 11 12 13 14 15 16 17 18 19 20 21 22 23 24 25 26 27 28 29 30 31 32 33 34 35 36 37 38 39 40 41 42 43 44 45 46 47 48 49 50 51 52 53 54 55 56 57 58 59 60 61 62 63 64 65 66 67 68 69 70 71 72 73 74 75 76 77 78 79 80 81 82 83 84 85 86 87 88 89 90 91 92 93 94 95 96 97 98 99 100 101 102 103 104 105 106 107 108 109 110 111 112 113 114 115 116 117 118 119 120 121 122 123 124 125 126 127 128 129 130 131 132 133 134 135 136 137 138 139 140 141 142 143 144 145 146 147 148 149 150 151 152 153 154 155 156 157 158 159 160 161 162 163 164 165 166 167 168 169 170 171 172 173 174 175 176 177 178 179 180 181 182 183 184 185 186 187 188 189 190 191 192 193 194 195 196 197 198 199 200 201 202 203 204 205 206 207 208 209 210 211 212 213 214 215 216 217 218 219 220 221 222 223 224 225 226 227 228 229 230 231 232 233 234 235 236 237 238 239 240 241 242 243 244 245 246 247 248 249 250 251 252 253 254 255 256 257 258 259 260 261 262 263 264 265 266 267 268 269 270 271 272 273 274 275 276 277 278 279 280 281 282 283 284 285 286 287 288 289 290 291 292 293 294 295 296 297 298 299 300 301 302 303 304 305 306 307 308 309 310 311 312 313 314 315 316 317 318 319 320 321 322 |
#include<Wire.h> #include <ESP8266WiFi.h> #include <WiFiUdp.h> WiFiUDP UDP; char packet[4]; //IPAddress local_IP(192, 168, 203, 158); //IPAddress gateway(192, 168, 1, 158); //IPAddress subnet(255, 255, 0, 0); //_________________________________________// int ESCout_1 ,ESCout_2 ,ESCout_3 ,ESCout_4; int input_PITCH = 50; int input_ROLL = 50; int input_YAW = 50; volatile int input_THROTTLE = 0; int Mode = 0; boolean wall_car_init = false; boolean set_motor_const_speed = false; int8_t target_axis=0; int8_t target_dirr=0; boolean wheal_state = false; uint8_t pwm_stops; int arr[] = {20,10,20,10}; volatile int order[] = {0,0,0,0}; //volatile key int temp_arr[] = {0,0,0,0}; int pulldown_time_temp[] = {0,0,0,0,0}; int pulldown_time[] = {0,0,0,0,0}; volatile int pulldown_time_temp_loop[] = {0,0,0,0,0}; //volatile key uint8_t pin[] = {14,12,13,15}; int i,j,temp_i,temp; boolean orderState1,orderState2,orderState3,orderState4,Timer_Init; int16_t gyro_x, gyro_y, gyro_z, acc_x, acc_y, acc_z, temperature, acc_total_vector; float angle_pitch, angle_roll,angle_yaw,prev_roll,prev_pitch,prev_yaw; boolean set_gyro_angles; float angle_roll_acc, angle_pitch_acc; float angle_pitch_output, angle_roll_output, angle_yaw_output; long Time, timePrev; float elapsedTime,P_factor; float acceleration_x,acceleration_y,acceleration_z; long gyro_x_cal, gyro_y_cal, gyro_z_cal; float pitch_PID,roll_PID,yaw_PID; float roll_error, roll_previous_error, pitch_error, pitch_previous_error, yaw_error, yaw_previous_error; float roll_pid_p, roll_pid_d, roll_pid_i, pitch_pid_p, pitch_pid_i, pitch_pid_d, yaw_pid_p, yaw_pid_i, yaw_pid_d; float roll_desired_angle, pitch_desired_angle, yaw_desired_angle; double twoX_kp=5; //5 double twoX_ki=0.003; //0.003 double twoX_kd=1.4; //1.4 double yaw_kp=8; //5 double yaw_ki=0; //0.005 double yaw_kd=4; //2.8 void ICACHE_RAM_ATTR PWM_callback() { switch (pwm_stops){ case 0: pulldown_time_temp[0] = pulldown_time_temp_loop[0]; pulldown_time_temp[1] = pulldown_time_temp_loop[1]; pulldown_time_temp[2] = pulldown_time_temp_loop[2]; pulldown_time_temp[3] = pulldown_time_temp_loop[3]; pulldown_time_temp[4] = pulldown_time_temp_loop[4]; pwm_stops = 1; if(input_THROTTLE!=0){GPOS = (1 << 14);GPOS = (1 << 12);GPOS = (1 << 15);GPOS = (1 << 13);} timer1_write(80*pulldown_time_temp[0]); break; case 1: pwm_stops = 2; GPOC = (1 << pin[order[0]]); timer1_write(80*pulldown_time_temp[1]); break; case 2: pwm_stops = 3; GPOC = (1 << pin[order[1]]); timer1_write(80*pulldown_time_temp[2]); break; case 3: pwm_stops = 4; GPOC = (1 << pin[order[2]]); timer1_write(80*pulldown_time_temp[3]); break; case 4: pwm_stops = 0; GPOC = (1 << pin[order[3]]); timer1_write(80*pulldown_time_temp[4]); break; } } void setup() { pinMode(D5,OUTPUT);pinMode(D6,OUTPUT);pinMode(D7,OUTPUT);pinMode(D8,OUTPUT);pinMode(D0,OUTPUT); GPOC = (1 << 14);GPOC = (1 << 12);GPOC = (1 << 13);GPOC = (1 << 15); digitalWrite(D0,LOW); Serial.begin(115200); WiFi.mode(WIFI_STA); WiFi.begin("Redmi_R", "deywifi3210"); while (WiFi.status() != WL_CONNECTED){ delay(500);} Serial.println(WiFi.localIP()); UDP.begin(9999); delay(6000); //____________________________________________________________________// Wire.begin(); Wire.setClock(400000); Wire.beginTransmission(0x68); Wire.write(0x6B); Wire.write(0x00); Wire.endTransmission(); Wire.beginTransmission(0x68); Wire.write(0x1C); //accel Wire.write(0x08); //+-4g Wire.endTransmission(); Wire.beginTransmission(0x68); Wire.write(0x1B); //gyro Wire.write(0x18); //2000dps Wire.endTransmission(); Wire.beginTransmission(0x68); Wire.write(0x1A); Wire.write(0x03); Wire.endTransmission(); //____________________________________________________________________// for (int cal_int = 0; cal_int < 4000 ; cal_int ++){ if(cal_int % 125 == 0)Serial.print("."); Wire.beginTransmission(0x68); Wire.write(0x3B); Wire.endTransmission(); Wire.requestFrom(0x68,14); while(Wire.available() < 14); acc_y = Wire.read()<<8|Wire.read(); acc_x = Wire.read()<<8|Wire.read(); acc_z = Wire.read()<<8|Wire.read(); temperature = Wire.read()<<8|Wire.read(); gyro_y = Wire.read()<<8|Wire.read(); gyro_x = Wire.read()<<8|Wire.read(); gyro_z = Wire.read()<<8|Wire.read(); gyro_x_cal += gyro_x; gyro_y_cal += gyro_y; gyro_z_cal += gyro_z; delayMicroseconds(100); } gyro_x_cal /= 4000; gyro_y_cal /= 4000; gyro_z_cal /= 4000; timer1_attachInterrupt(PWM_callback); timer1_enable(TIM_DIV1, TIM_EDGE, TIM_SINGLE); } void loop() { //--------------------------------MPU6050----------------------------// timePrev = Time; Time = micros(); elapsedTime = (float)(Time - timePrev) / (float)1000000; Wire.beginTransmission(0x68); Wire.write(0x3B); Wire.endTransmission(); Wire.requestFrom(0x68,14); while(Wire.available() < 14); acc_y = Wire.read()<<8|Wire.read(); acc_x = Wire.read()<<8|Wire.read(); acc_z = Wire.read()<<8|Wire.read(); temperature = Wire.read()<<8|Wire.read(); gyro_y = Wire.read()<<8|Wire.read(); gyro_x = Wire.read()<<8|Wire.read(); gyro_z = Wire.read()<<8|Wire.read(); gyro_x -= gyro_x_cal; gyro_y -= gyro_y_cal; gyro_z -= gyro_z_cal; acceleration_x = gyro_x * (-0.0610687023); acceleration_y = gyro_y * (-0.0610687023); acceleration_z = gyro_z * (-0.0610687023); angle_pitch += acceleration_x * elapsedTime; angle_roll += acceleration_y * elapsedTime; angle_yaw += acceleration_z * elapsedTime; if(angle_yaw >= 180.00){angle_yaw-=360;} else if(angle_yaw < -180.00){angle_yaw+=360;} angle_roll_acc = atan(acc_x/sqrt(acc_y *acc_y + acc_z*acc_z))*(-57.296); angle_pitch_acc = atan(acc_y/sqrt(acc_x*acc_x + acc_z*acc_z))*57.296; angle_pitch_acc -= 4; angle_roll_acc += 9; if(set_gyro_angles){ angle_pitch = angle_pitch * 0.9996 + angle_pitch_acc * 0.0004; angle_roll = angle_roll * 0.9996 + angle_roll_acc * 0.0004; } else{ angle_pitch = angle_pitch_acc; angle_roll = angle_roll_acc; set_gyro_angles = true; } angle_pitch_output = angle_pitch_output * 0.9 + angle_pitch * 0.1; angle_roll_output = angle_roll_output * 0.9 + angle_roll * 0.1; angle_yaw_output = angle_yaw_output * 0.9 + angle_yaw * 0.1; //--------------------------PID_Calculation--------------------------// if(wall_car_init==false){ roll_desired_angle = 3*(input_ROLL - 50)/10.0; pitch_desired_angle = 3*(input_PITCH - 50)/10.0; } P_factor = 0.001286376*input_THROTTLE + 0.616932; roll_error = angle_roll_output - roll_desired_angle; pitch_error = angle_pitch_output - pitch_desired_angle; yaw_error = angle_yaw_output; roll_pid_p = P_factor*twoX_kp*roll_error; pitch_pid_p = P_factor*twoX_kp*pitch_error; yaw_pid_p = yaw_kp*yaw_error; roll_pid_i += twoX_ki*roll_error; pitch_pid_i += twoX_ki*pitch_error; yaw_pid_i += yaw_ki*yaw_error; roll_pid_d = twoX_kd*acceleration_y; pitch_pid_d = twoX_kd*acceleration_x; yaw_pid_d = yaw_kd*acceleration_z; if(roll_pid_i > 0 && roll_error < 0){roll_pid_i=0;} else if(roll_pid_i < 0 && roll_error > 0){roll_pid_i=0;} if(pitch_pid_i > 0 && pitch_error < 0){pitch_pid_i=0;} else if(pitch_pid_i < 0 && pitch_error > 0){pitch_pid_i=0;} if(yaw_pid_i > 0 && yaw_error < 0){yaw_pid_i=0;} else if(yaw_pid_i < 0 && yaw_error > 0){yaw_pid_i=0;} roll_PID = roll_pid_p + roll_pid_i + roll_pid_d; pitch_PID = pitch_pid_p + pitch_pid_i + pitch_pid_d; yaw_PID = yaw_pid_p + yaw_pid_i + yaw_pid_d; ESCout_1 = input_THROTTLE + pitch_PID - roll_PID + yaw_PID; ESCout_2 = input_THROTTLE + pitch_PID + roll_PID - yaw_PID; ESCout_3 = input_THROTTLE - pitch_PID + roll_PID + yaw_PID; ESCout_4 = input_THROTTLE - pitch_PID - roll_PID - yaw_PID; //------------------------- CarMode -----------------------------// if(Mode==1 && (abs(input_ROLL-50)>30 || abs(input_PITCH-50)>30)){ wall_car_init = true; if(input_ROLL > 30){target_axis = 1; target_dirr = 1;} else if(input_ROLL < -30){target_axis = 1; target_dirr = -1;} else if(input_PITCH > 30){target_axis = 2; target_dirr = 1;} else if(input_PITCH < -30){target_axis = 2; target_dirr = -1;} } else if(Mode==0){wall_car_init=false;set_motor_const_speed=false;} if(wall_car_init==true){ if(target_axis=1){roll_desired_angle = 90*target_dirr;} else if(target_axis=2){pitch_desired_angle = 90*target_dirr;} if((abs(acceleration_x)<15 && abs(acceleration_y)<15) && (abs(angle_roll_output)>45 || abs(angle_pitch_output)>45)){set_motor_const_speed = true;} if(set_motor_const_speed==true){ ESCout_1 = 1100; ESCout_2 = 1103; ESCout_3 = 1106; ESCout_4 = 1109; if(input_ROLL>50 && wheal_state == true){digitalWrite(D0,HIGH);} } } //----------------------------------------------------------------// if(ESCout_1>1199) ESCout_1=1199; else if(ESCout_1<1) ESCout_1=1; if(ESCout_2>1199) ESCout_2=1199; else if(ESCout_2<1) ESCout_2=1; if(ESCout_3>1199) ESCout_3=1199; else if(ESCout_3<1) ESCout_3=1; if(ESCout_4>1199) ESCout_4=1199; else if(ESCout_4<1) ESCout_4=1; //----------------------------- Sorting -------------------------------// arr[0]=ESCout_1;arr[1]=ESCout_2;arr[2]=ESCout_3;arr[3]=ESCout_4; temp_arr[0] = arr[0];temp_arr[1] = arr[1];temp_arr[2] = arr[2];temp_arr[3] = arr[3]; for (i = 0; i < 3; i++){ temp_i = i; for (j = i+1; j < 4; j++) if (temp_arr[j] < temp_arr[temp_i]) temp_i = j; temp = temp_arr[temp_i]; temp_arr[temp_i] = temp_arr[i]; temp_arr[i] = temp; } pulldown_time[0]=temp_arr[0]; pulldown_time[1]=temp_arr[1]-temp_arr[0]; pulldown_time[2]=temp_arr[2]-temp_arr[1]; pulldown_time[3]=temp_arr[3]-temp_arr[2]; pulldown_time[4]=1200-temp_arr[3]; if(pulldown_time[1]==0){pulldown_time[1]=1;} if(pulldown_time[2]==0){pulldown_time[2]=1;} if(pulldown_time[3]==0){pulldown_time[3]=1;} if(pulldown_time[4]==0){pulldown_time[4]=1;} pulldown_time_temp_loop[0] = pulldown_time[0]; pulldown_time_temp_loop[1] = pulldown_time[1]; pulldown_time_temp_loop[2] = pulldown_time[2]; pulldown_time_temp_loop[3] = pulldown_time[3]; pulldown_time_temp_loop[4] = pulldown_time[4]; orderState1=false;orderState2=false;orderState3=false;orderState4=false; for(int k=0; k <4; k++){ if(temp_arr[0] == arr[k] && orderState1 == false){ order[0] = k; orderState1=true;} else if(temp_arr[1] == arr[k] && orderState2 == false){ order[1] = k; orderState2=true;} else if(temp_arr[2] == arr[k] && orderState3 == false){ order[2] = k; orderState3=true;} else if(temp_arr[3] == arr[k] && orderState4 == false){ order[3] = k; orderState4=true;} } //----------------------------- WiFi ----------------------------------// int packetSize = UDP.parsePacket(); if (packetSize) { int len = UDP.read(packet, 4); if(len>0){packet[len] = '\0';} input_ROLL = int(packet[0]); input_PITCH = int(packet[1]); input_THROTTLE = int(packet[2])*24; Mode = int(packet[3]); } if(input_THROTTLE == 0){ angle_yaw_output=0;angle_yaw=0;yaw_PID=0; yaw_pid_p=0;yaw_pid_i=0;yaw_pid_d=0;twoX_ki=0; } //-------------------------------------------------------------------// //Serial.print(input_ROLL);Serial.print(" "); //Serial.print(input_PITCH);Serial.print(" "); //Serial.print(input_THROTTLE);Serial.print(" "); //Serial.print(angle_roll_output,0);Serial.print(" "); //Serial.print(angle_pitch_output,0);//Serial.print(" "); //Serial.println(input_THROTTLE); if(wheal_state == false){digitalWrite(D0,LOW);} if(Timer_Init == false){ timer1_write(80); Timer_Init = true; } wheal_state = !wheal_state; while(Time - timePrev <1200); } |
Download Drone_FInal.ino from the attachment of this step. Open Arduino IDE and copy code from Drone_FInal.ino and paste it into Arduino IDE.Edit the SSID and Password of your network in the code by editing the following two lines.
|
1 |
WiFi.begin("Diyprojectslab", "romeooo"); //ssid or pass |
- In Arduino IDE goto tools>Boards>select NODEMCU 1.0 (ESP – 12E Module)
- Go to tools and select port.
- Change the Wifi name and password from the following code.
- Now click on the Upload button to upload the following code.
- If all goes fine then you can see the blue LED on ESP8266 start flashing every second.
Android App Setup and Testing Esp8266 Drone
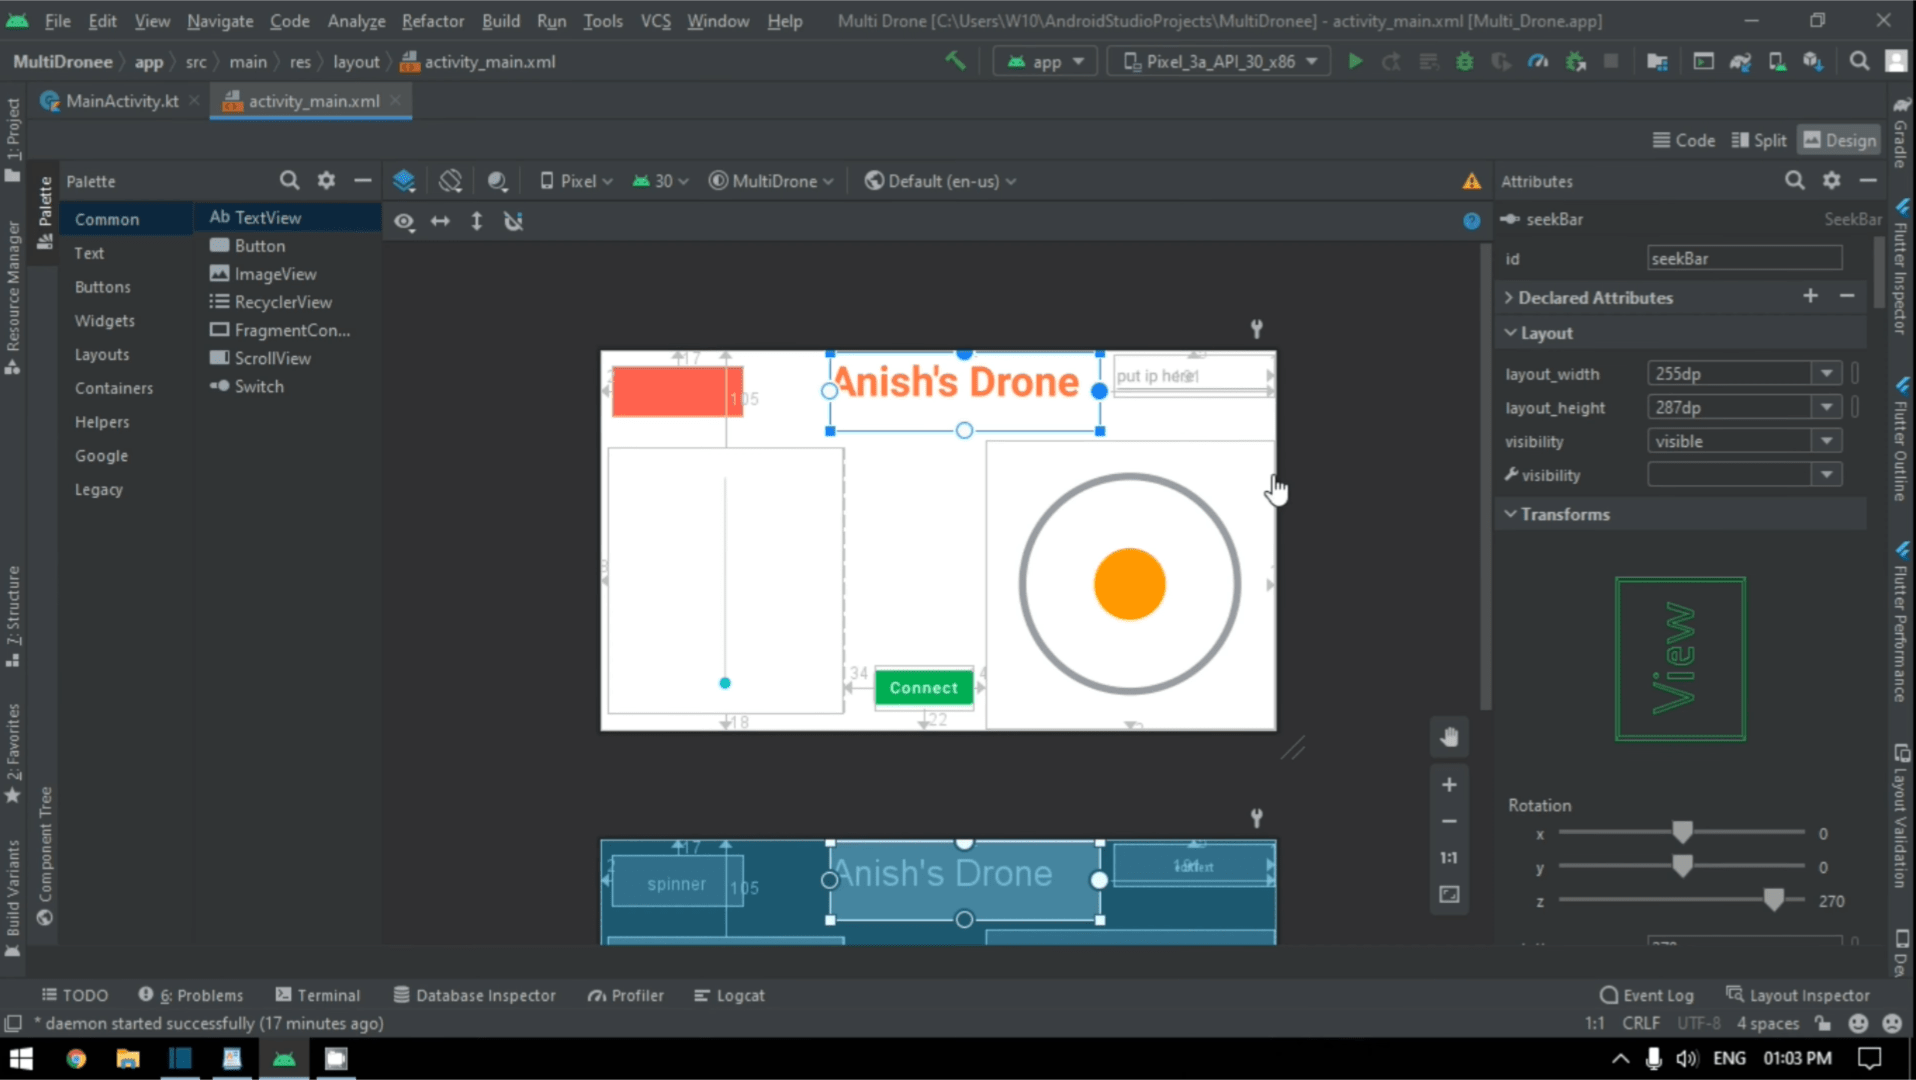
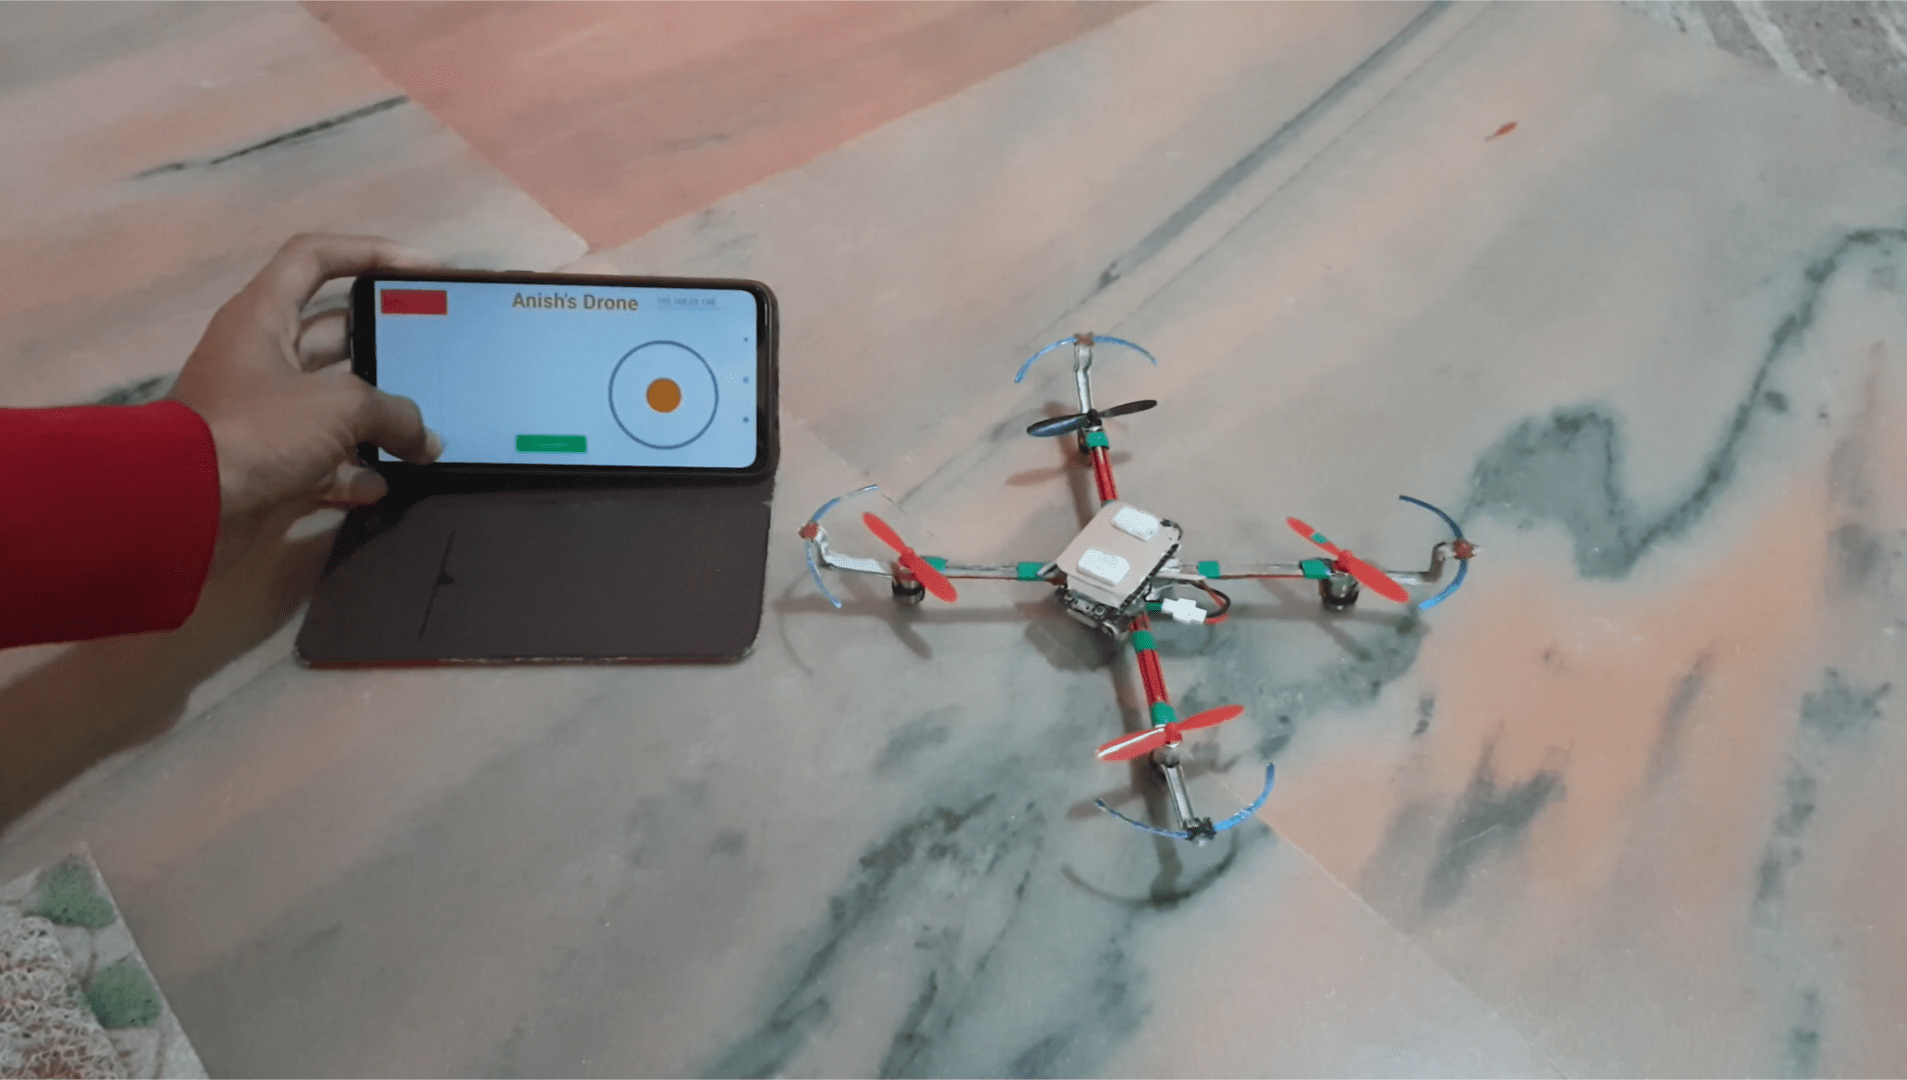
You just need to download the Download App file attached to this step to your smartphone. This Android App is developed using Processing for Android App
Installation of an Android Application for WiFi plane to your smartphone is quite easy and it’s step by step in this video.
Once the Android App is up and running on your smart phone, refer above video to know how the App works and the various cool features of the app.
It’s Time to Fly Ready to fly?…
A Wall Climbing based on NodeMCU Flight Controller an Android App control. Full details and explanation video.
Video Explanation :



8 Comments
Pingback: Build Arduino RC Transmitter For RC Toys - Drone And Planes1
Dear Sir , Madam,
My name is Ger and I live in the Netherlands.
I am excited about the description of flying a drone with the ESP8266 arduino in combination with coreless motors.
I’m going to try and the parts are on their way.
Question : I see a diode in the wiring diagram, can you explain to me what this is for and which diode I can or should use for it?
Do you also have a script to test the engines with the ESP8266?
Thanks in advance for an answer,
Regards Ger
Dear Sir / Madam,
My name is Ger from the Netherlands.
I am excited about the article controlling coreless drone motors with ESP8266.
I’m going to try it and have already ordered the parts.
In the wiring diagram I see a diode. Can you explain to me what this is for and which diode it should be
Do you also have a script to test the engines with the ESP8266?
Thanks in advance for an answer,
Regards Ger
Dear sir,
Esp8266 drone debug apk not installation in my smartphone please solved my problem.
Same problem …
Use Android 11
Apk support on Android 11
brother please share apk