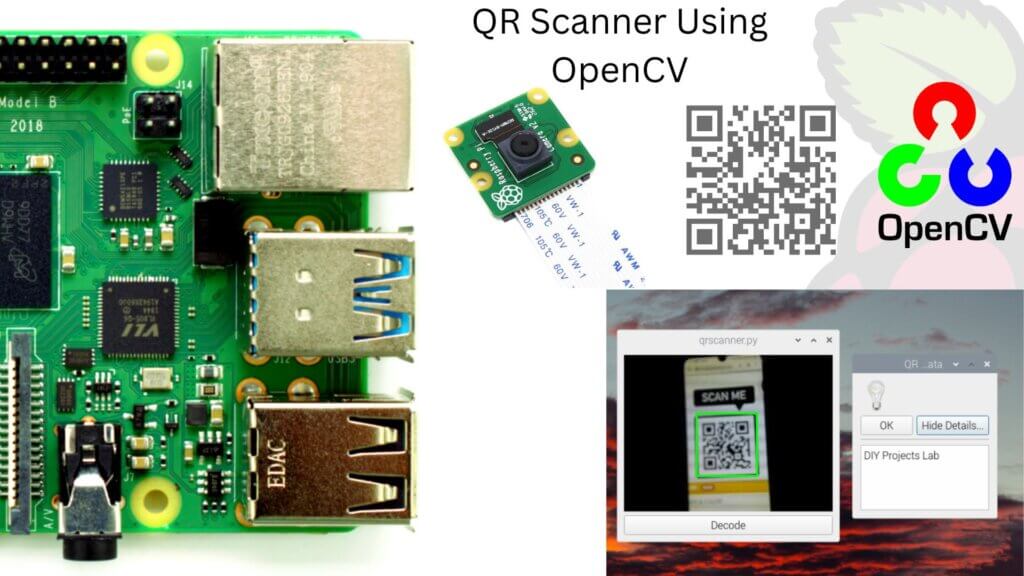
This guide provides you with a step-by-step guide to creating a QR scanner using Raspberry Pi. The guide contains the installation of Raspbian OS, the Connecting of the camera module to the Pi’s camera port, activation of the camera interface, and updating/upgrading the packages. the QR code can be generated using a website like QR Code Generator.
Required Material
To create a QR code decoder using Raspberry Pi, you will need the following components:
- Raspberry Pi board
- Raspberry Pi Camera
- Internet connection
Install Raspbian Operating System
The first step is to install Raspbian OS on your Raspberry Pi (if you already installed then ignore it). You can download the latest Raspbian OS image from the official Raspberry Pi website and check our previous instructions.
Install OpenCV On Raspberry Pi
Here’s how to install OpenCV on Raspberry Pi first Update and Upgrade: It is recommended to run the following command in a terminal window to update and upgrade the packages on your Raspberry Pi:
|
1 2 |
sudo apt-get update sudo apt-get upgrade |
Check out How To Install OpenCV On Raspberry Pi With Command
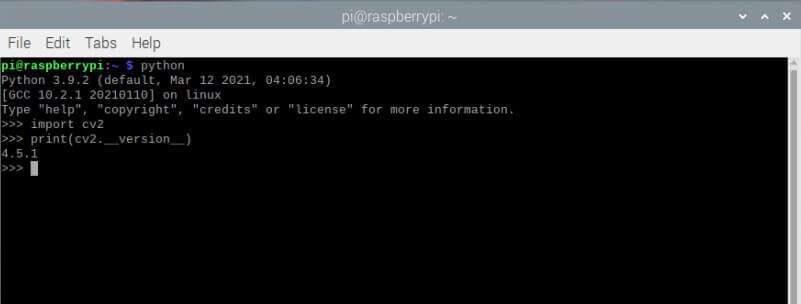
After completing the installation test if OpenCV is properly installed or not, open the Raspberry Pi terminal and type the following code:
|
1 2 3 |
python import cv2 print(cv2.__version__) |
If OpenCV is installed perfectly, the version digit should be printed to the terminal.
Install required packages
Install the necessary packages for your Raspberry Pi, please follow the guidelines below:
The below commands will update and upgrade your Raspberry Pi’s packages.
|
1 2 3 4 5 6 |
sudo apt-get update sudo apt-get upgrade sudo python3 -m pip install -U Pillow sudo apt-get install libzbar0 libzbar-dev sudo python3 -m pip install pyzbar sudo pip3 install PyQt5 |
As well as install the pyzbar and PyQt5 library, which will be used to decode the QR code.
Connect the camera
Connect the camera module to the Raspberry Pi’s camera port.
Enable the camera interface
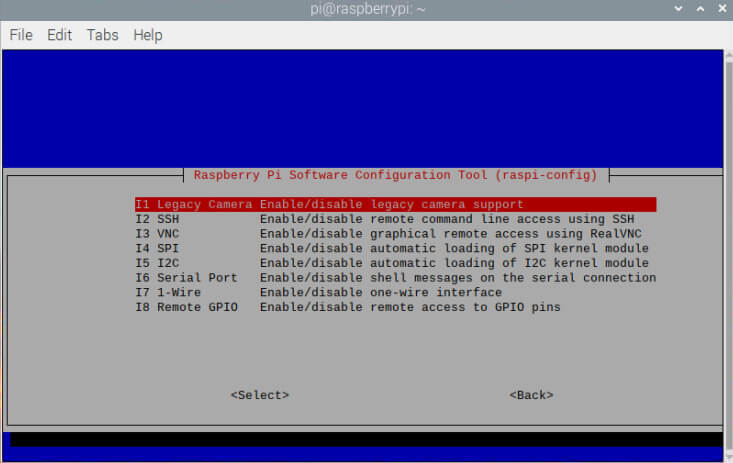
Run the following command to enable the camera interface
|
1 |
sudo raspi-config |
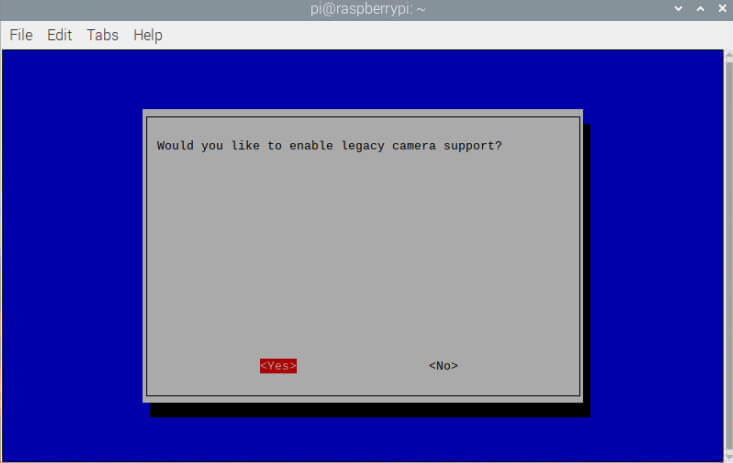
To use the Raspberry pi camera, you’ll need to enable the camera interface. Go to “Interfacing options” and then “Camera.”
Test the camera
To test the camera, enter the next command in a terminal window:
This command takes an image from the Raspberry Pi camera and stores it as “test.jpg“. You can see the picture by opening the home directory in the file manager.
Create a Python script: QR Scanner Using Raspberry Pi
Start a new Python script by entering the following command in the terminal window:
|
1 |
nano qrscanner.py |
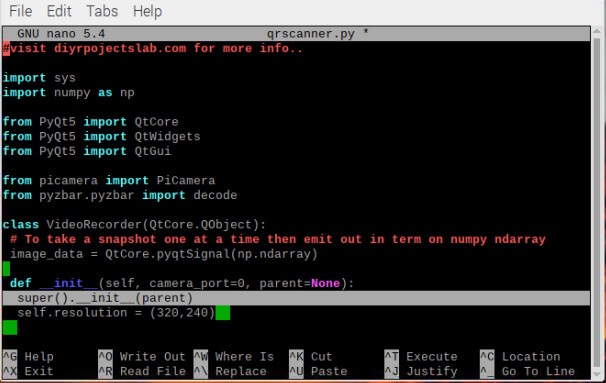
This command opens a text editor. paste the below Python code into the editor:
|
1 2 3 4 5 6 7 8 9 10 11 12 13 14 15 16 17 18 19 20 21 22 23 24 25 26 27 28 29 30 31 32 33 34 35 36 37 38 39 40 41 42 43 44 45 46 47 48 49 50 51 52 53 54 55 56 57 58 59 60 61 62 63 64 65 66 67 68 69 70 71 72 73 74 75 76 77 78 79 80 81 82 83 84 85 86 87 88 89 90 91 92 93 94 95 96 97 98 99 100 101 102 103 104 105 106 107 108 109 110 111 112 113 114 115 116 117 118 119 120 121 122 123 124 125 |
#visit diyrpojectslab.com for more info.. import sys import numpy as np from PyQt5 import QtCore from PyQt5 import QtWidgets from PyQt5 import QtGui from picamera import PiCamera from pyzbar.pyzbar import decode class VideoRecorder(QtCore.QObject): # To take a snapshot one at a time then emit out in term on numpy ndarray image_data = QtCore.pyqtSignal(np.ndarray) def __init__(self, camera_port=0, parent=None): super().__init__(parent) self.resolution = (320,240) self.camera = PiCamera() self.camera.resolution=self.resolution self.timer = QtCore.QBasicTimer() def start_recording(self): self.timer.start(0, self) def timerEvent(self, event): if (event.timerId() != self.timer.timerId()): return frame = np.empty((self.resolution[1],self.resolution[0],3),dtype=np.uint8) #capture image self.camera.capture(frame,'rgb') #emit image out self.image_data.emit(frame) class DecoderWidget(QtWidgets.QWidget): #To display image array and do decoding def __init__(self, parent=None): super().__init__(parent) self.qr_data = [] self.image = QtGui.QImage() self._red = (0, 0, 255) self._width = 2 self._min_size = (30, 30) def _decode(self): if self.qr_data != [] : msg = QtWidgets.QMessageBox() msg.setIcon(QtWidgets.QMessageBox.Information) msg.setWindowTitle("QR Code Data ") msg.setDetailedText(self.qr_data[0].data.decode('utf-8')) retval = msg.exec_() def image_data_slot(self, image_data: np.ndarray): self.qr_data = decode(image_data) self.image = self.get_qimage(image_data) if self.image.size() != self.size(): self.setFixedSize(self.image.size()) self.update() def get_qimage(self, image: np.ndarray): height, width, colors = image.shape bytesPerLine = 3 * width QImage = QtGui.QImage image = QImage(image.data, width, height, bytesPerLine, QImage.Format_RGB888) image = image.rgbSwapped() return image def paintEvent(self, event): painter = QtGui.QPainter(self) painter.drawImage(0, 0, self.image) self.image = QtGui.QImage() if self.qr_data != [] : col = QtGui.QColor(200, 0, 0) col.setNamedColor('#d4d4d4') painter.setPen(col) #painter.setBrush(QtGui.QColor(200, 0, 0)) rect = self.qr_data[0].rect painter.drawRect(rect.left, rect.top, rect.width, rect.height) class MainWidget(QtWidgets.QWidget): def __init__(self, parent=None): super().__init__(parent) self.decoder_widget = DecoderWidget() self.recorder = VideoRecorder() image_data_slot = self.decoder_widget.image_data_slot self.recorder.image_data.connect(image_data_slot) layout = QtWidgets.QVBoxLayout() layout.addWidget(self.decoder_widget) self.run_button = QtWidgets.QPushButton('Decode') layout.addWidget(self.run_button) self.run_button.clicked.connect(self.decoder_widget._decode) self.setLayout(layout) self.recorder.start_recording() def main(): app = QtWidgets.QApplication(sys.argv) main_window = QtWidgets.QMainWindow() main_widget = MainWidget() main_window.setCentralWidget(main_widget) main_window.show() sys.exit(app.exec_()) if __name__ == '__main__': main() |
Save the file “ctrl +s” and exit the text editor by pressing “Ctrl + X“, then “Y“, and then “Enter”.
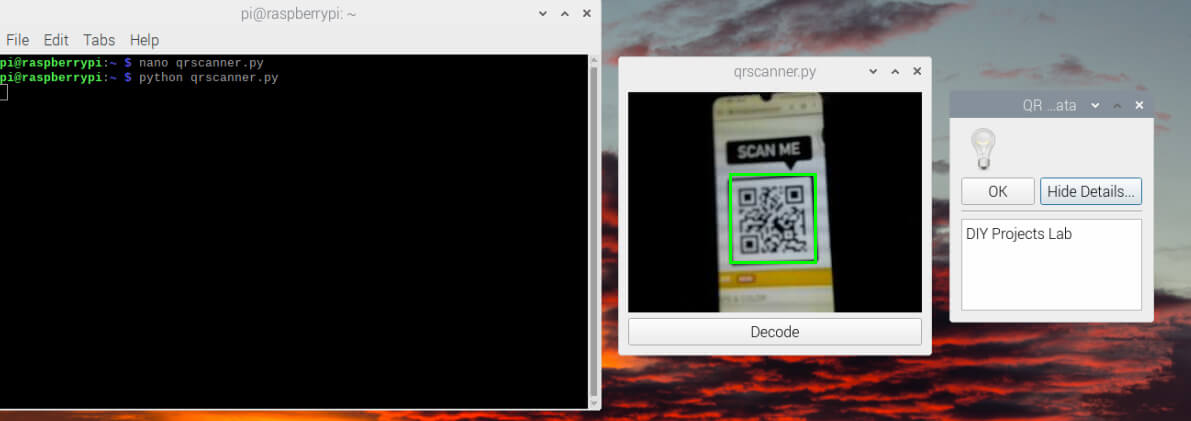
This code will operate the camera to capture video frames, detect and scan any QR codes in the framing, and show the decoded data in the terminal window.
Working
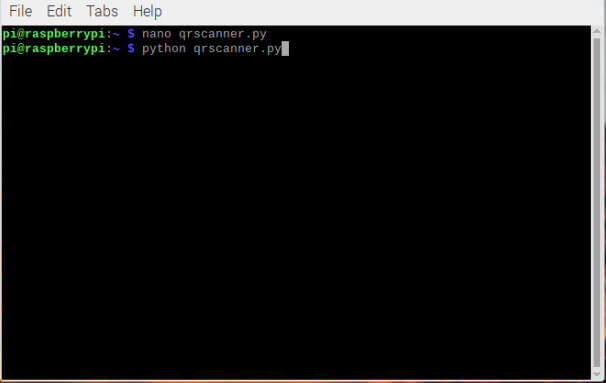
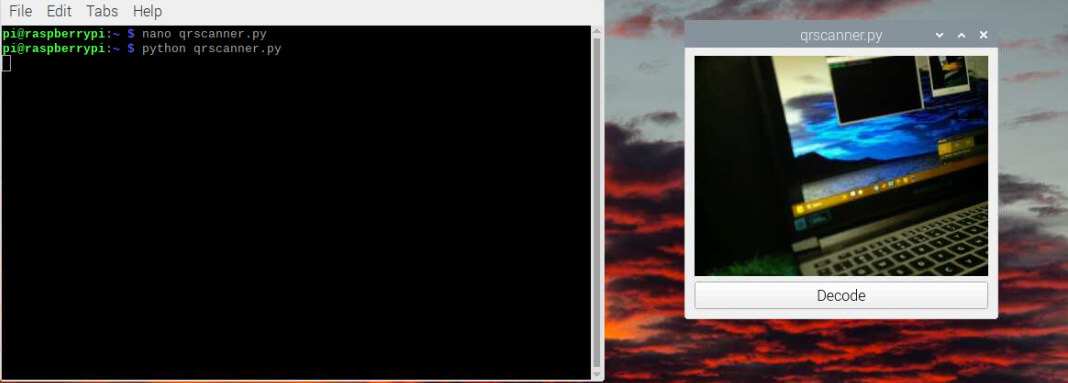
Finally, run the code by entering the following command.
|
1 |
python qrscanner.py |
it’s Working fine
Create QR code
There are many online tools that you can use to generate a QR code quickly and easily.
Choose a QR code generator website, such as https://www.qr-code-generator.com/ or https://www.the-qrcode-generator.com/.
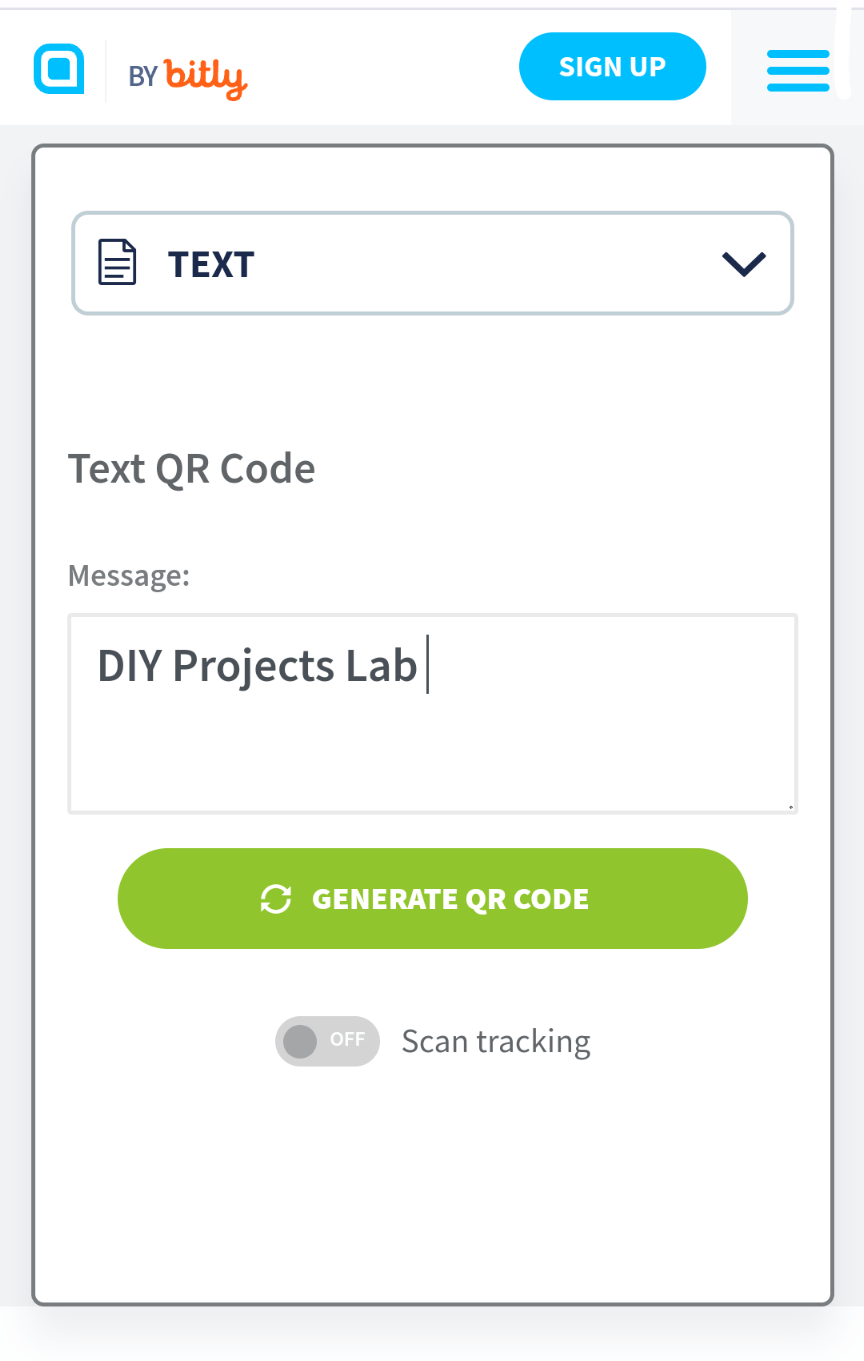
Select the “Text” option from the list.
Start entering the text in the input box right now. You can insert any text you like, such as a URL, a message, or any other information you want to Scan.
You now have a QR code you can scan with your Raspberry Pi.
Conclusion – QR Scanner Using Raspberry Pi
Your Raspberry Pi should now be capable of scanning QR codes in real-time using the camera and displaying the contents on the terminal window.

