Introduction
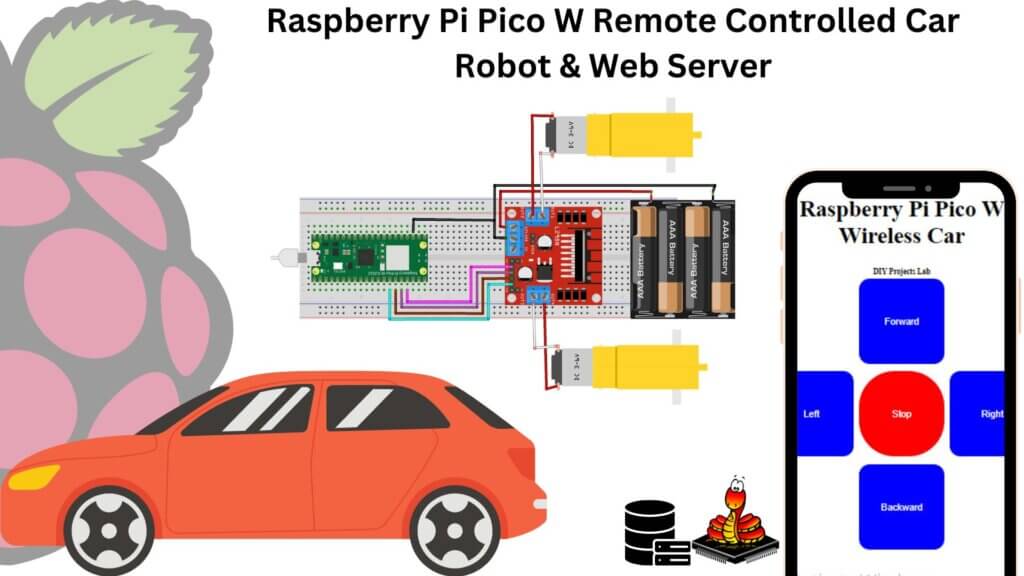
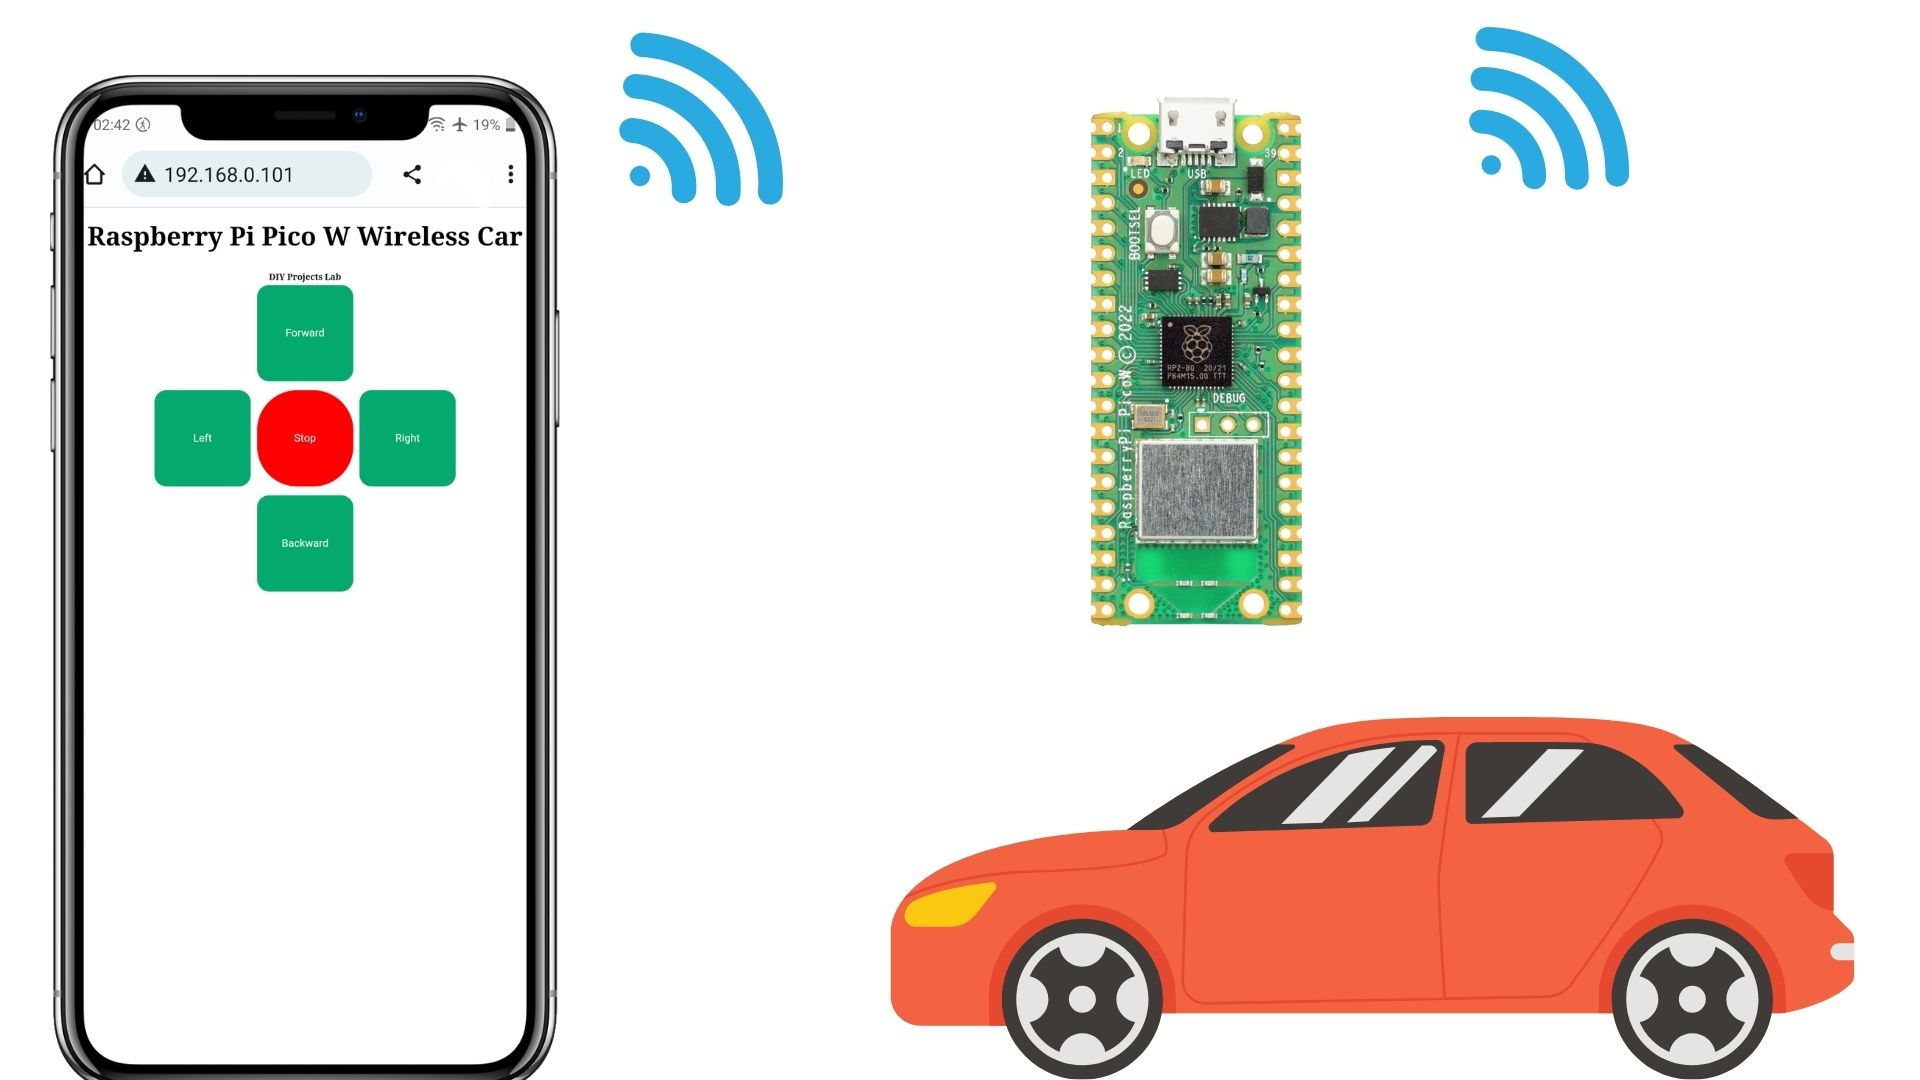
In this guide, we’ll be building a remote-controlled Raspberry Pi Pico W Remote Controlled Car. We’ll also be creating a web server so that we can control the car robot from anywhere in the world!
This tutorial will explain how to build an Internet or WiFi Controlled robot using Raspberry Pi Pico W Board. There are a bunch of Robots or Robotic cars from simple ones like Toys to complex ones like industrial Robotic Arms.
Required Components
- Raspberry Pi Pico W
- L298N Motor Driver
- Gearbox Motor Dual Shaft
- Jumper Wire
- Breadboard
- Battery Holders
Wi-Fi controlled robot
The wi-Fi-controlled robot can be controlled by a Wi-Fi network. The robot typically has a microcontroller board like Pico w which support Wi-Fi and is connected to a Wi-Fi module or module with the Wi-Fi function integrated. This allows the robot to connect to a Wi-Fi network and receive data from a smartphone.
We’ll design a web-based interface to control the robot, that can be accessed on any device(PC or Mobile).
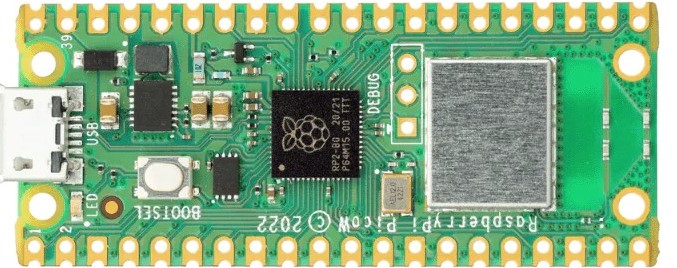
Raspberry Pi Pico W
The Raspberry Pi Pico W is a small, low-cost Microcontroller board based on the RP2040 chip and Wi-Fi and Bluetooth connectivity. Pico W is based on the Raspberry Pi Foundation’s RP2040 chip, which features a dual-core Arm Cortex-M0+ processor running at 133MHz, 264KB of RAM, and a wide range of peripherals including ADCs, and digital interfaces like I2C, SPI, and UART.
It is designed to be used in embedded applications like robotics, industrial control systems, and more.
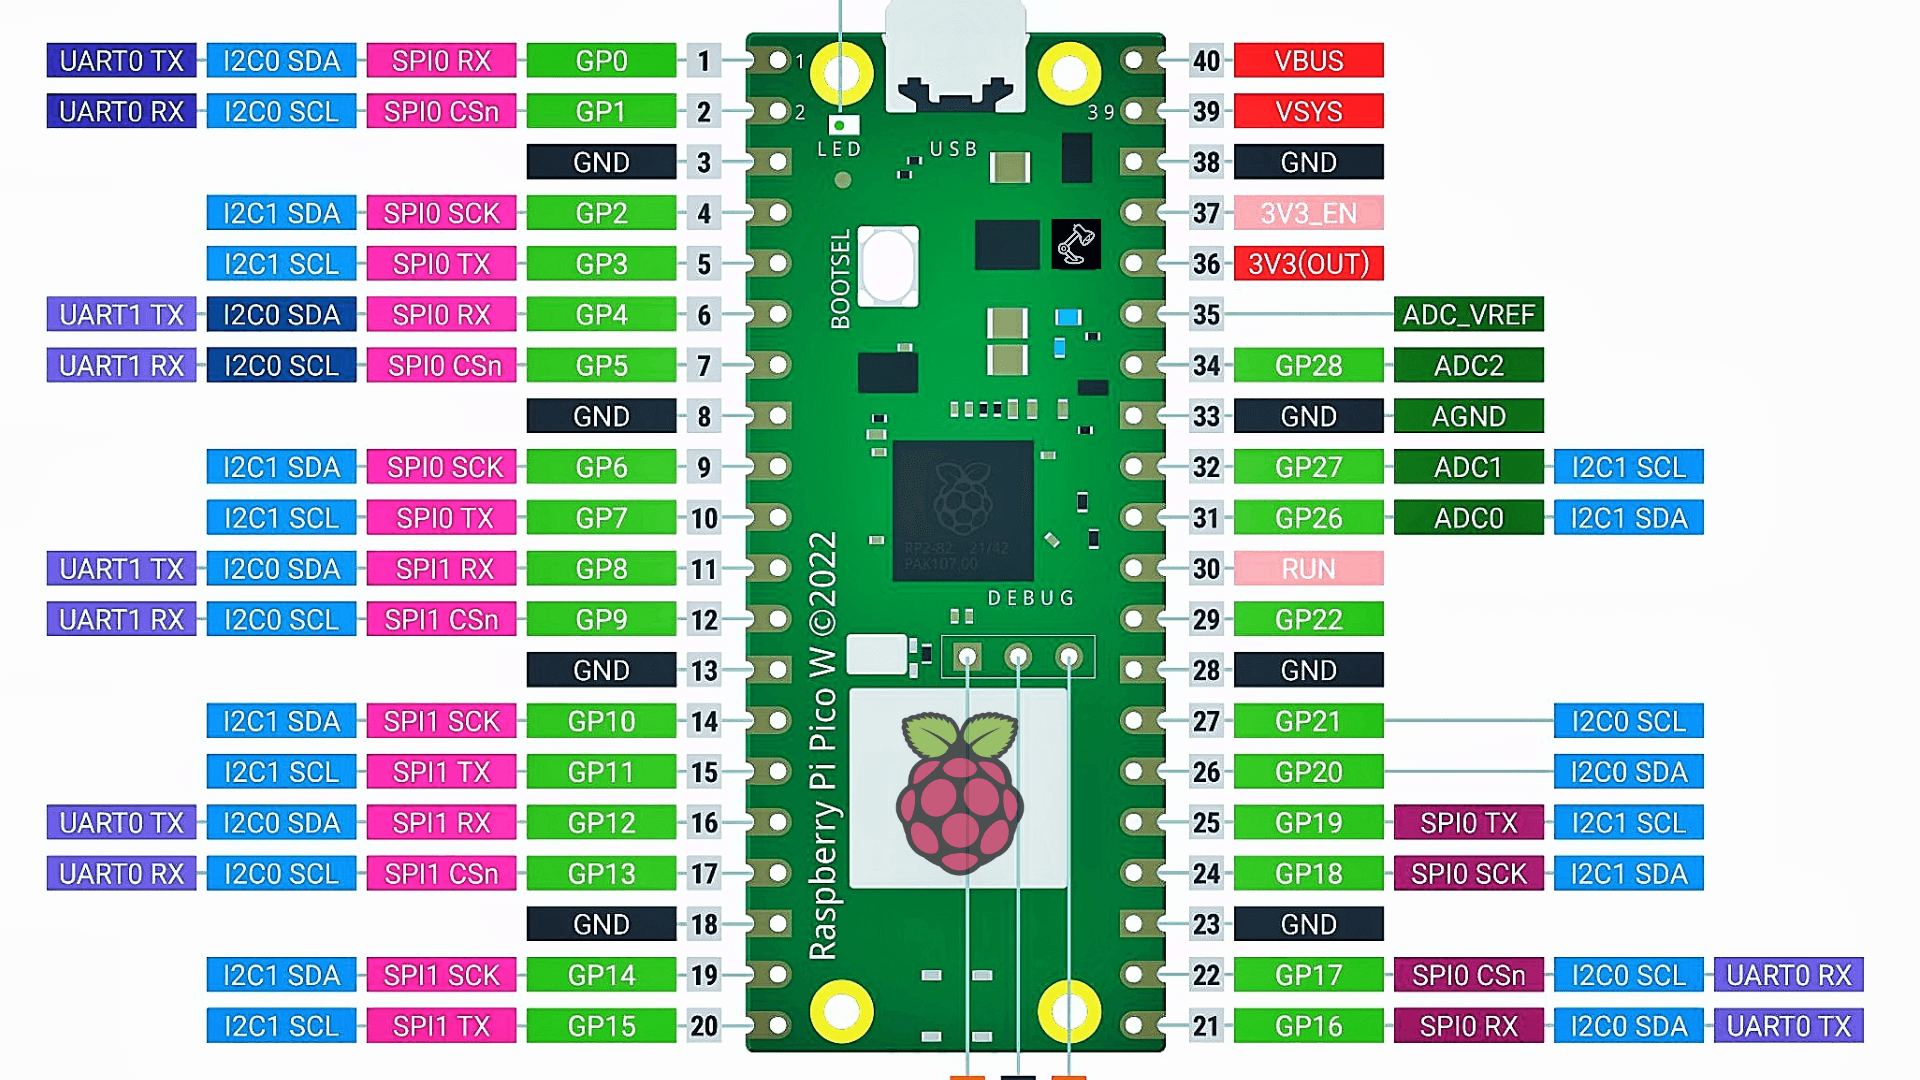
Raspberry Pi Pico W Pinout
L298N Motor Driver
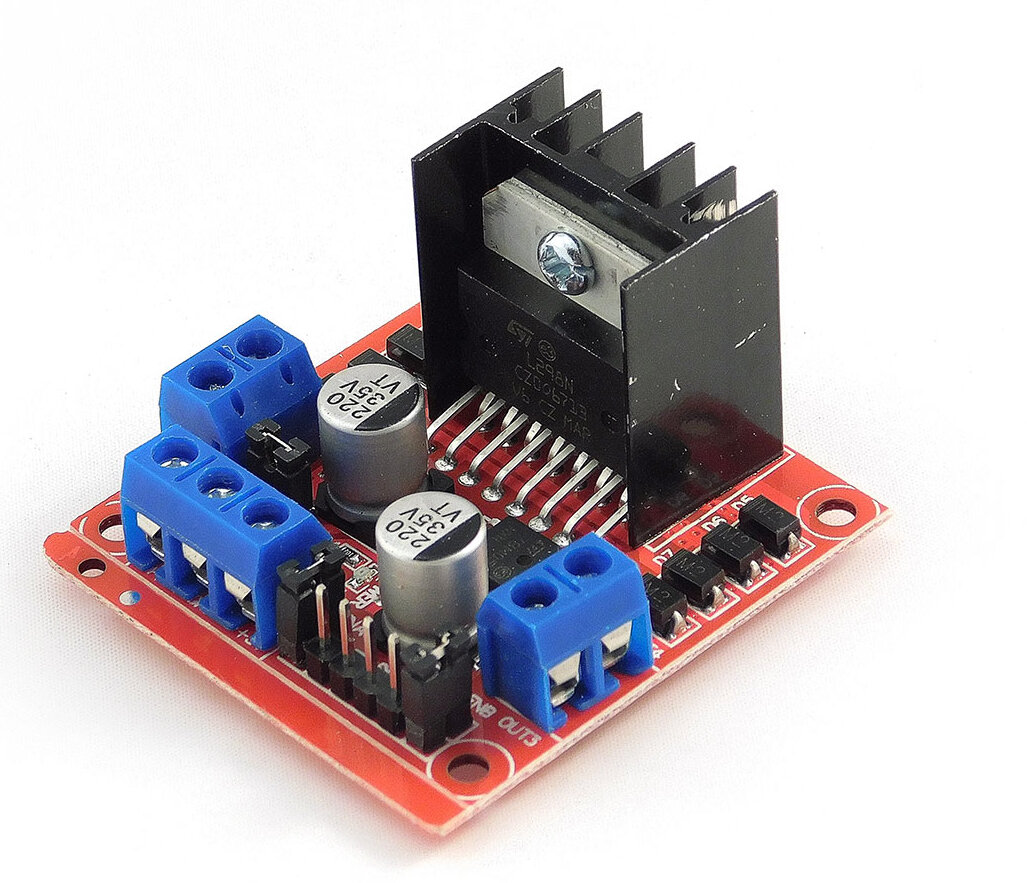
There are many ways to control DC motors. Here we’ll use the L298N motor driver that provides an easy way to control the speed and direction of 2 DC motors.
The L298N is a popular integrated circuit (IC) motor driver and can control two DC motors or a bipolar stepper motor. It’s commonly used in hobby robotics and other projects that require a motor. L298N breakout board contains two H-bridge circuits, each capable of driving a motor in either direction.
The inputs to the IC allow you to control the speed and direction of each motor independently. The IC also provides protection against over-voltage and over-current conditions.
Pinout of L298N Motor Driver
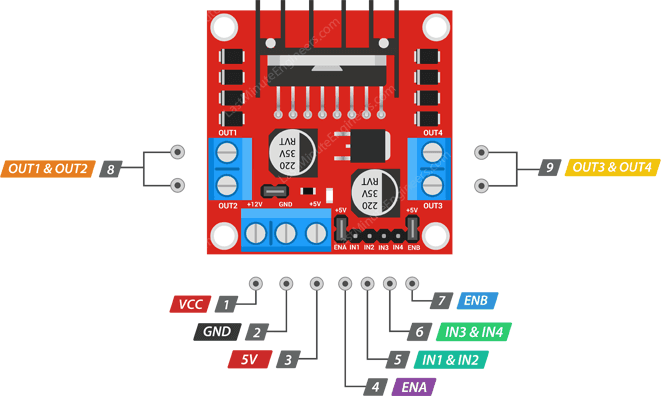
The L298N Motor Driver has two input/output pins:
Input Pins
- IN1 and IN2: This control the direction of Motor A.
- IN3 and IN4: This control the direction of Motor B.
- ENA: This controls the speed of Motor A.
- ENB: This control the speed of Motor B.
Output Pins
- OUT1 and OUT2: pins are connected to Motor A.
- OUT3 and OUT4: pins are connected to Motor B.
Other Pins
- VCC: Power supply.
- GND: Ground
- +5V: 5V output that can be used to power an external circuit.
Schematic Diagram – Raspberry Pi Pico W Wireless Robot Car
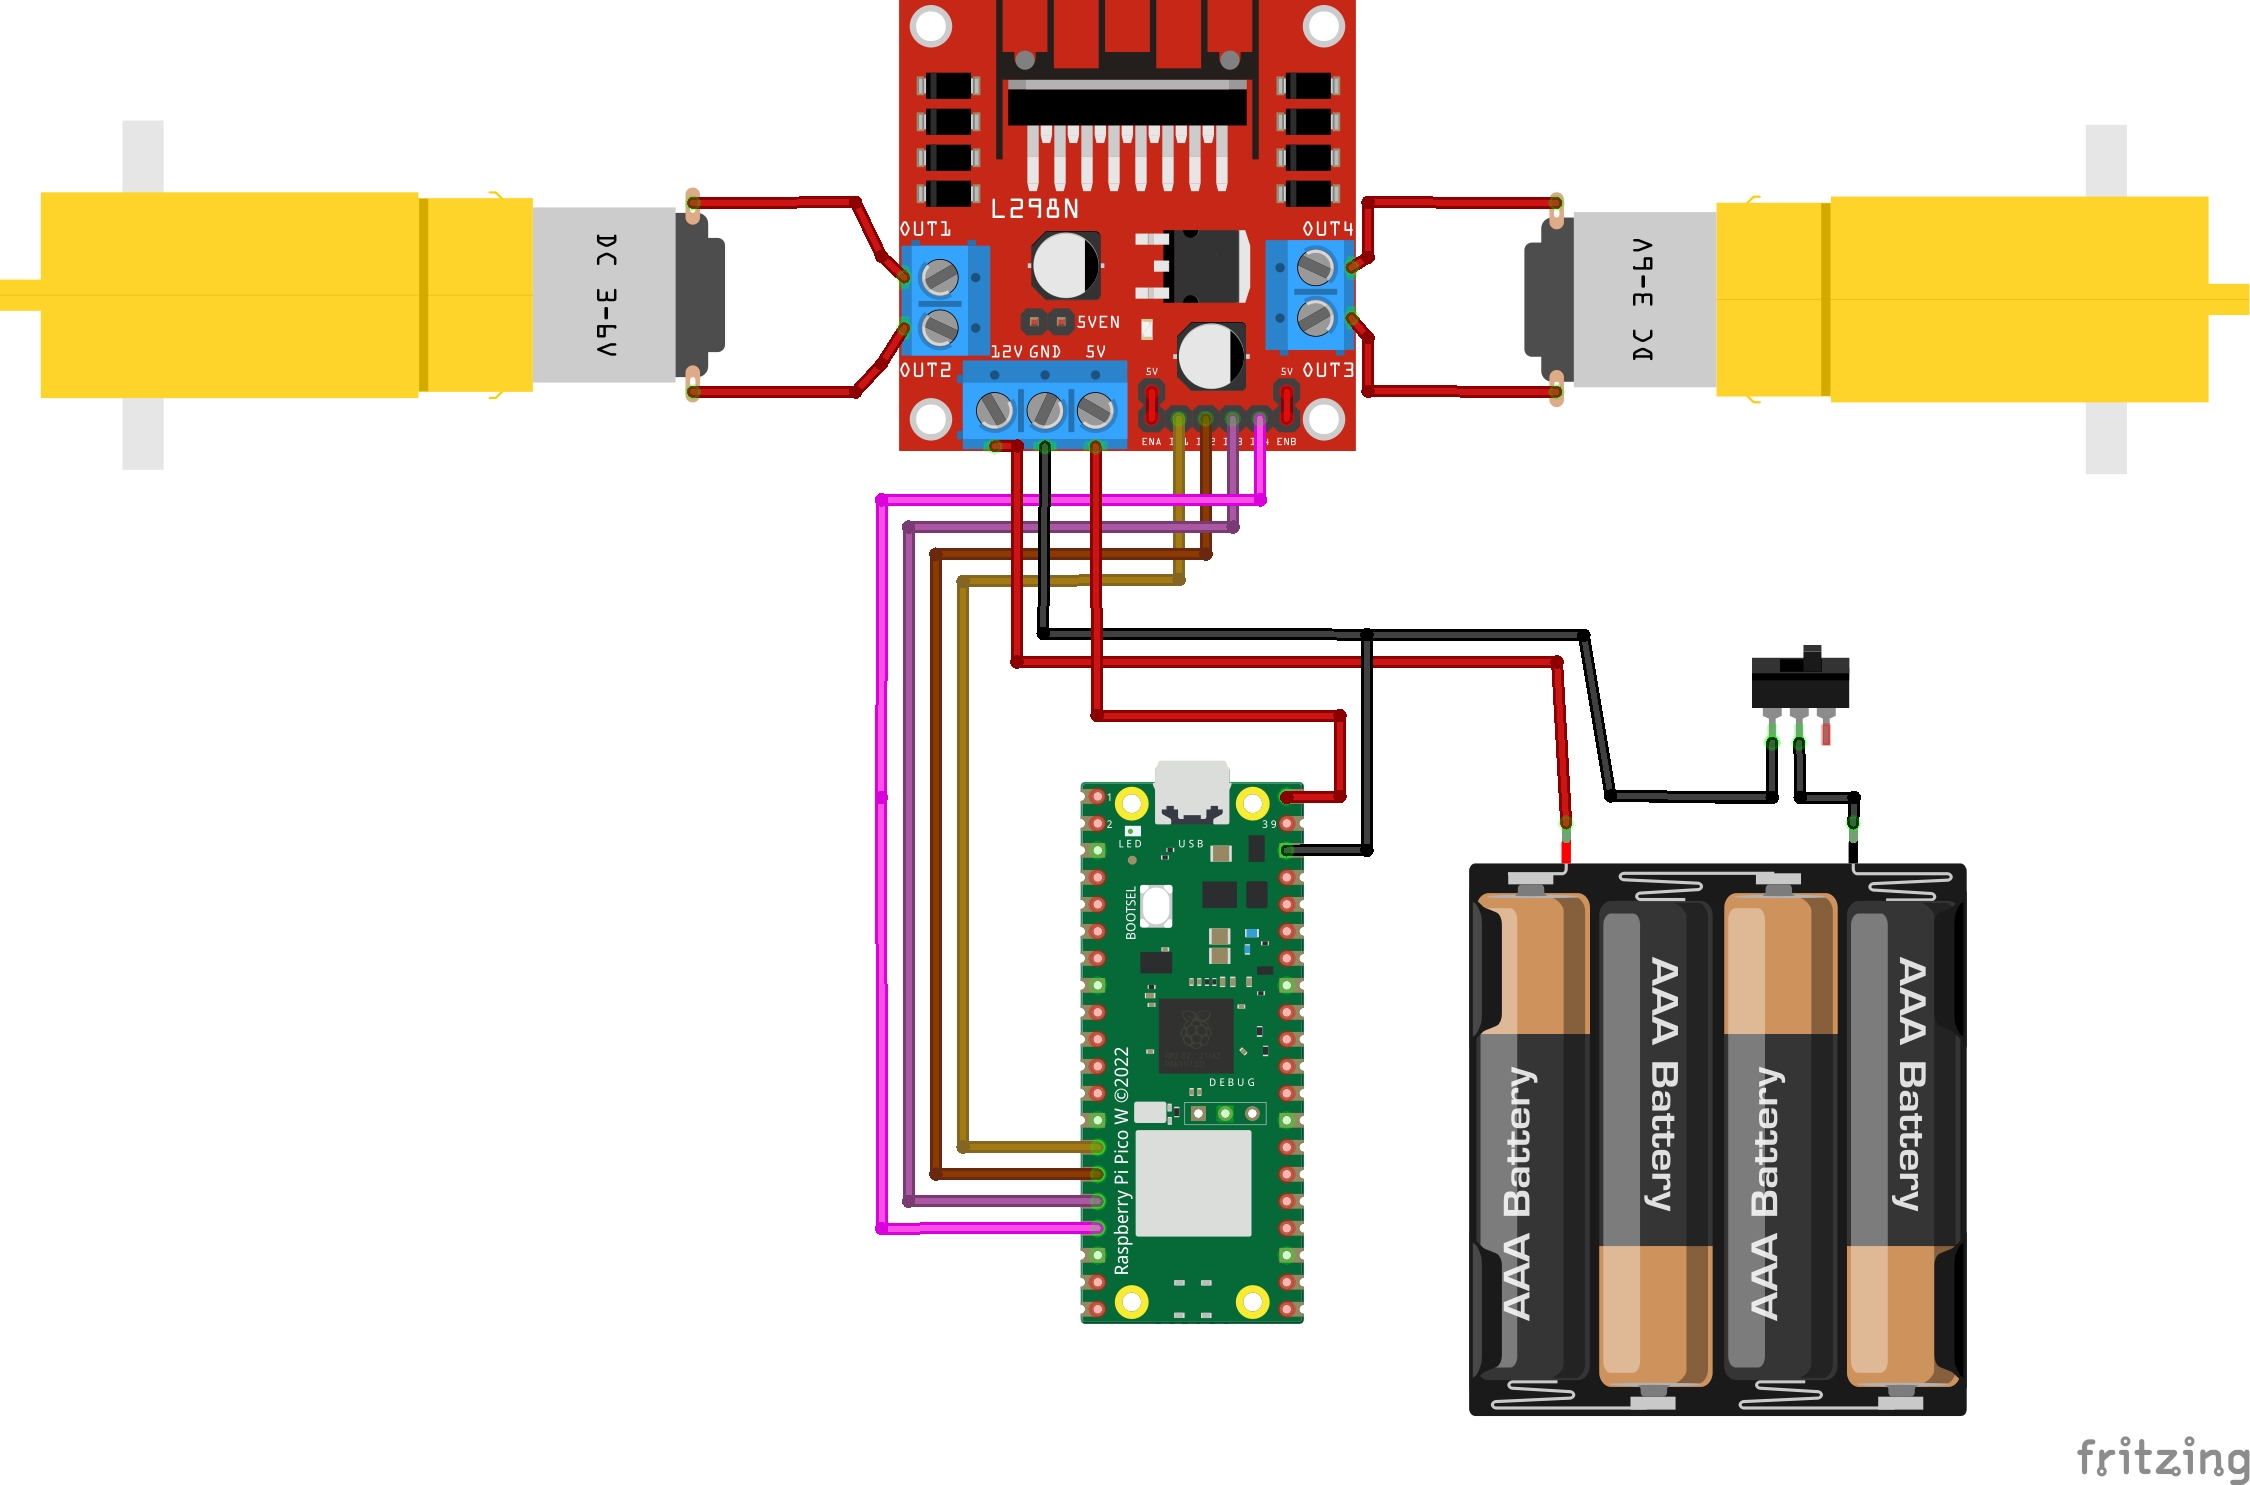
The complete circuit diagram for the Raspberry Pi Pico W Wireless Car is shown below. This circuit is made out of generic components and they are available in local stores or in an online store.
The following table shows the connections between the Raspberry Pi Pico W and the L298N Motor Driver.
| L298N Motor Driver | Raspberry Pi Pico W |
| IN1 | GPIO 10 |
| IN2 | GPIO 11 |
| IN3 | GPIO 12 |
| IN4 | GPIO 13 |
Jumper the ENA and ENB pins to 5V , you can use a jumper wire or other suitable connection
Micropython Code for Pi Pico W Wireless Controlled Robot
The Micropython code for the Raspberry Pi Pico and Wireless-based robot is not difficult. will start with the main file. Getting Started With Raspberry Pi Pico With Thonny IDE
Main.py
|
1 2 3 4 5 6 7 8 9 10 11 12 13 14 15 16 17 18 19 20 21 22 23 24 25 26 27 28 29 30 31 32 33 34 35 36 37 38 39 40 41 42 43 44 45 46 47 48 49 50 51 52 53 54 55 56 57 58 59 60 61 62 63 64 65 66 67 68 69 70 71 72 73 74 75 76 77 78 79 80 81 82 83 84 85 86 87 88 89 90 91 92 93 94 95 96 97 98 99 100 101 102 103 104 105 106 107 108 109 110 111 112 113 114 115 116 117 118 119 120 121 122 123 124 125 126 127 128 129 130 131 132 133 134 |
import socket from time import sleep import network import machine from machine import Pin # Set up the SSID and password for the WiFi network ssid = 'ESP Repeater' password = 'Antivirus' # Initialize pins for controlling the motor Motor_A_Forward = Pin(10, Pin.OUT) Motor_A_Backward = Pin(11, Pin.OUT) Motor_B_Forward = Pin(12, Pin.OUT) Motor_B_Backward = Pin(13, Pin.OUT) # Define functions for moving the motor in different directions def Forward(): Motor_A_Forward.value(1) Motor_B_Forward.value(0) Motor_A_Backward.value(0) Motor_B_Backward.value(1) def Backward(): Motor_A_Forward.value(0) Motor_B_Forward.value(1) Motor_A_Backward.value(1) Motor_B_Backward.value(0) def Stop(): Motor_A_Forward.value(0) Motor_B_Forward.value(0) Motor_A_Backward.value(0) Motor_B_Backward.value(0) def Left(): Motor_A_Forward.value(1) Motor_B_Forward.value(0) Motor_A_Backward.value(0) Motor_B_Backward.value(0) def Right(): Motor_A_Forward.value(0) Motor_B_Forward.value(0) Motor_A_Backward.value(0) Motor_B_Backward.value(1) # Stop the motor initially Stop() def Connect(): # Connect to the WiFi network red = network.WLAN(network.STA_IF) red.active(True) red.connect(ssid, password) while red.isconnected() == False: print('connecting ...') sleep(1) ip = red.ifconfig()[0] print(f'Connected with IP: {ip}') return ip def open_socket(ip): # Create a socket for the web server to listen on address = (ip, 80) connection = socket.socket() connection.bind(address) connection.listen(1) return connection def pagina_web(): html = f""" <!DOCTYPE html> <html> <head> </head> <body> <h1 style="text-align: center;">Raspberry Pi Pico W Wireless Car </body> <h6 style="text-align: center;">DIY Projects Lab <center> <form action="./Forward"> <input type="submit" value="Forward" style="background-color: #04AA6D; border-radius: 15px; height:120px; width:120px; border: none; color: white; padding: 16px 24px; margin: 4px 2px" /> </form> <table><tr> <td><form action="./Left"> <input type="submit" value="Left" style="background-color: #04AA6D; border-radius: 15px; height:120px; width:120px; border: none; color: white; padding: 16px 24px; margin: 4px 2px"/> </form></td> <td><form action="./Stop"> <input type="submit" value="Stop" style="background-color: #FF0000; border-radius: 50px; height:120px; width:120px; border: none; color: white; padding: 16px 24px; margin: 4px 2px" /> </form></td> <td><form action="./Right"> <input type="submit" value="Right" style="background-color: #04AA6D; border-radius: 15px; height:120px; width:120px; border: none; color: white; padding: 16px 24px; margin: 4px 2px"/> </form></td> </tr></table> <form action="./Backward"> <input type="submit" value="Backward" style="background-color: #04AA6D; border-radius: 15px; height:120px; width:120px; border: none; color: white; padding: 16px 24px; margin: 4px 2px"/> </form> </body> </html> """ return str(html) def serve(connection): while True: cliente = connection.accept()[0] peticion = cliente.recv(1024) peticion = str(peticion) try: peticion = peticion.split()[1] except IndexError: pass if peticion == '/Forward?': Forward() elif peticion =='/Left?': Left() elif peticion =='/Stop?': Stop() elif peticion =='/Right?': Right() elif peticion =='/Backward?': Backward() html = pagina_web() cliente.send(html) cliente.close() try: ip = Connect() connection = open_socket(ip) serve(connection) except KeyboardInterrupt: machine.reset() |
Robot Controls
The web server has 5 commands: Forward, Backward, Left, Right, and Stop. The robot drives forward as long as you click the buttons.
Conclusion

