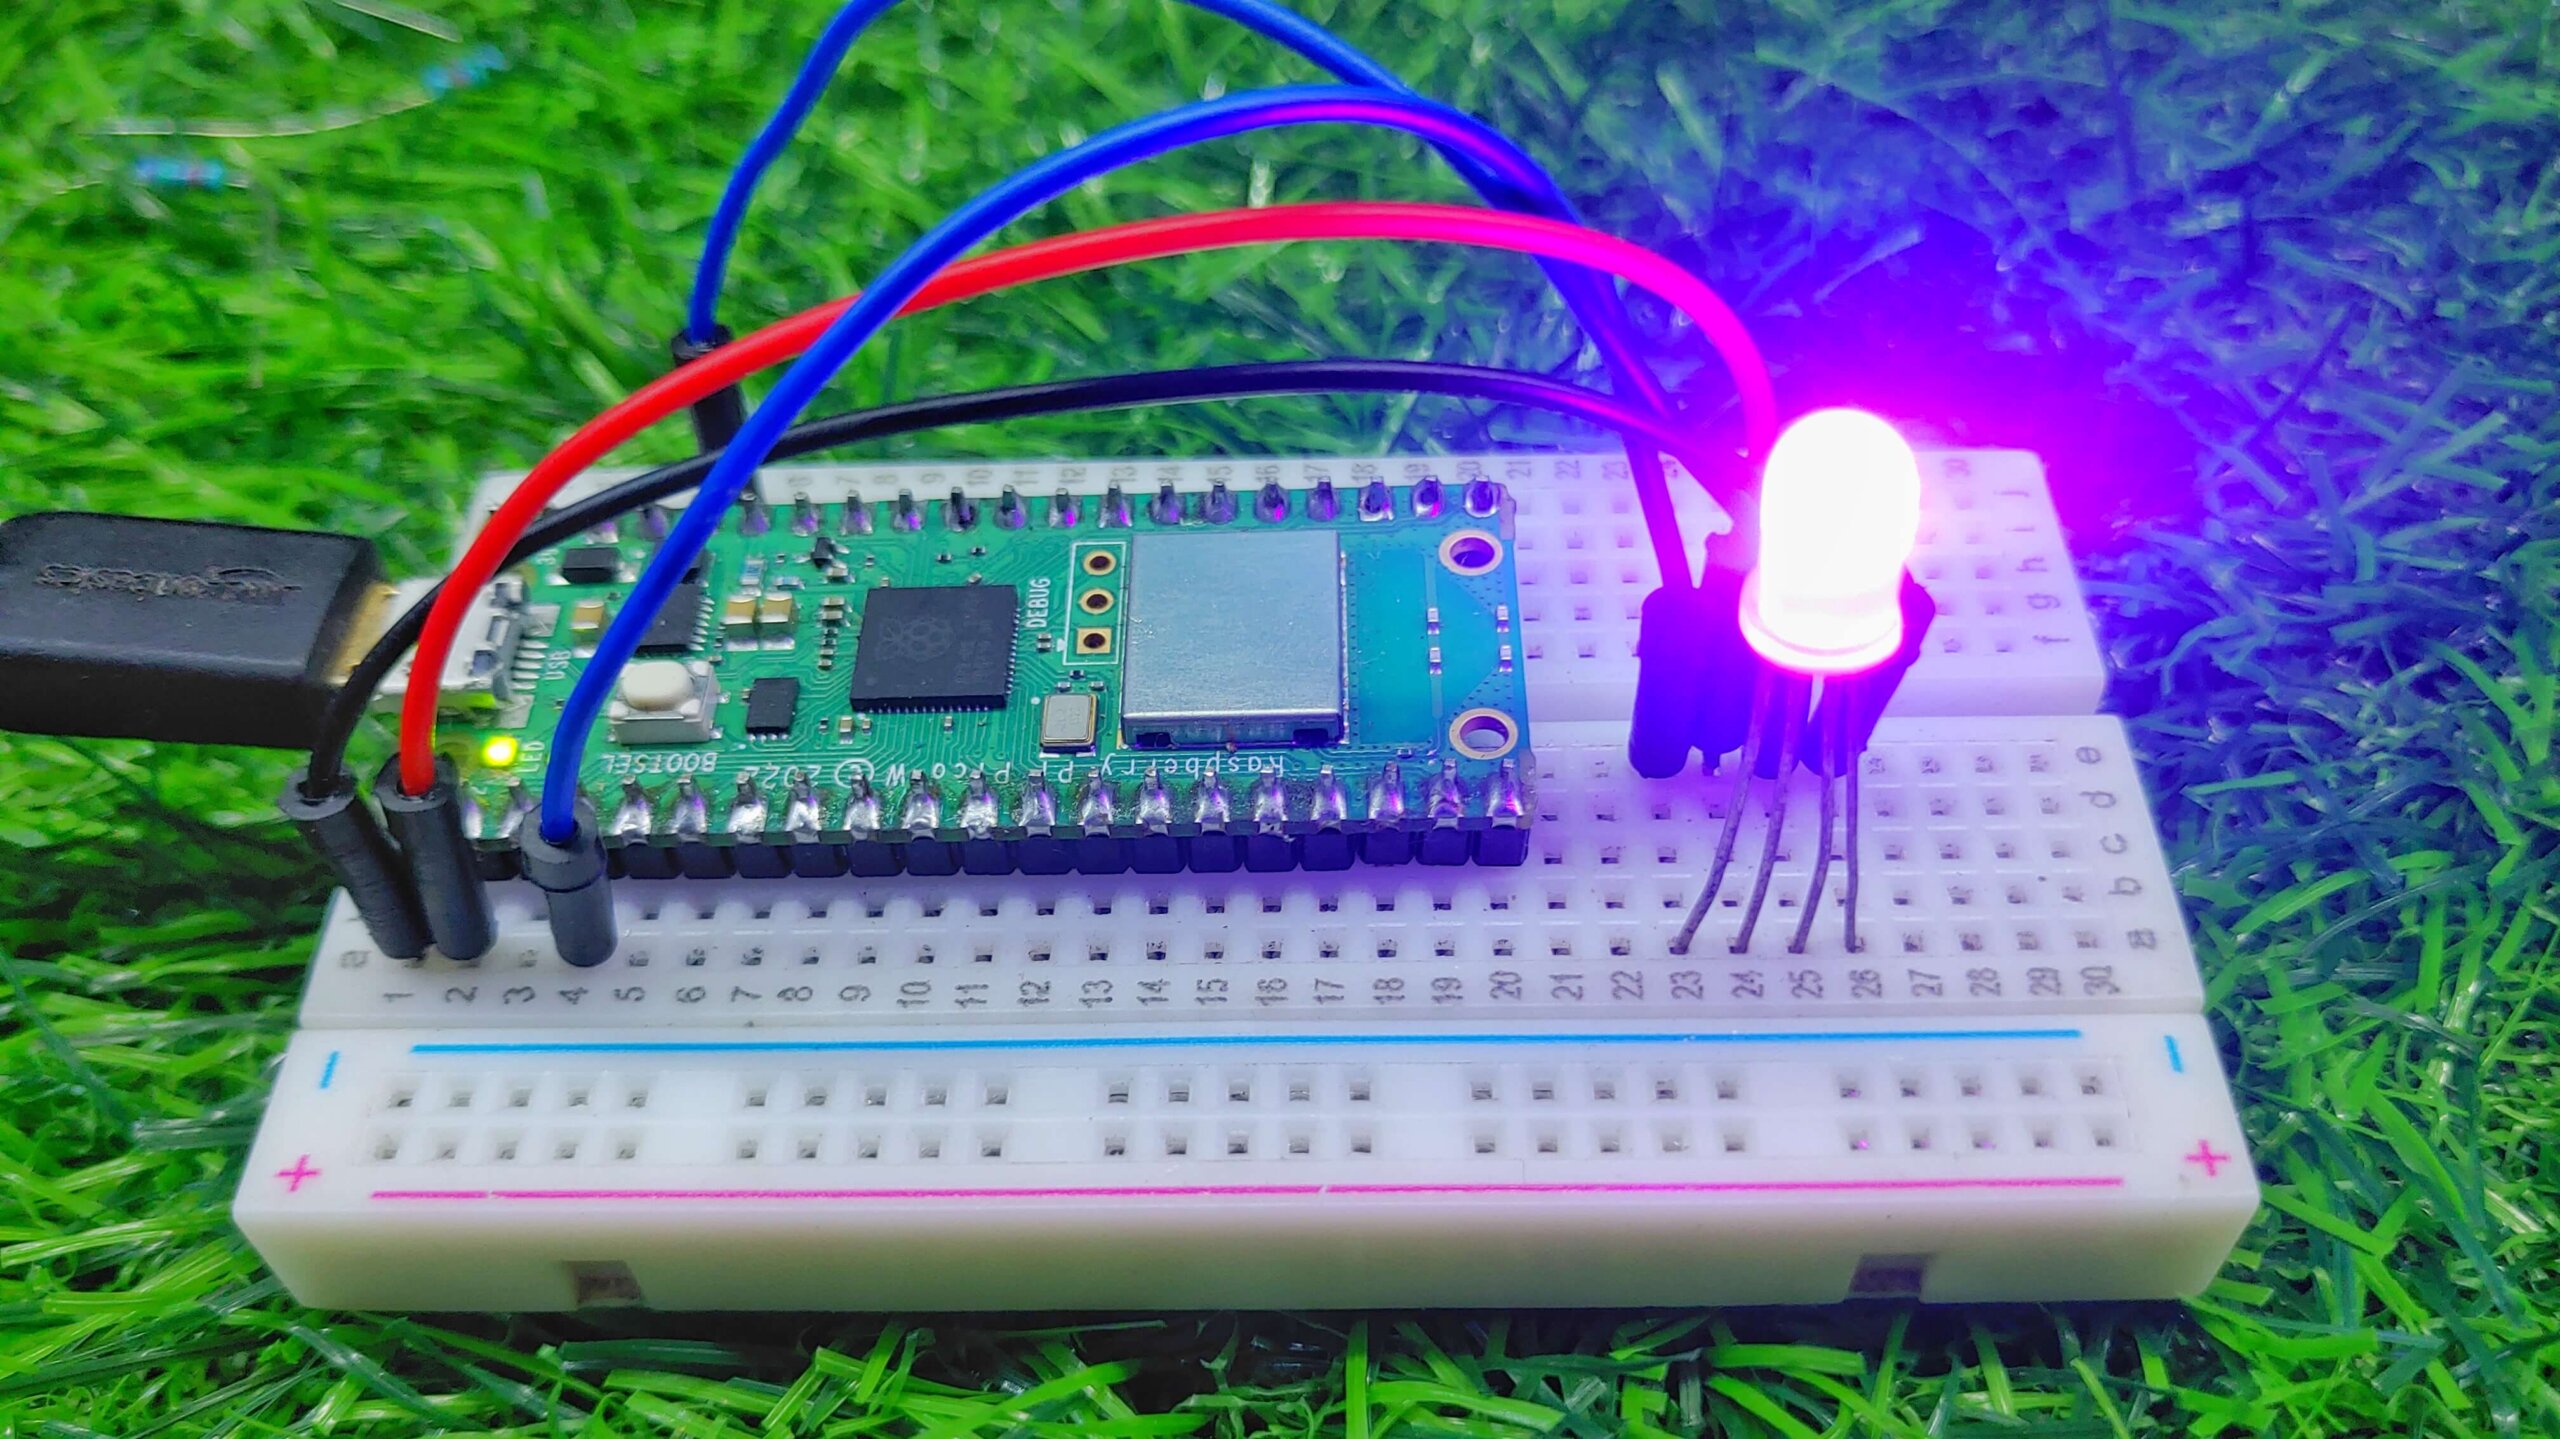
You can use the Raspberry Pi Pico to control RGB LED using WebServer. This tutorial provides instructions on how to set up the Raspberry Pi Pico W Web Server, and then use them to control RGB lights.
In this guide, we’ll control an RGB LED from a Raspberry Pi Pico web server using MicroPython. This is an excellent project for beginners to start with physical computing and controlling an LED from a web page. will provide a user interface to control the LED colour. Get started with Raspberry Pi Pico W Web Server
Required Material
The following bill of materials is required to build a Raspberry Pi Pico Web Server.
What is Raspberry Pi Pico W?
Raspberry Pi Pico W is a new Raspberry Pi product that adds WiFi capability to the Raspberry Pi Pico, allowing you to attach the device to a WiFi network. Raspberry Pi Pico W is a game-changer in the world of microcontrollers.
It is the world’s first microcontroller to be built on a silicon chip, producing it quite powerful and energy-efficient. The Raspberry Pi Pico is a microcontroller board made by Raspberry Pi. The Pico is based on the RP2040 microcontroller chip from Raspberry Pi
The Pico W is a powerful microcontroller board that is excellent for use with the MicroPython programming language. It has a wide range of libraries and is very easy to use. If you are looking for a microcontroller board to use with MicroPython, then the Raspberry Pi Pico is an ideal option.
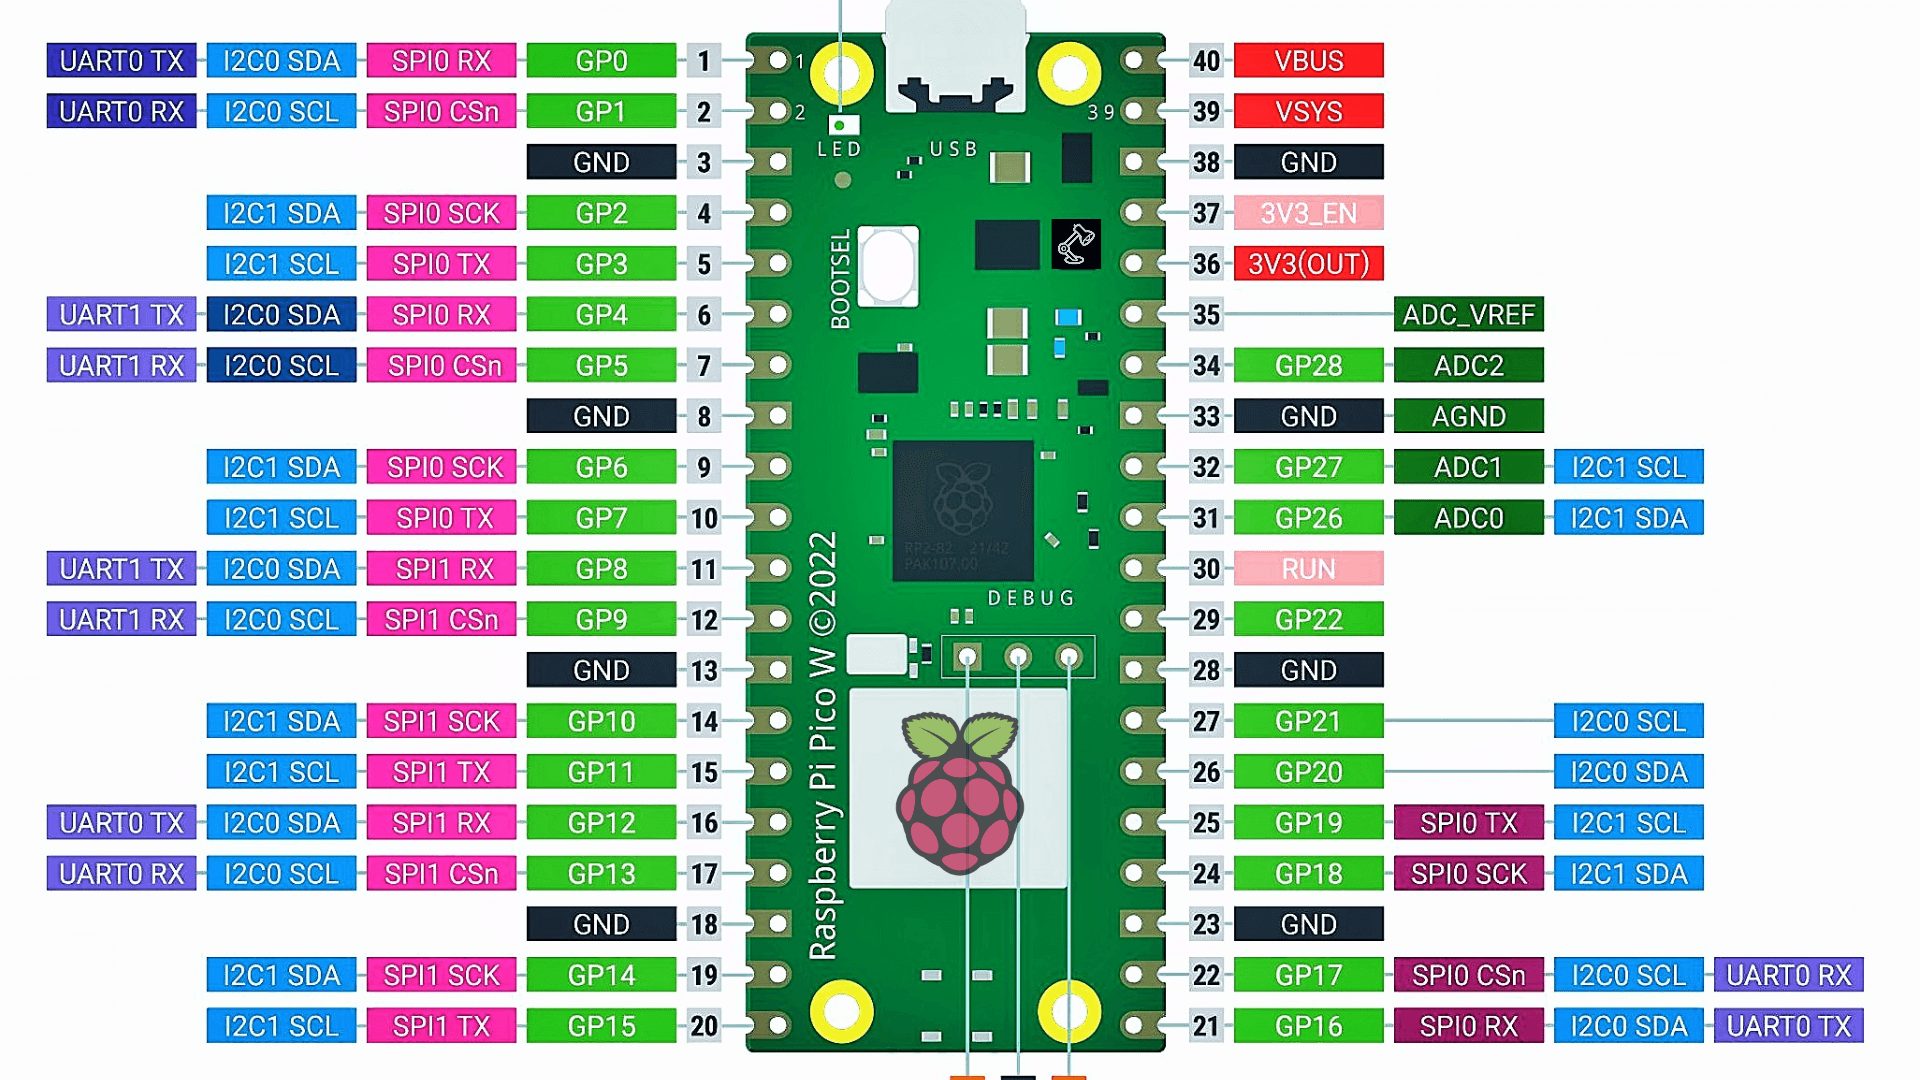
Raspberry Pi Pico W Pinout
Wiring Diagram
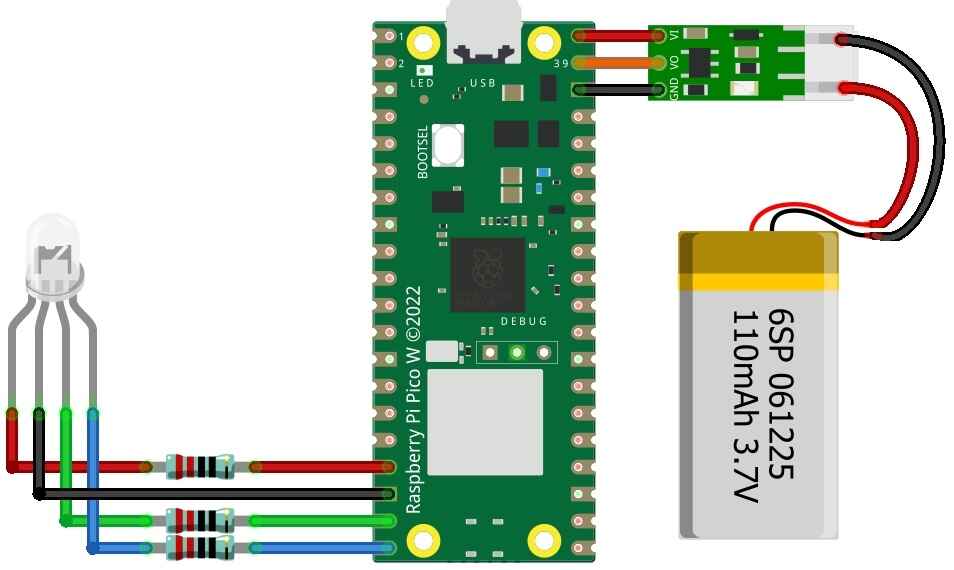
First, build the circuit. To do so, connect RGB LED to the Raspberry Pi Pico as shown in the following schematic diagram. The first step is to connect the RGB LED to the Pico. The LED has four legs, each of which corresponds to a different colour. The longest leg is the anode, and it should be connected to the Pico’s ground (GND) pin.
This schematic diagram shows how to connect RGB LED lights using a three-wire cable. The RGB LED lights can be connected in any order, but the order in which the lights are connected is required for a proper duty cycle. The red light comes first, followed by the green light, and then the blue light. You need to connect a 200-ohm resistor through per R, G, and B pins of the LED.
MicroPython Code – Raspberry Pi Pico W Web Server
Here is the code for creating a Raspberry Pi Pico W-based Web Server, Sure, you will want to modify the code for your WiFi SSID and password. Save the file to Raspberry Pi Pico W with the name main.py or anything else. Getting Started With Raspberry Pi Pico W With Thonny IDE
main.py
|
1 2 3 4 5 6 7 8 9 10 11 12 13 14 15 16 17 18 19 20 21 22 23 24 25 26 27 28 29 30 31 32 33 34 35 36 37 38 39 40 41 42 43 44 45 46 47 48 49 50 51 52 53 54 55 56 57 58 59 60 61 62 63 64 65 66 67 68 69 70 71 72 73 74 75 76 77 78 79 80 81 82 83 84 85 86 87 88 89 90 91 92 93 94 95 96 97 98 99 100 101 102 103 104 105 106 107 108 109 110 111 112 113 114 115 116 117 |
import machine import socket import math import utime import network import time wlan = network.WLAN(network.STA_IF) wlan.active(True) wlan.connect("DIY","diyprojectslab") # rgb led red=machine.Pin(11,machine.Pin.OUT) green=machine.Pin(12,machine.Pin.OUT) blue=machine.Pin(13,machine.Pin.OUT) # Wait for connect or fail wait = 10 while wait > 0: if wlan.status() < 0 or wlan.status() >= 3: break wait -= 1 print('waiting for connection...') time.sleep(1) # Handle connection error if wlan.status() != 3: raise RuntimeError('wifi connection failed') else: print('connected') ip=wlan.ifconfig()[0] print('IP: ', ip) # Temperature Sensor sensor_temp = machine.ADC(4) conversion_factor = 3.3 / (65535) def temperature(): temperature_value = sensor_temp.read_u16() * conversion_factor temperature_Celcius = 27 - (temperature_value - 0.706)/0.00172169/ 8 print(temperature_Celcius) utime.sleep(2) return temperature_Celcius def webpage(value): html = f""" <!DOCTYPE html> <html> <body> <form action="./red"> <input type="submit" value="red " /> </form> <form action="./green"> <input type="submit" value="green" /> </form> <form action="./blue"> <input type="submit" value="blue" /> </form> <form action="./off"> <input type="submit" value="off" /> </form> <p>Temperature is {value} degrees Celsius</p> </body> </html> """ return html def serve(connection): while True: client = connection.accept()[0] request = client.recv(1024) request = str(request) try: request = request.split()[1] except IndexError: pass print(request) if request == '/off?': red.low() green.low() blue.low() elif request == '/red?': red.high() green.low() blue.low() elif request == '/green?': red.low() green.high() blue.low() elif request == '/blue?': red.low() green.low() blue.high() value='%.2f'%temperature() html=webpage(value) client.send(html) client.close() def open_socket(ip): # Open a socket address = (ip, 80) connection = socket.socket() connection.bind(address) connection.listen(1) print(connection) return(connection) try: if ip is not None: connection=open_socket(ip) serve(connection) except KeyboardInterrupt: machine.reset() |
Execute the above script code, so that the Python Shell in thonny IDE will display the IP Address of the Raspberry Pi Pico W Webserver.
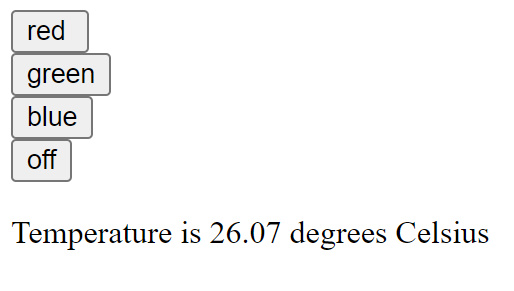
Copy the IP Address and paste it on any Web browser and hit enter.
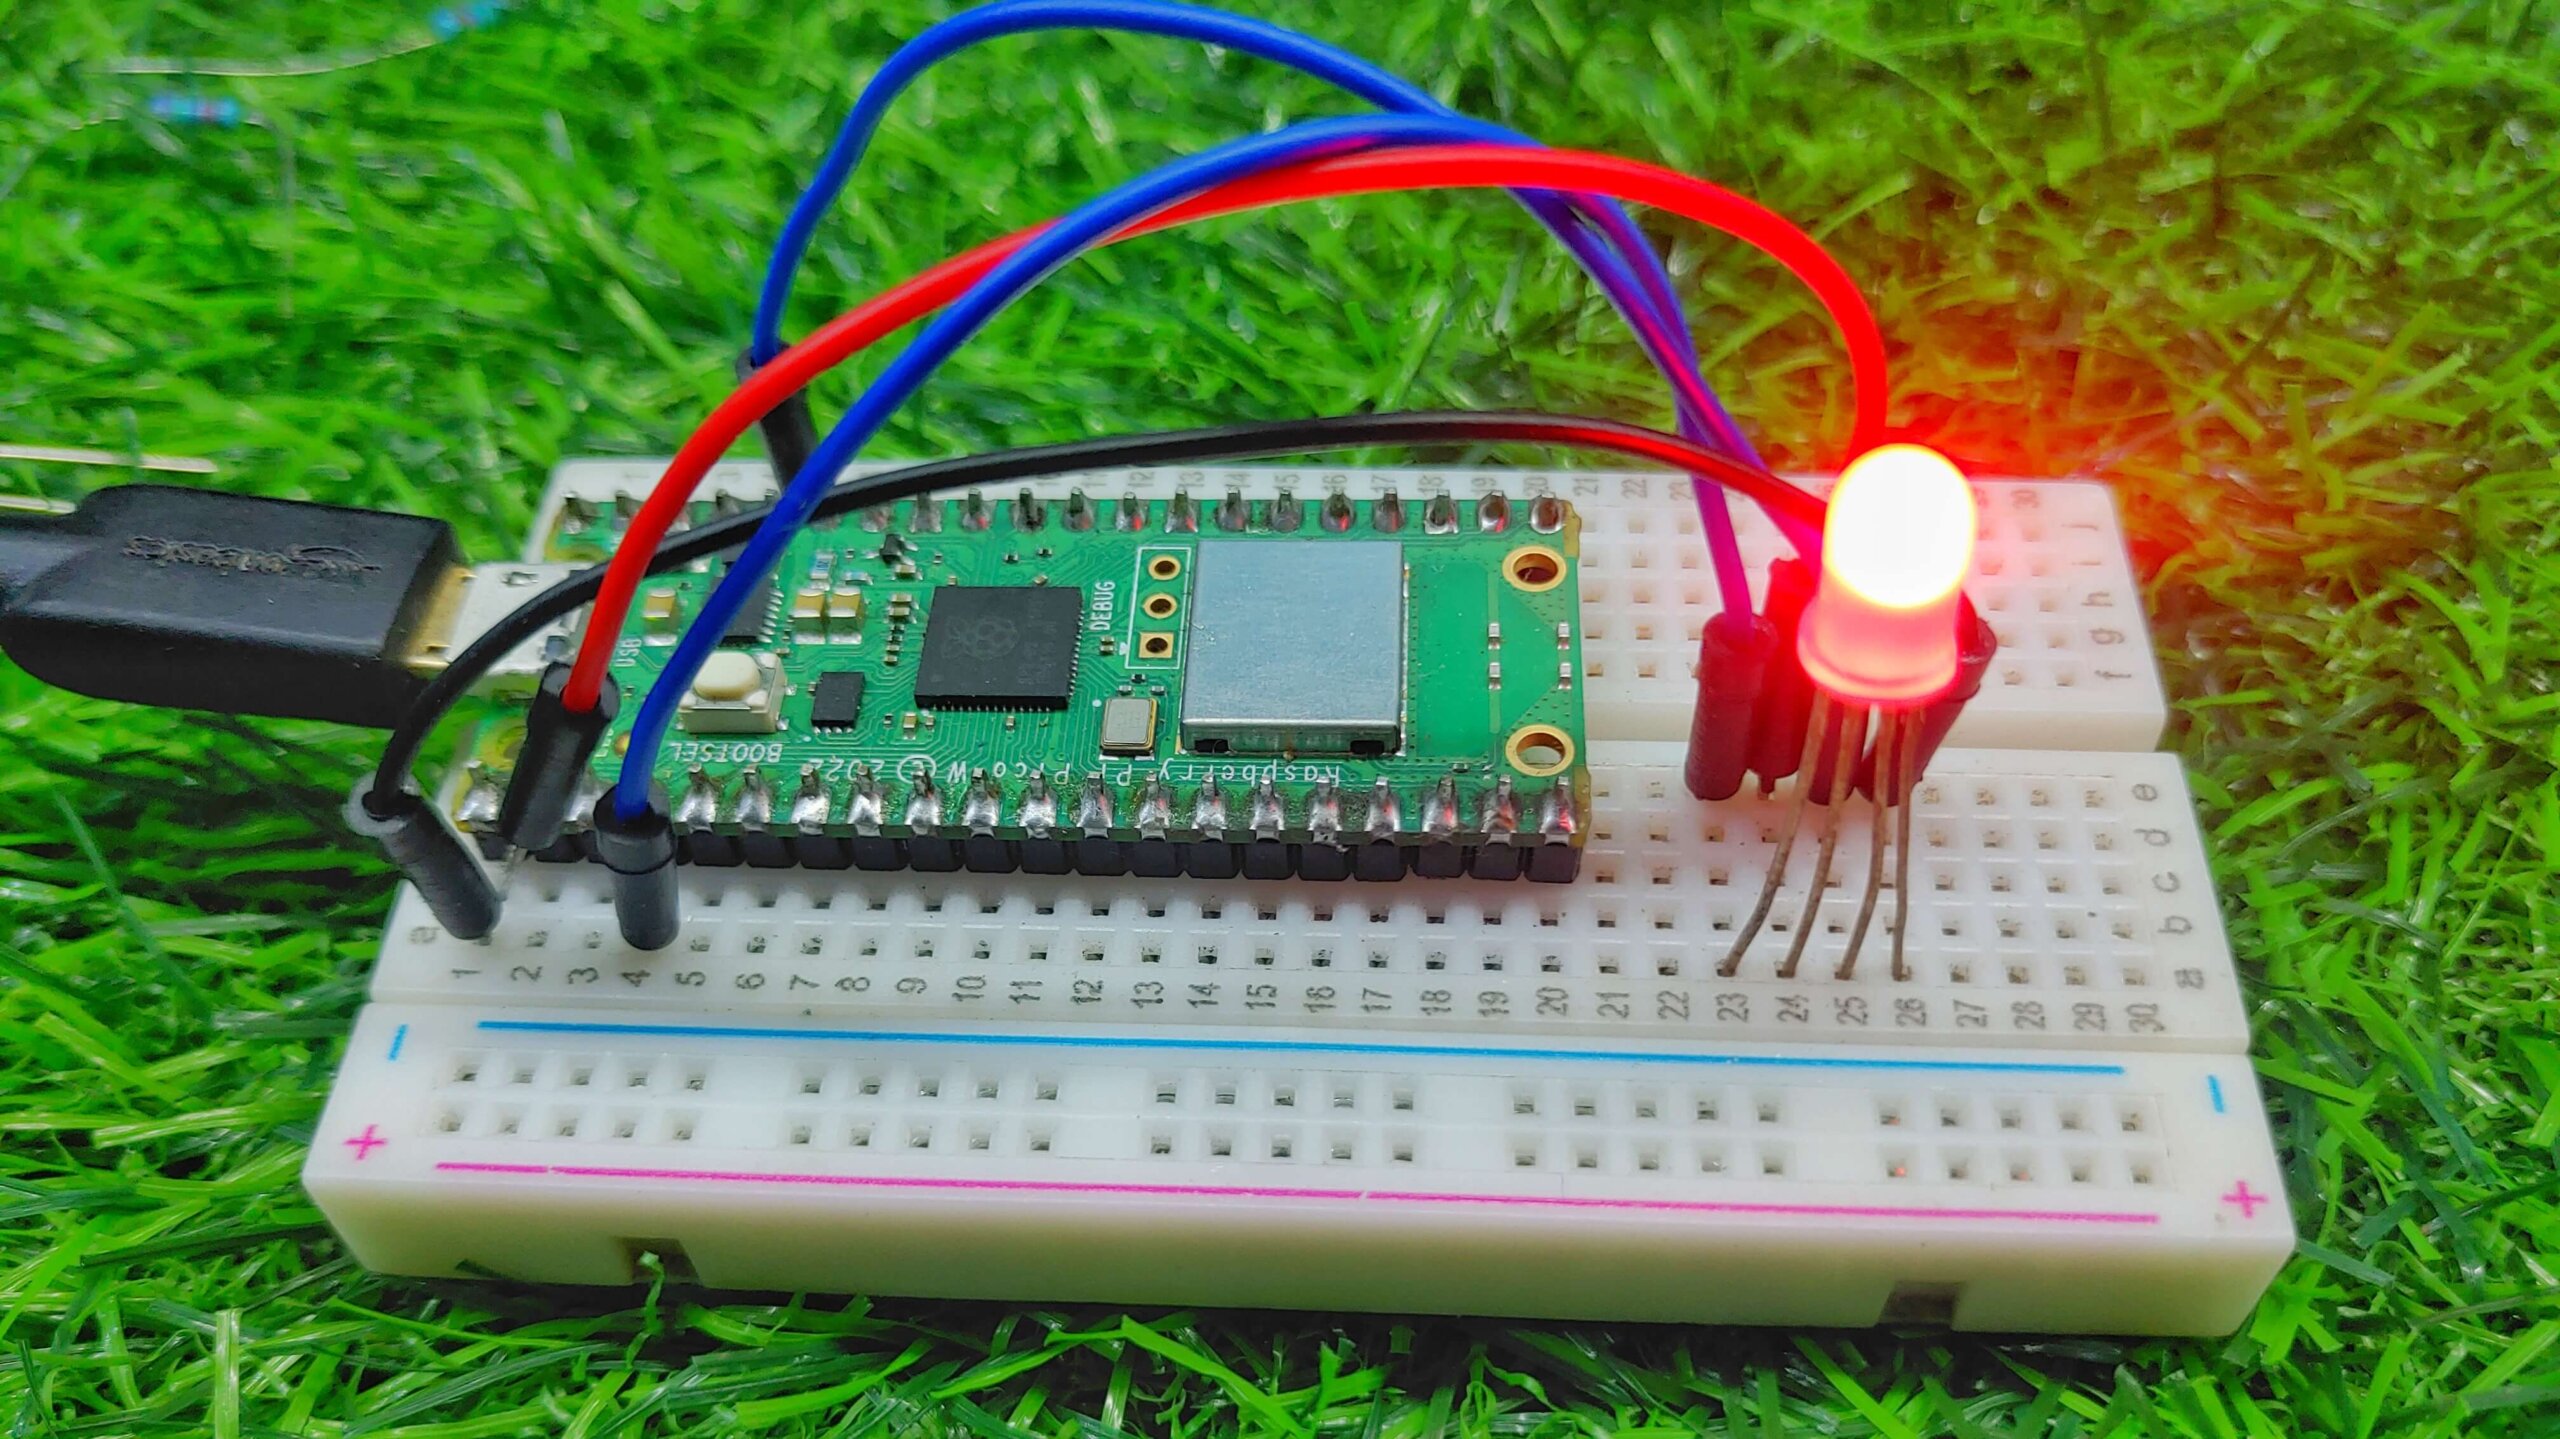
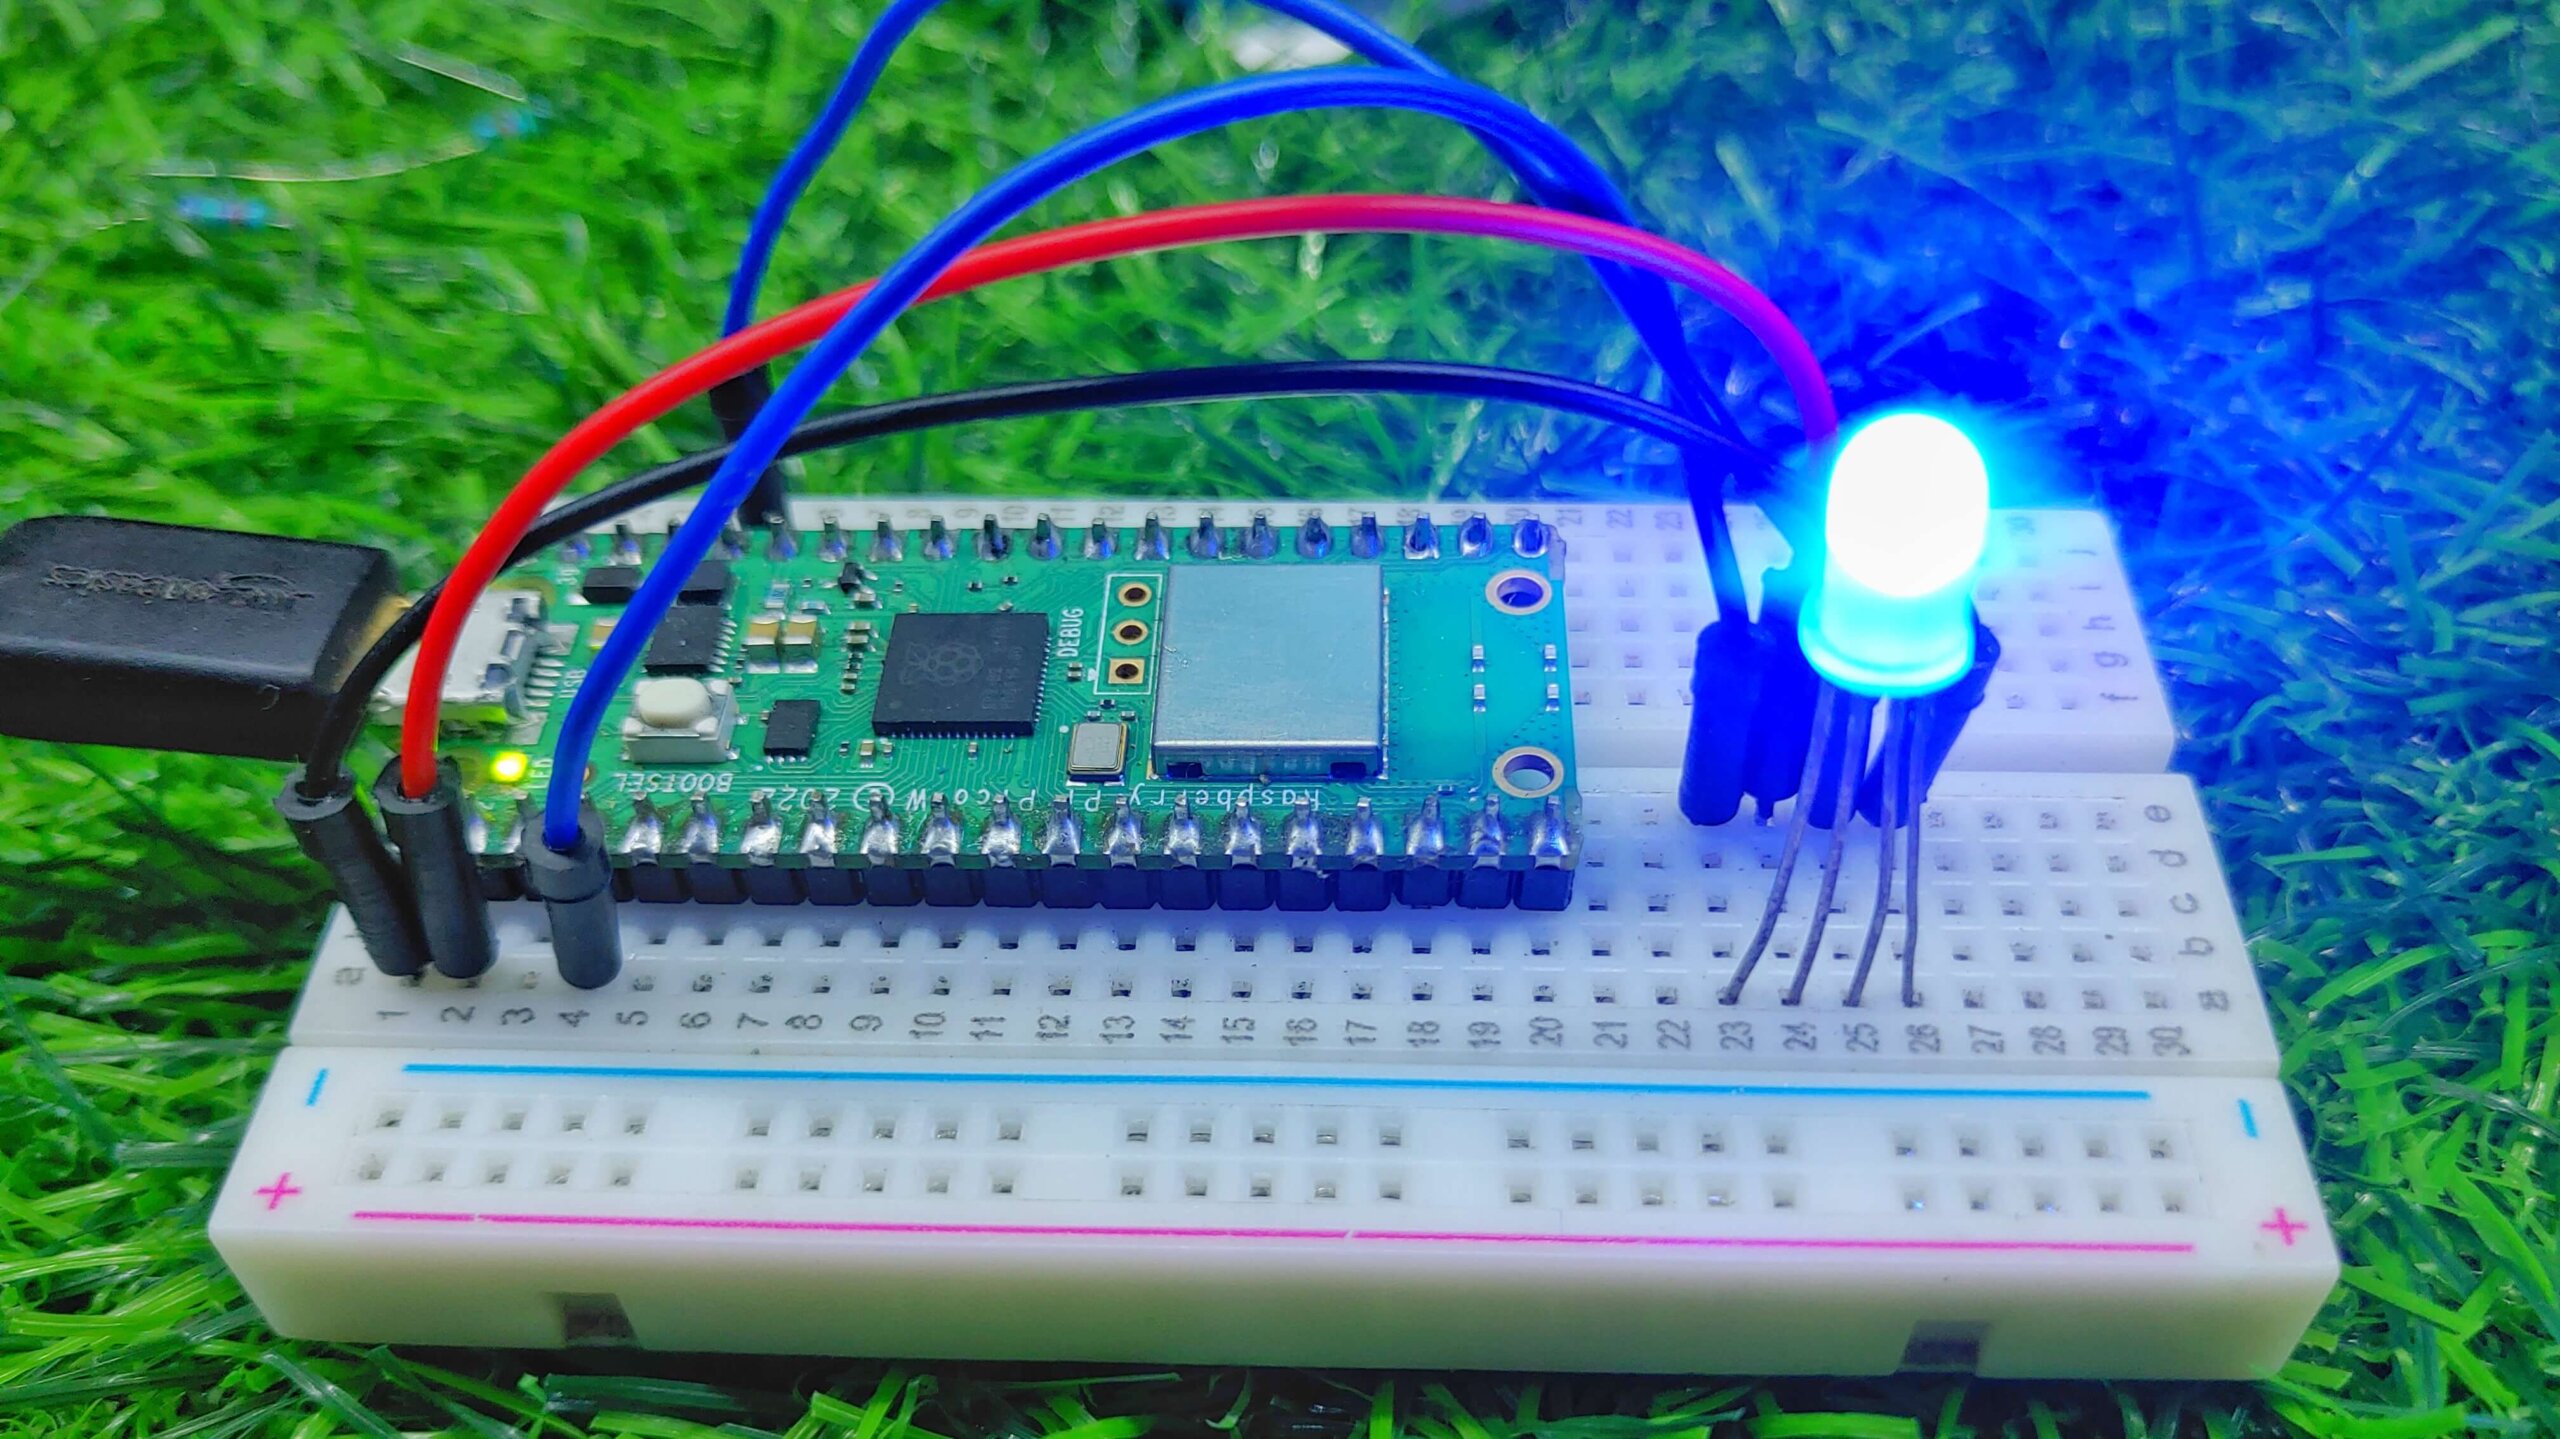
The RGB LED can be controlled using the red, green, and blue buttons. Click the buttons to change the colour of the LED.



3 Comments
Pingback: Raspberry Pi Pico W Web Server With BME280 – Weather Station
Pingback: BME280 Sensor With Raspberry Pi Pico W Using MicroPython Code
Pingback: Raspberry Pi Pico Weather Station using I2C BME280 Environmental Sensor - PiShop Blog