Introduction Raspberry Pi Pico With CircuitPython
In this guide, we’ll show you how to get started with your new Raspberry Pi Pico and CircuitPython. We’ll cover how to install CircuitPython, how to connect your Pico to your computer, and how to write and run your first Pico code in CircuitPython.
In this guide, we’ll be using CircuitPython to code on the Raspberry Pi Pico. CircuitPython is a programming language designed to make programming microcontrollers easy. It’s based on the popular Python programming language, so it’s easy to learn for beginners. And it’s open source, so you can modify the source code to suit your needs.
With CircuitPython you can write clean and simple Python code to control hardware instead of having to use complex low-level languages like C++ or Arduino. This makes it easier to get started and experiment with the coding on hardware.
What is Raspberry Pi Pico?
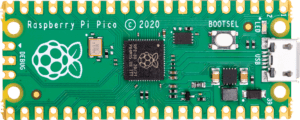
Raspberry Pi Pico is a tiny, low-cost new microcontroller board from Raspberry Pi. It’s their smallest and most affordable board yet, at only $4 USD. it was released in early 2021. This makes it the cheapest and smallest Raspberry Pi ever made!
The Pico is designed to be used with low-cost code development tools like MicroPython and CircuitPython. It’s also fully compatible with the Raspberry Pi GPIO Pinout. The Pico is the perfect way to get started with the coding on a Raspberry Pi.
RP2040 Chip features:
- Dual ARM Cortex-M0+ @ 133MHz
- 264kB on-chip SRAM in six independent banks
- Support for up to 16MB of off-chip Flash memory via a dedicated QSPI bus
- DMA controller
- Fully-connected AHB crossbar
- 30 GPIO pins, 4 of which can be used as analogue inputs
- Peripherals
- 2 UARTs
- 2 SPI controllers
- 2 I2C controllers
- 16 PWM channels
- USB 1.1 controller and PHY, with host and device support
- 8 PIO state machines
What is CircuitPython?
CircuitPython is a programming language designed to simplify experimenting and learning to code on low-cost microcontroller boards. It is based on the popular Python programming language and adds hardware support for interacting with electronics.
In addition, CircuitPython comes with many helpful libraries that allow you to control a wide variety of hardware. These libraries make it easy to get started with basic coding on CircuitPython boards.
If you’re interested in learning to code on hardware or looking for a simple and powerful programming language for your next project, CircuitPython is a great choice!
Installing CircuitPython on the Raspberry Pi Pico
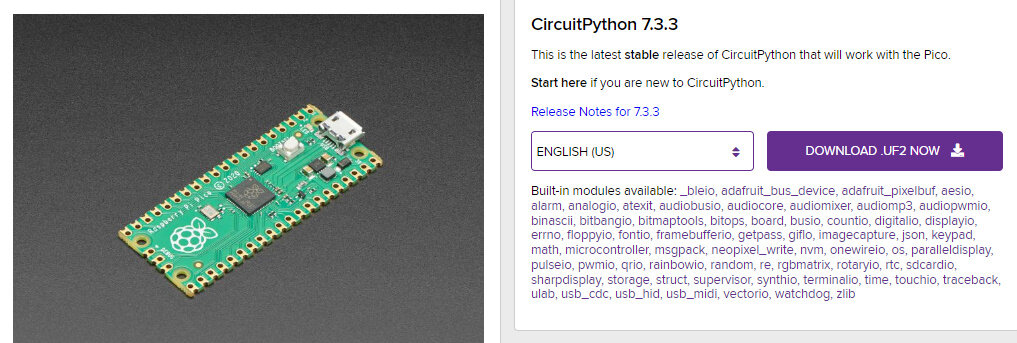
The first thing you need to do is download the latest CircuitPython release from Adafruit’s CircuitPython releases page. It is open source and can be freely downloaded from the official website
Downloading CircuitPython Download the latest version of CircuitPython from the download page on the CircuitPython website.
The next thing you need to do is connect your Pico to your computer using a USB cable. Once your Pico is connected, you need to open the bootloader by holding down the BOOTSEL button and pressing the reset button.
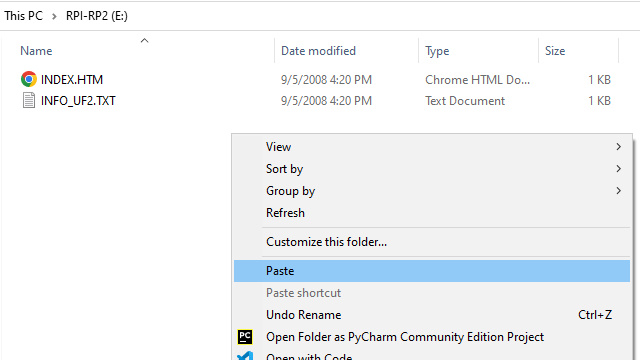
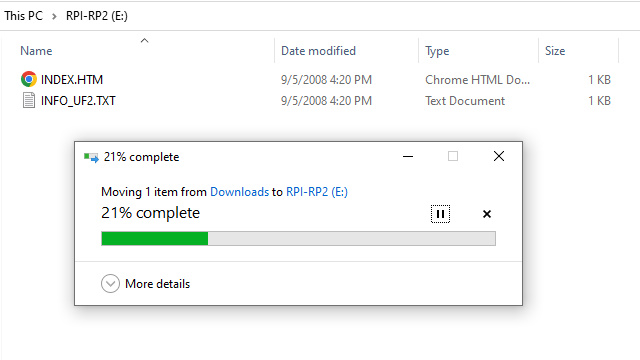
The Pico will then appear as a USB drive on your computer. The next thing you need to do is drag the appropriate UF2 file from the CircuitPython release you downloaded onto the Pico
This will install CircuitPython onto your Pico. Now that CircuitPython is installed,
Now you can write code in any text editor and save it to the Pico as a .py file. To run your code, simply open the file in CircuitPython’s Mu Editor and click the play button. Your code will now be running on the Pico!
And that’s it! You’re now ready to start programming the Pico using CircuitPython. To get started, check out the CircuitPython Essentials guide, which covers the basics of CircuitPython programming.
CircuitPython Thonny IDE Setup
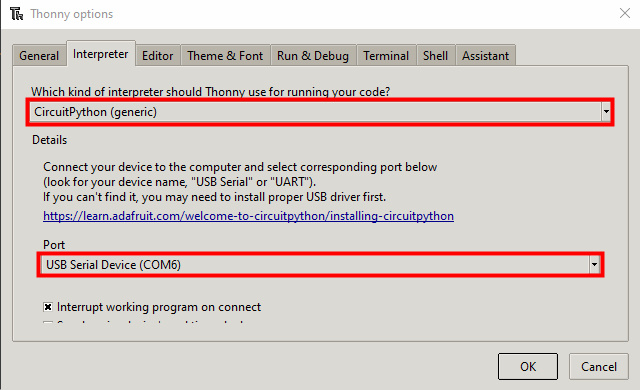
You need to open the Thonny IDE and go to the “Tool” menu. From there, you need to click on “Options” and then go to the “CircuitPython” tab.
Finally, you need to click on the “OK” button and restart the Thonny IDE. After restarting the Thonny IDE, you should see the “CircuitPython” menu in the “Tool” menu. From there, you can now access all the features of CircuitPython.
Write Micropython Script
Now, you are ready to write some code. In the main.py file.
Test Program – Blink Onboard LED
|
1 2 3 4 5 6 7 8 9 10 11 12 13 |
"""Example for Pico. Blinks the built-in LED.""" import time import board import digitalio led = digitalio.DigitalInOut(board.LED) led.direction = digitalio.Direction.OUTPUT while True: led.value = True time.sleep(0.5) led.value = False time.sleep(0.5) |
Conclusion
In conclusion, it is possible to set up a Raspberry Pi Pico with CircuitPython code. There are a few other methods to do this, but the most familiar is to use the Mu editor. Mu is a great editor for CircuitPython development and it has a lot of nice features.
Read Similar Articles:
- Getting Started Raspberry Pi Pico – Pinout, Specs – Beginner Guide
- Interfacing PIR Motion Sensor with Raspberry Pi Pico
- Raspberry Pi Pico Home Automation System
- Interface Servo Motor With Raspberry Pi Pico
- Interface 0.96″ OLED Display with Raspberry Pi Pico
- Raspberry Pi Pico Weather Station Using Dht11 Sensor
- Interface 16*2 LCD Display With Raspberry Pi Pico





1 Comment
Pingback: Control PC Volume, Brightness Using Raspberry Pi Pico - Python