Raspberry Pi Pico With Thonny IDE
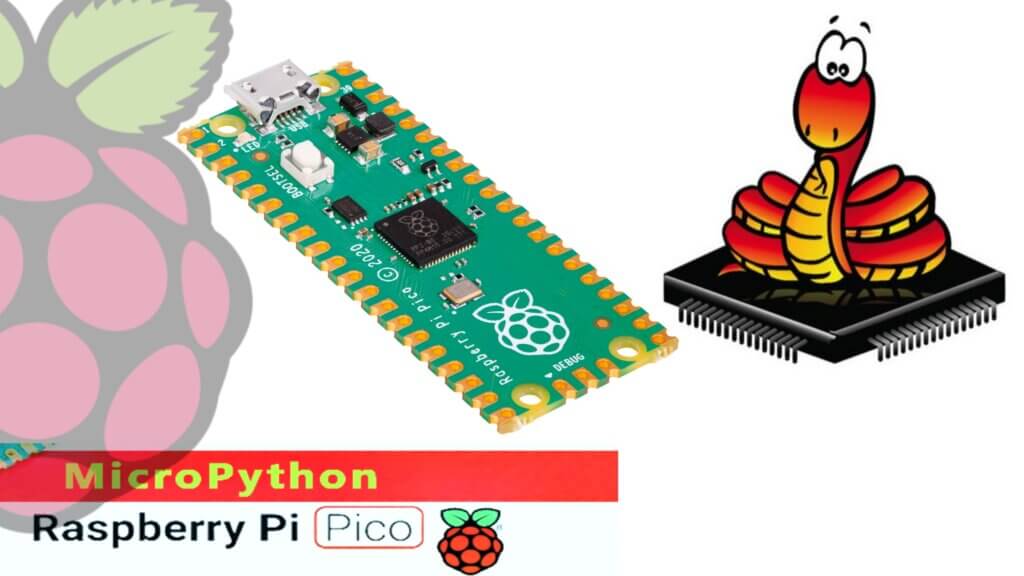
In this tutorial, we will show how to set up Raspberry Pi Pico With Thonny IDE I Raspberry Pi Pico is a low-cost, high-performance microcontroller board with a flexible digital interface. It is designed to be used with the MicroPython programming language, which is a very efficient implementation of the Python 3 programming language. Micropython is a version of python that has been designed to run on microcontrollers. This means that you can write python code that will run directly on your Raspberry pi pico board,
Requirements:
Software
- MicroPython firmware for Raspberry Pi Pico
- The Thonny Python IDE
Hardware
- A Raspberry Pi Pico with soldered headers
- A computer that can run the Thonny IDE
- A micro USB cable
- A breadboard and jumper leads for connecting additional components (optional)
We are going to learn :
What is Raspberry Pi Pico?
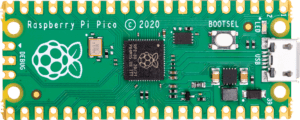
Raspberry Pi Pico is an effective yet inexpensive microcontroller that was recently launched by the Raspberry Pi Foundation. This microcontroller is different from other microcontrollers available in the market because it is built on a brand new chip, the RP2040. The Pico also has a variety of peripherals that can be used with Micropython, including GPIO, I2C, SPI, and UART. I don’t want to lecture about the Raspberry pi Pico in full detail here. you can check here Getting Started Raspberry Pi Pico – Pinout, Specs – Beginner Guide
What is Micropython?
Python is a programming language with many features, but one of the best things about it is that it’s easy to learn That’s where micropython comes in. Micropython is a version of python that has been designed to run on microcontrollers. This means that you can write python code that will run directly on your microcontroller, without the need for an operating system. This makes micropython perfect for writing code that needs to run quickly and efficiently, without the overhead of an operating system.
Why Micropython?
There are a number of reasons why you might want to use Micropython on the Pico. One reason is that it is a great way to learn about programming and electronics. Micropython is a very simple and concise language that is easy to learn.
The Pico also has a number of tutorials and examples available that show you how to use Micropython to control various hardware peripherals. Another reason to use Micropython on the Pico is that it is an excellent way to develop prototypes.
What is Thonny IDE?
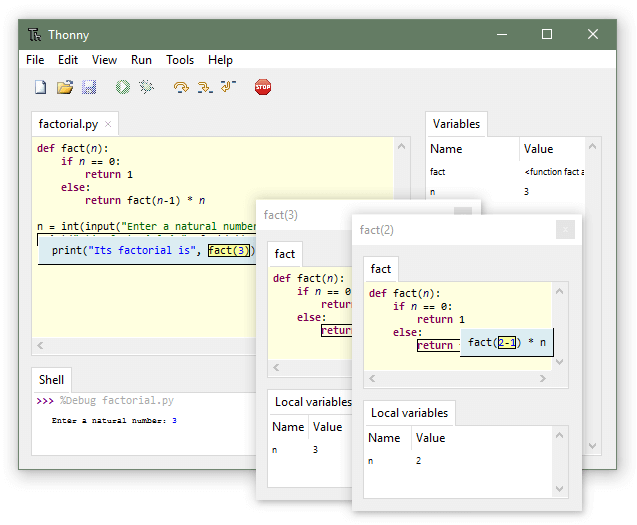
Thonny IDE is a Python development environment that is designed to be simple and easy to use for beginners. Thonny comes with Python 3.7 built-in, so just make sure to have that installed on your computer. Thonny’s user interface is very straightforward. You can write Python code in the code editor and execute it in the debug viewer. It has a very intuitive user interface and a wide range of features that make it a great tool for learning and developing Python applications.
Why use Thonny IDE?
Raspberry Pi Pico is a microcontroller based on the RP2040 microcontroller chip and can be programmed using the Thonny IDE. Raspberry Pi Pico is a great microcontroller board for beginners. It is easy to use and can be programmed using the Thonny IDE. Thonny IDE is a great development environment for beginners and it makes it easy to develop for the Raspberry Pi Pico.
Raspberry Pi Pico is a great choice for beginners who want to learn microcontroller programming. Thonny IDE makes it easy to get started with programming on Raspberry Pi Pico.
How to get started with Raspberry Pi Pico With Thonny IDE?
Raspberry Pi Pico is a microcontroller board based on the RP2040 chip. It was released in January 2021. Thonny IDE is a Python IDE for Raspberry Pi Pico. that comes bundled with the Raspberry Pi OS, so you don’t need to install anything. Just open the Thonny IDE and you’re ready to go. Raspberry Pi Pico is a great little board for starting development with Python. In this guide, we will show you how to get started with Raspberry Pi Pico and Thonny IDE.
Install Thonny IDE and Start MicroPython :
You can program your Raspberry Pi Pico using MicroPython by attaching it to a computer via USB and then dragging and dropping files to it.
- Install MicroPython to Pico
- Install Thonny IDE
- Upload codes
Installing MicroPython & Thonny IDE
Installation of MicroPython on Raspberry Pi Pico needs a “UF2” file to stand copied onto it. A UF2 file is a “binary data file” which contains a program that can be communicated from a PC to a microcontroller, such as an ESP32 or Pico board.
Raspberry Pi Pico uf2 File
The uf2 file below Download the MicroPython UF2 file from this link (click here);
To Install MicroPython on Pico board:
- Download the “MicroPython UF2 file” from here.
- Attach the cable to the Raspberry Pi Pico & then press and hold the “BOOTSEL” button before plugging the USB cable into the computer. (Do not release the button)
- Release the button after pico is connected
- Release BOOTSEL once the drive RPI-RP2 seems on your computer.
- Drag and drop the MicroPython UF2 file onto the RPI-RP2 disk. Your Pico will reboot auto. You are now running MicroPython.
- You can access the REPL via USB Serial.
- Your Pico will reboot. That’s it, you are now running MicroPython on your Pico.
- Visit the Raspberry Pi Official Documentation page from here: Raspberry Pi Documentation.
Firmware & Releases
- v1.18 (2022-01-17) .uf2 [Release notes] (latest)
- v1.17 (2021-09-02) .uf2 [Release notes]
- v1.16 (2021-06-18) .uf2 [Release notes]
- v1.15 (2021-04-18) .uf2 [Release notes]
- v1.14 (2021-02-02) .uf2 [Release notes]
Raspberry Pi Pico With Thonny IDE Setup
A Thonny IDE is a software that gives its users an environment for performing programming, along with development as well as testing and debugging the application
- Download Thonny IDE from here download the IDE version for your specific operating system. install it.
- Open Thonny
- Connect the Raspberry Pi Pico to your computer. ,
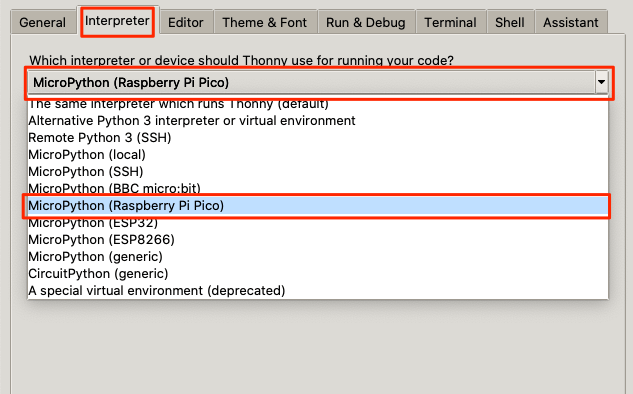
4. Go to “tools” –> “options” –> “interpreter” –> select “MicroPython (Raspberry Pi Pico)” as the interpreter and select the COM port being used.
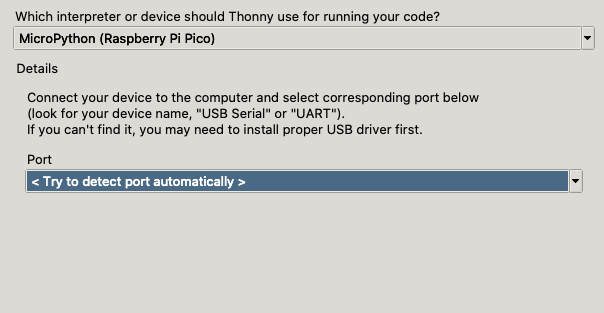
5. The port dropdown menu can be left to “automatically detect the Pico”. Click “OK” to close.
(NOTE: There’ll be a prompt asking to install MicroPython, click yes (as shown in the figure), and then you can check in a shell that Pico is connected.) Thonny Setup tutorial From Adafruit
Conclusion
Writing Blink Code for the onboard LED of pico board.
Enter the following code, make sure you tap Enter after each line.
|
1 2 3 4 5 6 7 8 |
from machine import Pin import utime led = Pin(25, Pin.OUT) led.low() while True: led.toggle() print("Toggle") utime.sleep(1) |
- First, save the project on your computer as a “.py” file e.g
blinky.py. Tip You need to enter the.pyfile extension so that Thonny recognises the file as a Python file. - Navigate to File >> Save
- Select “This computer” and save
Click in the primary editor panel of Thonny and enter the following code to toggle the onboard LED.
Click the “Run” button to complete the code.
Save the program on the Raspberry Pi Pico and give the name blink.py make sure While saving the file it is a name main.py
When the code will run & you can see the LED toggling on the board. Congratulations your Pico is now running Blinky
References
- Raspberry Pi Documentation link
- Raspberry Pi Datasheet link
- Micropython on Raspberry Pi Pico link
- Getting Started with Micropython on Raspberry Pi Pico link
Related Posts:
- Getting Started Raspberry Pi Pico – Pinout, Specs – Beginner Guide
- Interfacing PIR Motion Sensor with Raspberry Pi Pico
- Raspberry Pi Pico Home Automation System
- Interface Servo Motor With Raspberry Pi Pico
- Interface 0.96″ OLED Display with Raspberry Pi Pico
- Raspberry Pi Pico Weather Station Using Dht11 Sensor
- Interface 16*2 LCD Display With Raspberry Pi Pico



14 Comments
Pingback: Interface Servo Motor With Raspberry Pi Pico - Explain 2022
Pingback: Interface Joystick With Raspberry Pi Pico Using Python 1
Pingback: RGB LED Using A Raspberry Pi Pico With MicroPython
Pingback: Raspberry Pi Pico ADC | Read Analog Values With Micropython
Pingback: Getting Started Raspberry Pi Pico Pinout, Specs -Tutorials
Pingback: Interfacing Rotary Encoder With Raspberry Pi Pico Tutorial
Pingback: Connect MPU6050 With Raspberry Pi Pico Using Micropython
Pingback: IR Sensor With Raspberry Pi Pico W Using Micropython
Pingback: Raspberry Pi Pico W Led Blink Using MicroPython
Pingback: Getting Started With Raspberry Pi Pico W Using MicroPython
Pingback: How To Use HC-05 Bluetooth Module With Raspberry Pi Pico W
Pingback: Raspberry Pi Pico W Web Server With BME280 – Weather Station
Pingback: Raspberry Pi Pico W Remote Controlled Car Robot Web Server
Pingback: Raspberry Pi Pico Home Automation System Using GSM SIM800