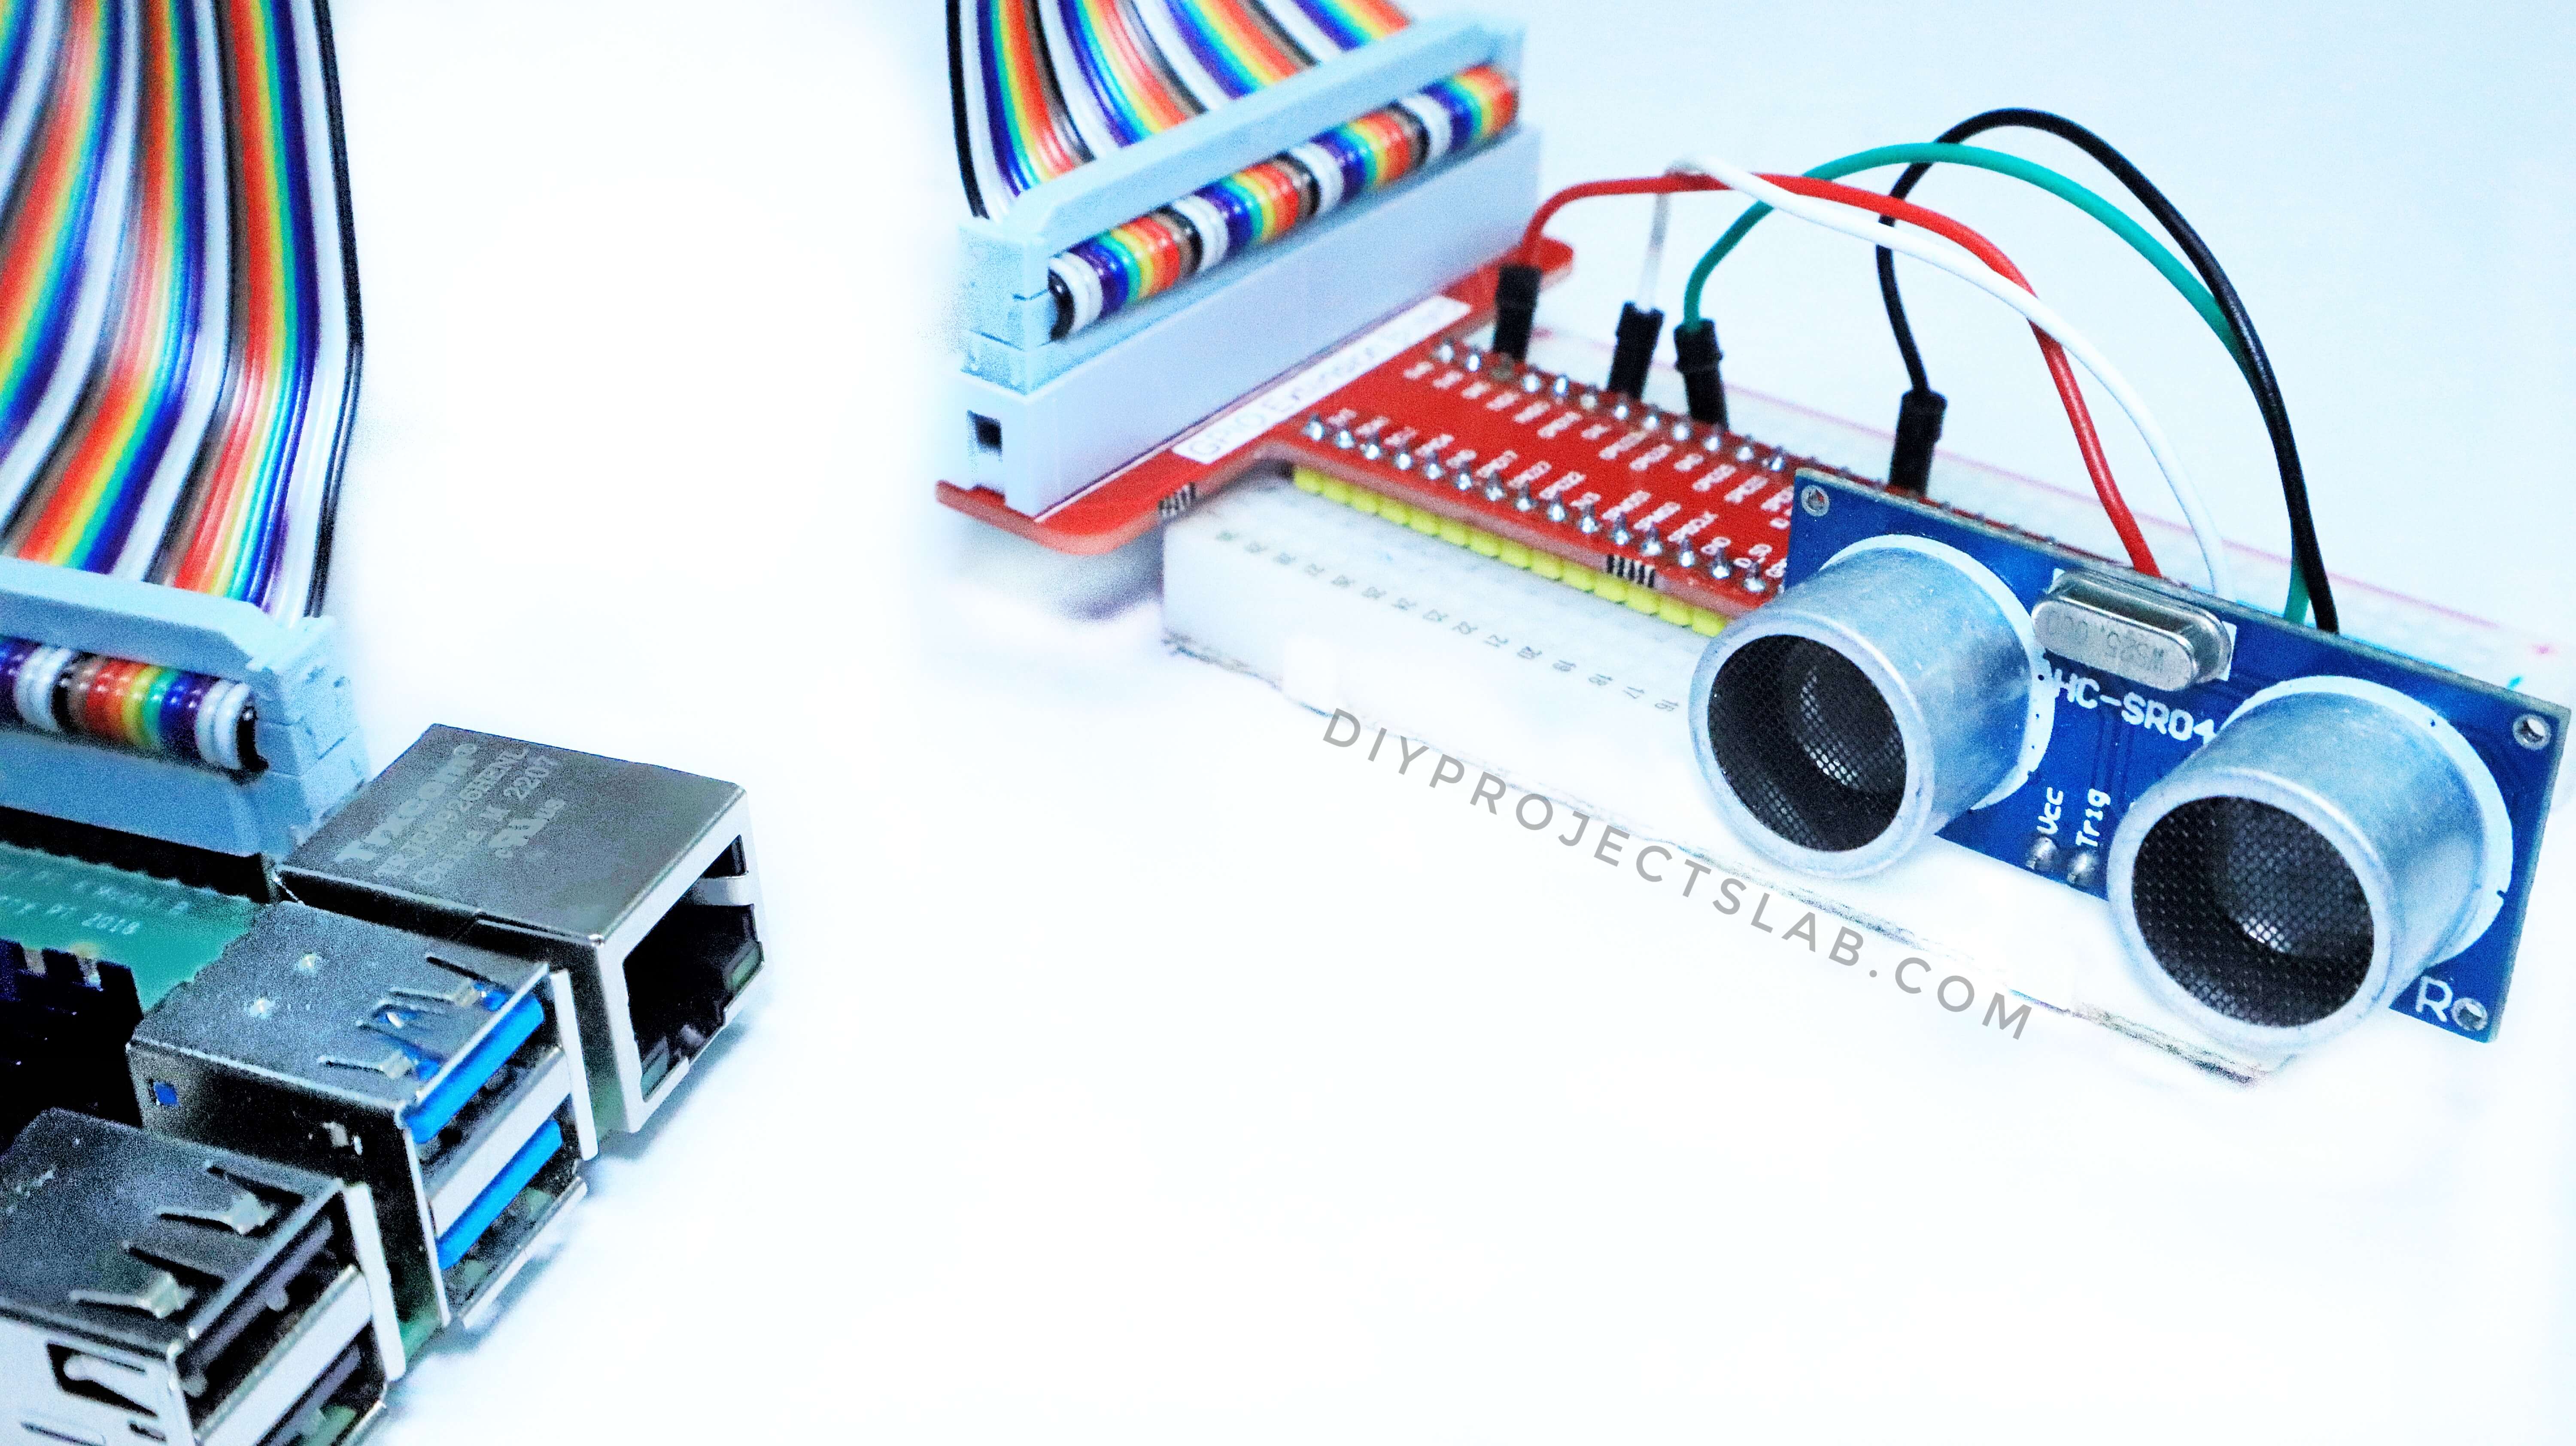
This is a tutorial on Raspberry Pi With Ultrasonic Sensor Tutorial or how to use an ultrasonic sensor module with a Raspberry Pi. The ultrasonic sensor module is used to measure distance. The module can be used to measure the distance to an object. The module can also be used to detect ultrasonic sounds. How to Setup a Raspberry Pi for the First Time | Getting Started with Raspberry Pi
The HC-SR04 module
The HC-SR04 module is an Ultrasonic sensor that can be used with Raspberry Pi or Arduino. It is a cheap and easy way to get started with using Ultrasonic sensors. The sensor can be used to measure distance, and can also be used to detect objects.
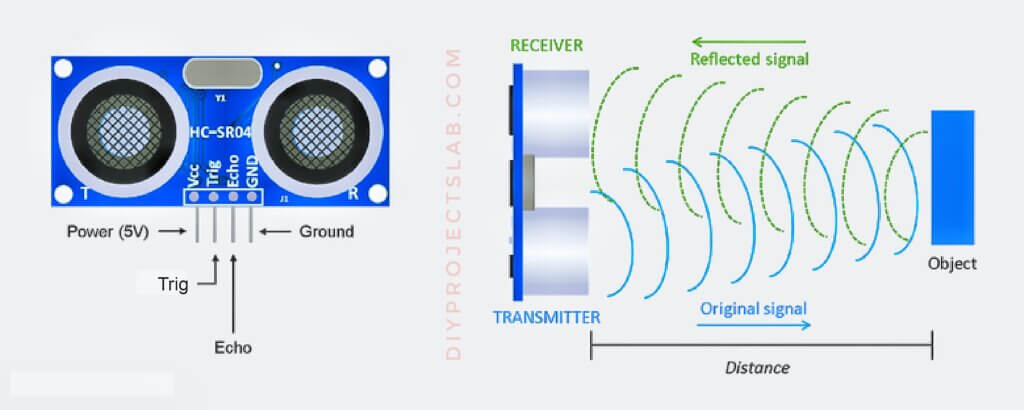
The sensor has two transducers, one that emits a sound wave, and one that receives the sound wave. The sound wave is used to determine the distance to an object. The HC-SR04 module can be used to measure distances up to 400 cm. The module is easy to use and can be interfaced with Raspberry Pi using just a few lines of code.
The HC-SR04 pinout
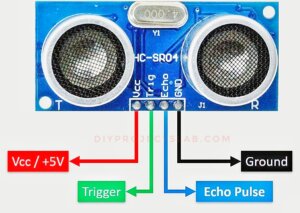
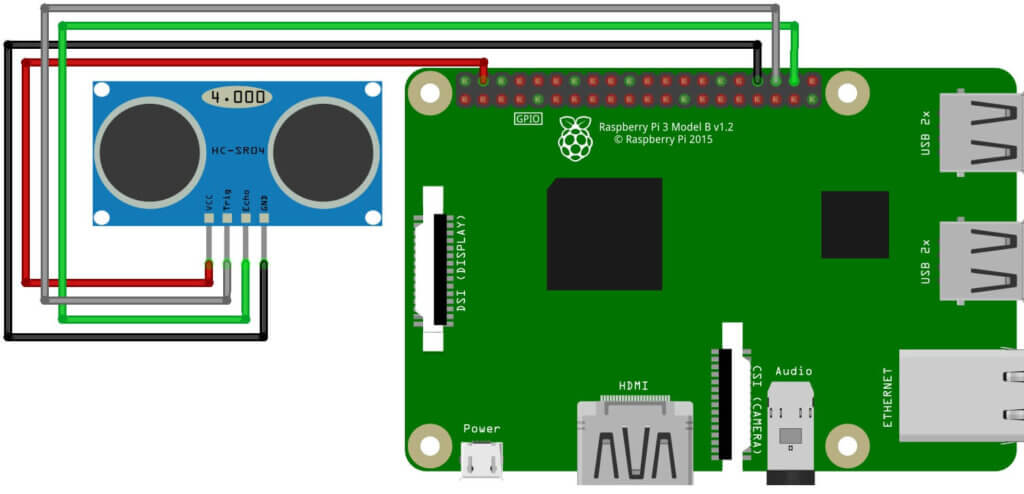
The HC-SR04 pinout is as follows:
- Vcc is the power supply voltage, which is +5V for the HC-SR04.
- Trig is the trigger input,
- The echo is the echo output.
- GND is the ground.
How Does the Ultrasonic Sensor Work?
The HC-SR04 sensor works by sending out a ray of ultrasound at a frequency of 40kHz. When this ultrasound hits an object, it will bounce back and be received by the HC-SR04. The HC-SR04 will then output a pulse whose width is proportional to the time it took for the ultrasound to bounce back. The HC-SR04 can be used to measure distance in a variety of applications. For example, it could be used to measure the distance between a sensor and an object in order to determine if the object is close enough to trigger a reaction.
Distance = Time x Speed
- Time – Time that is taken by the sound wave to reach the receiver
- Speed – Speed of the sound wave.
Interesting Note –
-
Speed of sound changes due to the change in temperature and change in humidity.
-
The speed of sound, however, is 4.3 times as fast in water as in air
Connecting The Raspberry Pi With Ultrasonic Sensor
As discussed before, ultrasonic sensors have a transmitter (Trigger) that can be operated to transmit infrared sound waves and have a receiver that receives reflected sound waves(ECHO pin).
The trig pin must be connected to an output pin, and the echo pin must be connected to an input pin. Then, the microcontroller can be used to trigger the sensor and read the echo pulse. The HC-SR04 is a viral sensor and is relatively easy to use. It is a versatile sensor that can
Python Script for Raspberry Pi With Ultrasonic Sensor
Now for the script to really take some measures. In this example, I am using Python. Why Python? It’s a famous language on the Raspberry Pi.
You need to update the package version of Raspberry Pi using the below command.
|
1 |
sudo apt-get update |
|
1 |
sudo apt-get install idle3 |
Code:
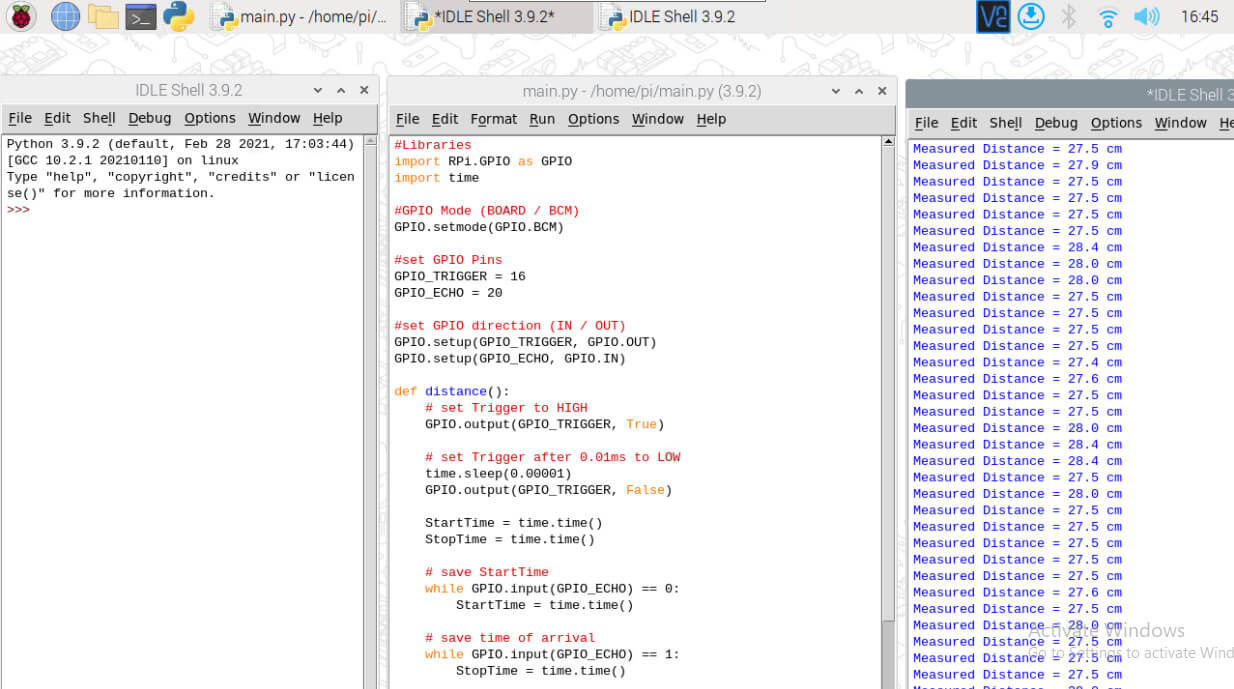
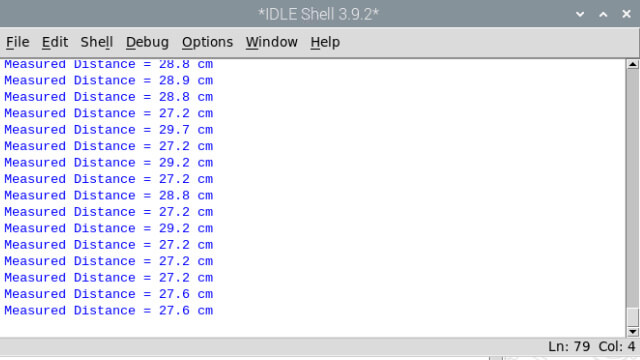
Save the program named distance.py and type python distance.py to run the program in a terminal window. Now, you will see that the sensor starts reading at one-second intervals. Here, you can see an image of a Distance reading.
|
1 2 3 4 5 6 7 8 9 10 11 12 13 14 15 16 17 18 19 20 21 22 23 24 25 26 27 28 29 30 31 32 33 34 35 36 37 38 39 40 41 42 43 44 45 46 47 48 49 50 51 52 53 54 55 56 |
# Measure distance using an ultrasonic module # ----------------------- # Import required Python libraries # ----------------------- import RPi.GPIO as GPIO import time #GPIO Mode (BOARD / BCM) GPIO.setmode(GPIO.BCM) #set GPIO Pins GPIO_TRIGGER = 16 GPIO_ECHO = 20 #set GPIO direction (IN / OUT) GPIO.setup(GPIO_TRIGGER, GPIO.OUT) GPIO.setup(GPIO_ECHO, GPIO.IN) def distance(): # set Trigger to HIGH GPIO.output(GPIO_TRIGGER, True) # set Trigger after 0.01ms to LOW time.sleep(0.00001) GPIO.output(GPIO_TRIGGER, False) StartTime = time.time() StopTime = time.time() # save StartTime while GPIO.input(GPIO_ECHO) == 0: StartTime = time.time() # save time of arrival while GPIO.input(GPIO_ECHO) == 1: StopTime = time.time() # time difference between start and arrival TimeElapsed = StopTime - StartTime # multiply with the sonic speed (34300 cm/s) # and divide by 2, because there and back distance = (TimeElapsed * 34300) / 2 return distance if __name__ == '__main__': try: while True: dist = distance() print ("Measured Distance = %.1f cm" % dist) time.sleep(1) # Reset by pressing CTRL + C except KeyboardInterrupt: print("Measurement stopped by User") GPIO.cleanup() |
RPi.GPIO– This module helps us to talk with the GPIO pins of Raspberry Pi.Time– We are operating the Time Module to add a delay between transmitting infrared sound waves and receiving them.
|
1 2 |
<span class="hljs-attr">GPIO_ECHO</span> = 20 <span class="hljs-attr">GPIO_TRIG</span> = 16// These lines of code are used for initialize of PINs, to which we will connect the ultrasonic sensor. |
- Open Terminal
- Launch IDLE IDE by typing
- After the IDLE launches, open a new window by FILE>OPEN or Ctrl+N
- Type the code below in the window
- Save the code by FILE>SAVE or Ctrl+S
- To run your code RUN>RUN or Ctrl+F5
In this article, we learned how to interface Raspberry Pi With Ultrasonic Sensor Tutorial. If you liked this article or have any suspicion then let me know in the comment area.
Read Similar Articles:
- Getting Started Raspberry Pi Pico – Pinout, Specs – Beginner Guide
- Interfacing PIR Motion Sensor with Raspberry Pi Pico
- Raspberry Pi Pico Home Automation System
- Interface Servo Motor With Raspberry Pi Pico
- Interface 0.96″ OLED Display with Raspberry Pi Pico
- Raspberry Pi Pico Weather Station Using Dht11 Sensor
- Interface 16*2 LCD Display With Raspberry Pi Pico

