Introduction
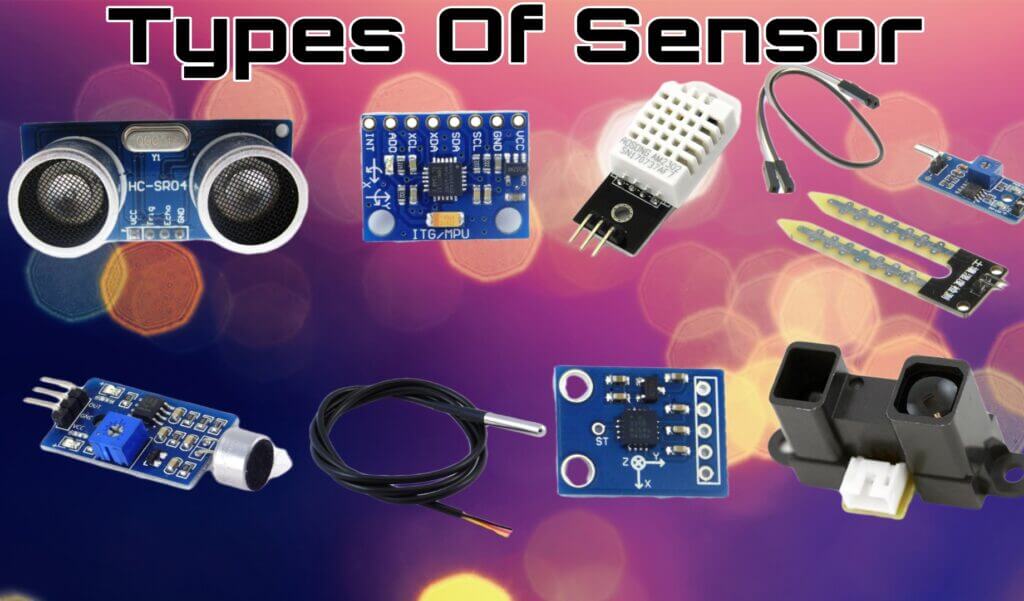
There are different types of sensors used in different applications. Some common types of sensors are as follows: -Temperature sensors -Pressure sensors -Flow sensors -Level sensors -Position sensors – Detectors Sensors are devices that measure a physical quantity and convert it into a signal which can be read by an observer or by an instrument. Sensors are used in multiple applications such as in industrial and consumer electronics, automotive, and others. Check our previous post Different Types of Batteries And Their Function
Thank You NextPCB:
This project is successfully finished because of the service and support from NextPCB. NextPCB is one of the most professional PCB manufacturers in Global and has specialized in the PCB and assembly industry for over 16 years. Not only could NextPCB deliver the most creative printed circuit boards and assembly technologies in the most elevated quality standards, but the fastest delivery turnaround was also as fast as 24 hours.
Guys if you have a PCB project, please visit their website and get exciting discounts and coupons. if you sign-up using this link you will get free coupons worth $100. Checkout out NextPCB now and get amazing discounts on your first order.
- Only 0$ for 5-10pcs PCB Prototypes:https://www.nextpcb.com/PCBPrototypes
- 4-layer PCB price reduction up to 40%: nextpcb.com/40%off
- Register and get $100 from NextPCB: Nextpcb.com/coupon
What is a sensor?
A sensor is a device that detects or measures a physical property and converts it into a signal that can be read by an Arduino. There are many different types of sensors, Sensors are used in a wide variety of applications, from measuring the temperature of the air to detecting the presence of metal objects. They are an essential part of many systems and devices, and their capabilities are constantly expanding as technology advances.
Sensors come in many different shapes and sizes, and they can be made from a variety of materials. They can be simple devices, like thermometers, or they can be complex systems, like those used in self-driving cars. Today, sensors are used in a variety of fields, including medicine, manufacturing, environmental monitoring, and telecommunications. They play a vital role in many modern technologies.
Different types of sensors?
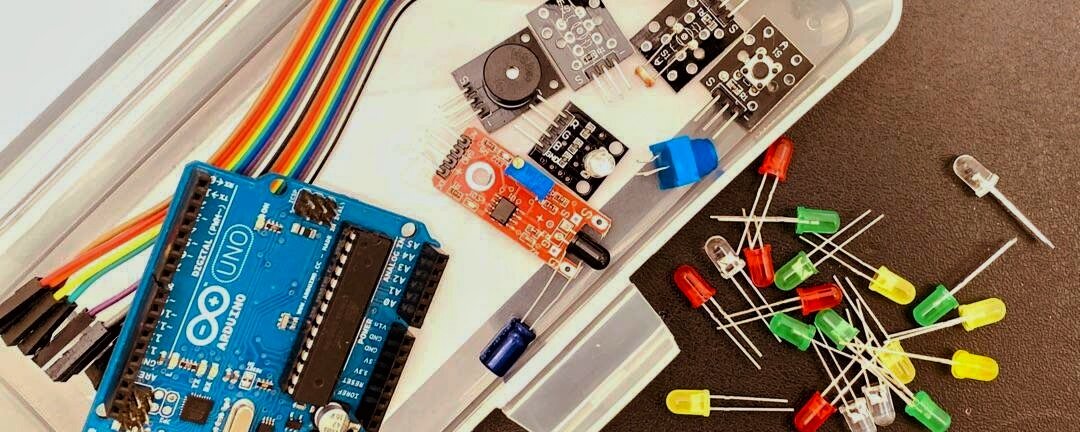
There are many different types of sensors, and each has its advantages and disadvantages. Some of the most common types of sensors include:
- DHT11 Humidity Sensors
- Magnetic sensors
- LM35 Temperature Sensors
- Force Sensors
- Vibration Sensors
- Proximity Sensors
- Photoelectric Sensors
- Motion Sensors
- Gas Sensors
- MQ3 Alcohol Sensor
- Flame Sensors
-
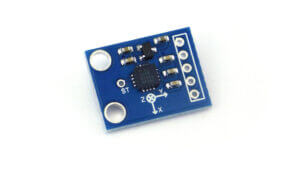
ADXL335 Accelerometer Sensor
Use this code to collect data from an analog sensors
|
1 2 3 4 5 6 7 8 9 10 11 12 13 14 15 16 |
//collects data from an analog sensor int sensorpin = 0; // analog pin used to connect the sharp sensor int val = 0; // variable to store the values from sensor(initially zero) void setup() { Serial.begin(9600); // starts the serial monitor } void loop() { val = analogRead(sensorpin); // reads the value of the sharp sensor Serial.println(val); // prints the value of the sensor to the serial monitor delay(400); // wait for this much time before printing next value } |
DHT11 Humidity Sensors
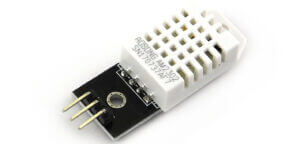
The DHT11 is a basic, low-cost digital temperature and humidity sensor. It uses a capacitive humidity sensor and a thermistor to measure the surrounding air and spits out a digital signal on the data pin (no analog input pins are needed).
The only real downside of this sensor is that it is not very accurate or precise, especially compared to the more expensive DHT22. The DHT11 is often used in weather stations and other applications where temperature and humidity readings are needed.
The temperature sensor is a negative temperature coefficient (NTC) thermistor. The humidity sensor is a capacitive sensor. The thermistor is used to measure temperature, while the capacitive sensor is used to measure humidity. The DHT11 sensor has four pins: power, ground, data, and a No Connection (NC) pin. The power pin is used to supply power to the sensor. The ground pin is used to ground the sensor. The data pin is used to output the data from the sensor. The NC pin is not used. The DHT11 sensor can measure temperature from 0-50°C (32-122°F) with an accuracy of ±2°C (±4°F).
Compatible with various microcontrollers like Arduino, and ESP8266.
DHT11 Humidity Sensors With Arduino Code
Download DHT11 library
|
1 2 3 4 5 6 7 8 9 10 11 12 13 14 15 16 17 18 19 20 |
//diyprojectslab.com #include <dht.h> dht DHT; #define DHT11_PIN 7 void setup(){ Serial.begin(9600); } void loop(){ int chk = DHT.read11(DHT11_PIN); Serial.print("Temperature = "); Serial.println(DHT.temperature); Serial.print("Humidity = "); Serial.println(DHT.humidity); delay(1000); } |
Magnetic sensors
One of the most popular Arduino projects is using magnetic sensors. These sensors can be used to detect the presence of a magnetic field and can be used to measure its strength. Magnetic sensors are useful for a variety of applications. For example, they can be used to detect the presence of metal objects, to measure the strength of a magnetic field, or to detect changes in the magnetic field.
Hall effect sensors are not the only type of magnetic sensor available. There are also magnetoresistive sensors, which are used in a variety of applications including medical devices, automotive sensors, and industrial sensors. Magnetic sensors are a popular choice for Arduino projects because they are relatively easy to use and are available in a variety of forms
Arduino Code for Magnetic Sensors
|
1 2 3 4 5 6 7 8 9 10 11 12 13 14 15 16 17 18 19 20 21 |
int led = 13; // LED pin int reelSwitch = 2; // magnetic senso rpin int switchState; // variable to store reel switch value void setup() { pinMode (led, OUTPUT); pinMode (reelSwitch, INPUT); } void loop() { switchState = digitalRead(reelSwitch); // read the value of digital interface 2 and assign it to switchState if (switchState == HIGH) // when the magnetic sensor detect a signal, LED is flashing { digitalWrite(led, HIGH); } else { digitalWrite(led, LOW); } } |
LM35 Temperature Sensors
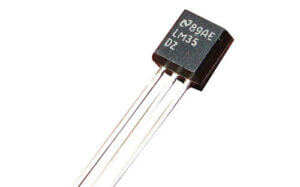
The LM35 is a precision temperature sensor that can be used to measure temperature in a variety of environments. The sensor is very accurate and can be used to measure temperature with great accuracy. The sensor is also very sensitive and can be used to measure temperature in a variety of environments. The sensor is very small and can be easily mounted on a breadboard. The sensor is also very low power and can be used in a variety of applications.
Arduino Code for LM35 Temperature Sensors
|
1 2 3 4 5 6 7 8 9 10 11 12 13 14 15 16 17 18 19 20 21 22 23 24 25 26 27 |
//https://www.diyprojectslab.com/ int val; int tempPin = 1; //Analog pin 1 - A1 void setup() { Serial.begin(9600); } void loop() { val = analogRead(tempPin); float mv = ( val/1024.0)*5000; float cel = mv/10; float farh = (cel*9)/5 + 32; Serial.print("TEMPRATURE = "); Serial.print(cel); Serial.print("*C"); Serial.println(); delay(1000); /* uncomment this to get temperature in farenhite Serial.print("TEMPRATURE = "); Serial.print(farh); Serial.print("*F"); Serial.println(); */ } |
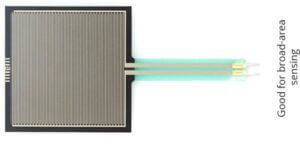
Force Sensors
A force sensor is a device that measures the pressure exerted by an object. The most common type of force sensor is a load cell, which is a device that converts a force into an electrical signal. Load cells are used in a variety of applications, including weighing scales, force gauges, and tension meters. This project is a great way to learn about force sensors, load cells, and the Arduino platform.
Arduino Code for Force Sensors
|
1 2 3 4 5 6 7 8 9 10 11 12 13 14 15 16 17 18 19 20 21 22 23 24 25 26 |
//https://www.diyprojectslab.com/ #define FORCE_SENSOR_PIN A0 // the FSR and 10K pulldown are connected to A0 void setup() { Serial.begin(9600); } void loop() { int analogReading = analogRead(FORCE_SENSOR_PIN); Serial.print("Force sensor reading = "); Serial.print(analogReading); // print the raw analog reading if (analogReading < 10) // from 0 to 9 Serial.println(" -> no pressure"); else if (analogReading < 200) // from 10 to 199 Serial.println(" -> light touch"); else if (analogReading < 500) // from 200 to 499 Serial.println(" -> light squeeze"); else if (analogReading < 800) // from 500 to 799 Serial.println(" -> medium squeeze"); else // from 800 to 1023 Serial.println(" -> big squeeze"); delay(1000); } |
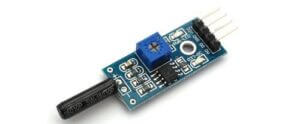
Vibration Sensors
Vibration sensors are devices that can detect and measure vibrations. Vibrations are oscillating motions of a body or object. Vibration sensors can be used to measure vibrations in a wide variety of applications, including automotive, aerospace, and industrial applications. Vibration sensors can be classified into two main categories: piezoelectric and piezoresistive.
- Piezoelectric sensors generate an electrical signal when they are subjected to mechanical stress.
- Piezoresistive sensors, on the other hand, change their resistance when they are subjected to mechanical stress.
Arduino Code for Vibration Sensors
|
1 2 3 4 5 6 7 8 9 10 11 12 13 14 15 16 17 18 19 20 21 |
//https://www.diyprojectslab.com/ int vib_pin=7; int led_pin=13; void setup() { pinMode(vib_pin,INPUT); pinMode(led_pin,OUTPUT); } void loop() { int val; val=digitalRead(vib_pin); if(val==1) { digitalWrite(led_pin,HIGH); delay(1000); digitalWrite(led_pin,LOW); delay(1000); } else digitalWrite(led_pin,LOW); } |
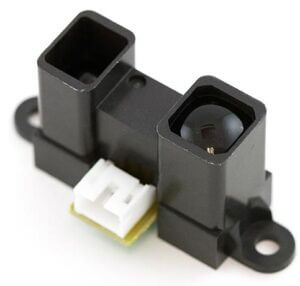
Proximity Sensors
Proximity sensors Sensor that can detect the presence of an object without making physical contact. They are commonly used in security and automation applications. Proximity sensors can be classified according to the type of technology they use: inductive, capacitive, ultrasonic, or infrared.
Proximity sensors are used in a variety of applications, including security systems, automotive collision avoidance systems, and industrial automation.
Arduino code for Proximity Sensors
|
1 2 3 4 5 6 7 8 9 10 11 12 13 14 15 16 17 18 19 20 21 22 23 24 25 26 27 |
/* IR Proximity Sensor interface code Turns on an LED on when obstacle is detected, else off. blog.circuits4you.com 2016 */ const int ProxSensor=7; //Pin 7 is connected to the output of proximity sensor void setup() { pinMode(13, OUTPUT); // Pin 13 has an LED connected on most Arduino boards: pinMode(ProxSensor,INPUT); } void loop() { if(digitalRead(ProxSensor)==HIGH) //Check the sensor output { digitalWrite(13, HIGH); // set the LED on } else { digitalWrite(13, LOW); // set the LED off } delay(100); // wait for a second } |
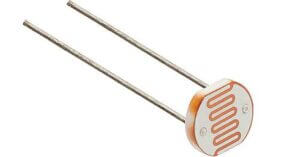
Photoelectric Sensors
A photoelectric sensor is a device that uses a light-sensitive element to detect the presence or absence of an object. The most common type of photoelectric sensor is the photoresistor, which is used in many electronic devices, including cell phones, digital cameras, and computers. The photoresistor is a light-sensitive resistor that changes its resistance in response to light. When light shines on the photoresistor, its resistance decreases, and when the light is removed, the resistance increases. The amount of resistance change is proportional to the intensity of the light.
it is used in many applications, including security systems, automatic doors, and motion detectors. They are also used in many industrial applications.
Arduino Code for Photoelectric Sensors
|
1 2 3 4 5 6 7 8 9 10 11 12 13 14 15 16 17 18 19 20 21 22 23 24 25 26 27 28 29 30 31 |
//https://www.diyprojectslab.com/ int sensorPin = 7; int LED = 8; int sensorValue = LOW; void setup() { Serial.begin(9600); pinMode(LED, OUTPUT); } void loop() { sensorValue = digitalRead(sensorPin); Serial.println(sensorValue); if (sensorValue != LOW) { digitalWrite(LED, HIGH); } else { digitalWrite(LED, LOW); } delay(500); } |
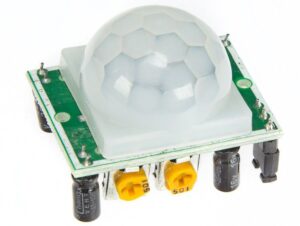
Motion Sensors
A motion sensor is a device that detects moving objects, usually people. They are commonly used in security systems and are often integrated with alarm systems. Motion sensors can be used to detect intruders in your home or business, and can also be used to automate lighting and other devices. Arduino motion sensors are a great way to add interactivity to your projects.
The most common type of Arduino motion sensor is the infrared (IR) motion sensor. These sensors work by detecting infrared radiation, which is emitted by all warm objects.
Arduino code for Motion Sensor
|
1 2 3 4 5 6 7 8 9 10 11 12 13 14 15 16 17 18 19 20 21 22 23 24 25 26 27 |
// https://www.diyprojectslab.com/ int ledPin = 13; // LED int pirPin = 7; // PIR Out pin int pirStat = 0; // PIR status void setup() { pinMode(ledPin, OUTPUT); pinMode(pirPin, INPUT); Serial.begin(9600); } void loop(){ pirStat = digitalRead(pirPin); if (pirStat == HIGH) { // if motion detected digitalWrite(ledPin, HIGH); // turn LED ON Serial.println("Hey I got you!!!"); } else { digitalWrite(ledPin, LOW); // turn LED OFF if we have no motion } } |
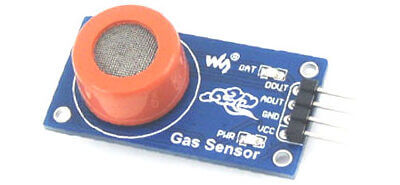
Gas Sensor
A gas sensor detects the presence of different gases in an area, usually as part of a safety system. Gas sensors are used in a variety of applications, including industrial monitoring and control, environmental protection, and domestic security, There are many different types of gas sensors, each designed to detect a specific gas or group of gases. gas sensors are commonly used in industrial settings to monitor for dangerous gases that may be present in the air.
Arduino code for Gas Sensor
|
1 2 3 4 5 6 7 8 9 10 11 12 13 14 15 16 17 18 19 20 21 22 23 24 25 26 27 28 29 30 31 32 33 34 35 36 37 38 39 |
/******* All the resources for this project: https://www.diyprojectslab.com/ *******/ int redLed = 13; int buzzer = 12; int smokeA0 = A5; // Your threshold value int sensorThres = 400; void setup() { pinMode(redLed, OUTPUT); pinMode(buzzer, OUTPUT); pinMode(smokeA0, INPUT); Serial.begin(9600); } void loop() { int analogSensor = analogRead(smokeA0); Serial.print("Pin A0: "); Serial.println(analogSensor); // Checks if it has reached the threshold value if (analogSensor > sensorThres) { digitalWrite(redLed, HIGH); tone(buzzer, 1000, 200); } else { digitalWrite(redLed, LOW); noTone(buzzer); } delay(100); } |
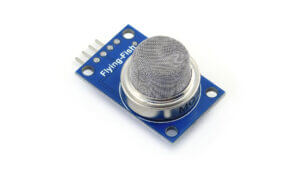
MQ3 Alcohol Sensor
A new Alcohol Detection Sensor has been developed which can be used to detect the presence of ethanol in the air. So, if you are preparing to make your own breathalyzer to measure the amount of liquor in the human body, the MQ3 alcohol sensor module is an excellent option. The sensor is low cost and easy to use, making it an ideal choice for a variety of applications.
Arduino code for Alcohol Sensor
|
1 2 3 4 5 6 7 8 9 10 11 12 13 14 15 16 17 18 19 20 21 22 23 24 |
#define Sensorpin 7 int sensorValue; //variable to store sensor value void setup() { Serial.begin(9600); // sets the serial port to 9600 Serial.println("MQ3 warming up!"); delay(20000); // allow the MQ3 to warm up } void loop() { sensorValue = digitalRead(Sensorpin); // read digital output pin Serial.print("Digital Output: "); Serial.print(sensorValue); // Determine the status if (sensorValue) { Serial.println(" | Alcohol: -"); } else { Serial.println(" | Alcohol: Detected!"); } delay(2000); // wait 2s for next reading } |
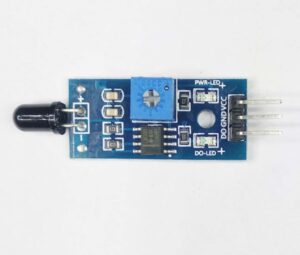
Flame Sensors
A flame sensor detects and measures the intensity of infrared radiation emitted from a flame. The most common type of flame sensor is the pyroelectric infrared sensor. The most common type of flame sensor is the photodiode, which detects infrared radiation.
Flame sensors are used in a variety of applications, including fire detection, security, and process control. The size of the sensor depends on the application. For example, a small sensor might be used in a security application, while a larger sensor might be used in a process control application.
Arduino code for flame Sensor
|
1 2 3 4 5 6 7 8 9 10 11 12 13 14 15 16 17 18 19 20 21 22 23 24 25 26 27 |
// lowest and highest sensor readings: const int sensorMin = 0; // sensor minimum const int sensorMax = 1024; // sensor maximum void setup() { Serial.begin(9600); // initialize serial communication @ 9600 baud: } void loop() { int sensorReading = analogRead(A0); // read the sensor on analog A0: int range = map(sensorReading, sensorMin, sensorMax, 0, 3); switch (range) { case 0: // A fire closer than 1.5 feet away. Serial.println("** Close Fire **"); break; case 1: // A fire between 1-3 feet away. Serial.println("** Distant Fire **"); break; case 2: // No fire detected. Serial.println("No Fire"); break; } delay(1); // delay between reads } |
ADXL335 Accelerometer Sensor
An ADXL335 Sensor is a small, thin and inexpensive accelerometer that can measure acceleration along three axes. I will use this sensor to measure the acceleration of an object as it moves in different directions. ou can interface an ADXL335 Sensor with an Arduino. With this sensor, you can measure the acceleration of an object in three dimensions. How To Make Arduino Gesture Control Car Using Accelerometer Sensor.
Arduino code ADXL335 Accelerometer Sensor
|
1 2 3 4 5 6 7 8 9 10 11 12 13 14 15 16 17 18 19 20 21 22 23 24 25 26 27 28 29 30 31 32 33 34 35 36 37 38 39 40 41 42 43 44 45 46 47 48 49 50 51 52 53 54 55 56 57 58 59 60 61 62 63 |
const int xInput = A0; const int yInput = A1; const int zInput = A2; // initialize minimum and maximum Raw Ranges for each axis int RawMin = 0; int RawMax = 1023; // Take multiple samples to reduce noise const int sampleSize = 10; void setup() { analogReference(EXTERNAL); Serial.begin(9600); } void loop() { //Read raw values int xRaw = ReadAxis(xInput); int yRaw = ReadAxis(yInput); int zRaw = ReadAxis(zInput); // Convert raw values to 'milli-Gs" long xScaled = map(xRaw, RawMin, RawMax, -3000, 3000); long yScaled = map(yRaw, RawMin, RawMax, -3000, 3000); long zScaled = map(zRaw, RawMin, RawMax, -3000, 3000); // re-scale to fractional Gs float xAccel = xScaled / 1000.0; float yAccel = yScaled / 1000.0; float zAccel = zScaled / 1000.0; Serial.print("X, Y, Z :: "); Serial.print(xRaw); Serial.print(", "); Serial.print(yRaw); Serial.print(", "); Serial.print(zRaw); Serial.print(" :: "); Serial.print(xAccel,0); Serial.print("G, "); Serial.print(yAccel,0); Serial.print("G, "); Serial.print(zAccel,0); Serial.println("G"); delay(200); } // Take samples and return the average int ReadAxis(int axisPin) { long reading = 0; analogRead(axisPin); delay(1); for (int i = 0; i < sampleSize; i++) { reading += analogRead(axisPin); } return reading/sampleSize; } |
Different Type sensors will have different capabilities and limitations, so it is important to choose the right sensor for the job at hand. There are many different types of sensors available on the market, so it is important to consult with an expert to find the best sensor for your specific application.


1 Comment
Pingback: Interface HC-SR04 Ultrasonic Sensor With Arduino Tutorials