Introduction
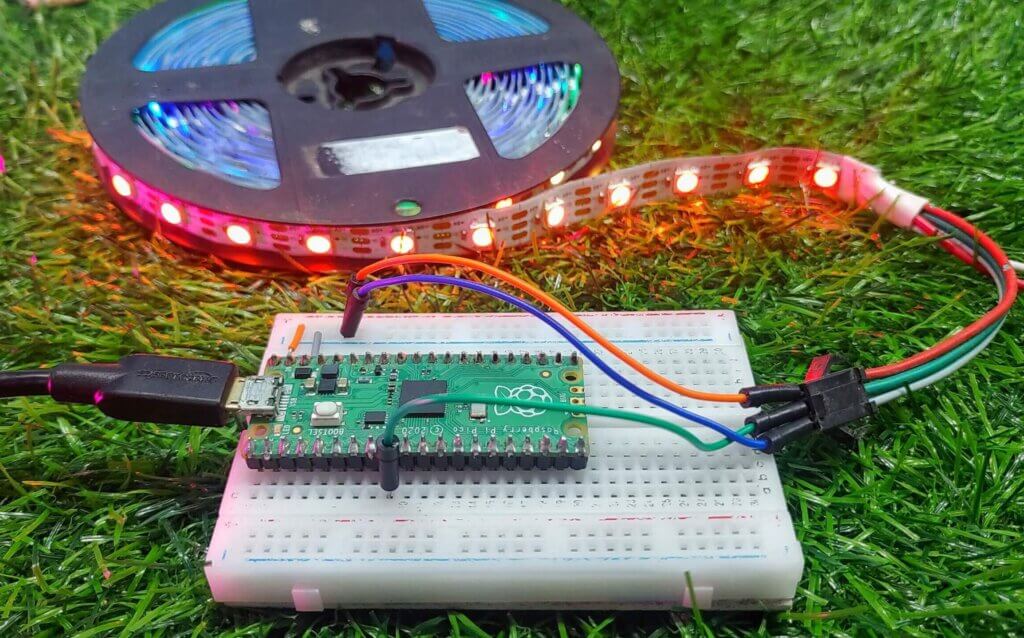
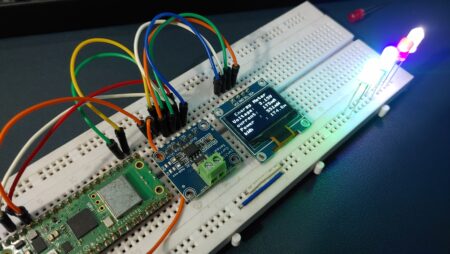
In this article, we will be discussing how to set up ws2812b LEDs with raspberry pi pico. Introducing the WS2812B LED. The WS2812B is an addressable RGB LED. That means you can control the colour of each individual LED. The WS2812B is also known as the NeoPixel. Follow these simple steps and you’ll have your LEDs up and running in no time!
In this tutorial, we will be using the Raspberry Pi Pico as our microcontroller. The Pico is a great choice for this project because it is small, cheap, and easy to use.
Required components
You will need the following materials for this project: –
- Raspberry Pi Pico
- WS2812B LED
- Breadboard
- Jumper wires
What is Raspberry Pi Pico?
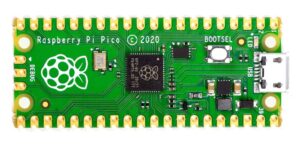
Raspberry Pi Pico is a low-cost, high-performance microcontroller board developed by Raspberry Pi Foundation. It was launched in January 2021. The board is based on the RP2040 microcontroller chip developed by Raspberry Pi Foundation. Raspberry Pi Pico can be used for various applications such as robotics, the internet of things (IoT), and embedded systems.
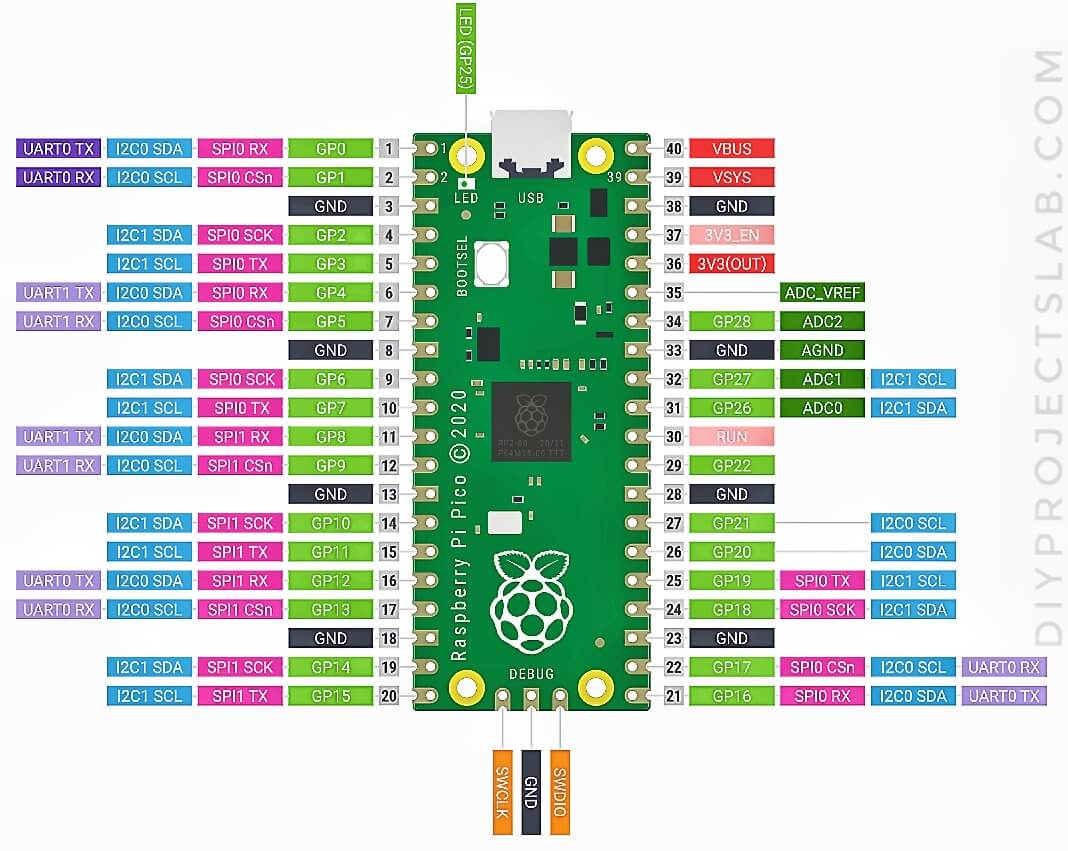
Raspberry Pi Pico Pinout
What are ws2812b LEDs?
The WS2812B is also known as the NeoPixel. These LEDs are commonly used in applications such as RGB backlighting, colour-changing effects, and lighting control systems. One of the benefits of using WS2812B LEDs is that they offer a wide range of colours and can be controlled individually, which allows for a wide range of lighting effects.
Ws2812b LEDs are a type of SMD LED that is often used in LED strips and strings. They are known for their bright colours and high intensity.
The WS2812B is also chainable, which means that you can control multiple WS2812Bs with a single signal wire. In this project, we will be using the Raspberry Pi Pico to control a WS2812B LED.
How WS2812B LEDs Work
The WS2812B is an integrated light-emitting diode (LED) and driver circuit. The device is designed for use in3528 and 5050 SMD LEDs. It is an “intelligent control LED light source” that contains a control circuit and an RGB chip integrated into a single 5050 SMD component. The control circuit built into the WS2812B LED allows it to be controlled with a very simple interface, such as a raspberry pi pico or Arduino etc. microcontroller.
WS2812B Pinout
The WS2812B has 3 pins. The first two pins are for power. The second two pins are for data. The data pin is what we will use to control the LED. The WS2812B LED is controlled by a microcontroller.
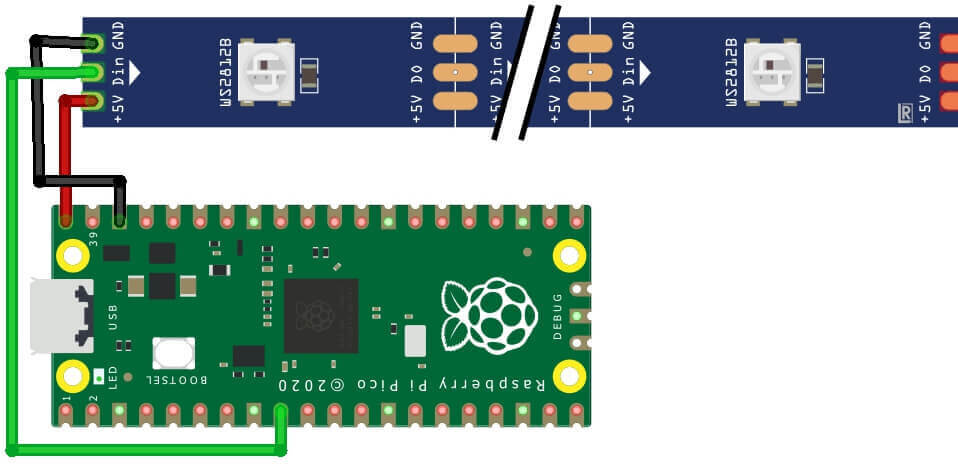
Schematics Diagram – ws2812b LEDs with raspberry pi pico
let’s take a look at the circuit diagram. The Pico is going to be the core of our circuit. It will control the LED. The LED is connected to the Pico through the data pin. The power and ground pins of the LED are also connected to the power and ground pins of the Pico.
Now, let’s connect everything together. First, insert the Pico into the breadboard. Make sure the Pico is inserted correctly.
Micropython Script – ws2812b LEDs with raspberry pi pico
Create a new script in Thonny IDE and paste it into the following code.

WS2812 Breathing
|
1 2 3 4 5 6 7 8 9 10 11 12 13 14 15 16 17 18 19 20 21 22 23 24 25 26 27 28 29 30 31 32 33 34 35 36 37 38 39 40 41 42 43 44 45 46 47 48 49 50 51 52 53 54 55 56 57 58 59 60 61 62 63 64 65 66 67 68 69 70 71 72 73 74 75 76 77 78 79 80 81 82 83 84 85 86 87 88 89 90 91 92 93 94 95 96 97 |
############################################################### # WS2812 RGB LED Ring Light Breathing # with the Raspberry Pi Pico Microcontroller # # by Joshua Hrisko, Maker Portal LLC (c) 2021 # # Based on the Example neopixel_ring at: # https://github.com/raspberrypi/pico-micropython-examples ############################################################### # import array, time from machine import Pin import rp2 # ############################################ # RP2040 PIO and Pin Configurations ############################################ # # WS2812 LED Ring Configuration led_count = 18 # number of LEDs in ring light PIN_NUM = 6 # pin connected to ring light brightness = 1.0 # 0.1 = darker, 1.0 = brightest @rp2.asm_pio(sideset_init=rp2.PIO.OUT_LOW, out_shiftdir=rp2.PIO.SHIFT_LEFT, autopull=True, pull_thresh=24) # PIO configuration # define WS2812 parameters def ws2812(): T1 = 2 T2 = 5 T3 = 3 wrap_target() label("bitloop") out(x, 1) .side(0) [T3 - 1] jmp(not_x, "do_zero") .side(1) [T1 - 1] jmp("bitloop") .side(1) [T2 - 1] label("do_zero") nop() .side(0) [T2 - 1] wrap() # Create the StateMachine with the ws2812 program, outputting on pre-defined pin # at the 8MHz frequency sm = rp2.StateMachine(0, ws2812, freq=8_000_000, sideset_base=Pin(PIN_NUM)) # Activate the state machine sm.active(1) # Range of LEDs stored in an array ar = array.array("I", [0 for _ in range(led_count)]) # ############################################ # Functions for RGB Coloring ############################################ # def pixels_show(brightness_input=brightness): dimmer_ar = array.array("I", [0 for _ in range(led_count)]) for ii,cc in enumerate(ar): r = int(((cc >> 8) & 0xFF) * brightness_input) # 8-bit red dimmed to brightness g = int(((cc >> 16) & 0xFF) * brightness_input) # 8-bit green dimmed to brightness b = int((cc & 0xFF) * brightness_input) # 8-bit blue dimmed to brightness dimmer_ar[ii] = (g<<16) + (r<<8) + b # 24-bit color dimmed to brightness sm.put(dimmer_ar, 8) # update the state machine with new colors time.sleep_ms(1) def pixels_set(i, color): ar[i] = (color[1]<<16) + (color[0]<<8) + color[2] # set 24-bit color def breathing_led(color): step = 5 breath_amps = [ii for ii in range(0,255,step)] breath_amps.extend([ii for ii in range(255,-1,-step)]) for ii in breath_amps: for jj in range(len(ar)): pixels_set(jj, color) # show all colors pixels_show(ii/255) time.sleep(0.02) # ############################################ # Main Calls and Loops ############################################ # # color specifications red = (255,0,0) green = (0,255,0) blue = (0,0,255) yellow = (255,255,0) cyan = (0,255,255) white = (255,255,255) blank = (0,0,0) colors = [blue,yellow,cyan,red,green,white] while True: # loop indefinitely for color in colors: breathing_led(color) time.sleep(0.1) # wait between colors |
Single LED Loop
|
1 2 3 4 5 6 7 8 9 10 11 12 13 14 15 16 17 18 19 20 21 22 23 24 25 26 27 28 29 30 31 32 33 34 35 36 37 38 39 40 41 42 43 44 45 46 47 48 49 50 51 52 53 54 55 56 57 58 59 60 61 62 63 64 65 66 67 68 69 70 71 72 73 74 75 |
import array, time from machine import Pin import rp2 # ############################################ # RP2040 PIO and Pin Configurations ############################################ # # WS2812 LED Ring Configuration led_count = 18 # number of LEDs in ring light PIN_NUM = 6 # pin connected to ring light brightness = 0.5 # 0.1 = darker, 1.0 = brightest @rp2.asm_pio(sideset_init=rp2.PIO.OUT_LOW, out_shiftdir=rp2.PIO.SHIFT_LEFT, autopull=True, pull_thresh=24) # PIO configuration # define WS2812 parameters def ws2812(): T1 = 2 T2 = 5 T3 = 3 wrap_target() label("bitloop") out(x, 1) .side(0) [T3 - 1] jmp(not_x, "do_zero") .side(1) [T1 - 1] jmp("bitloop") .side(1) [T2 - 1] label("do_zero") nop() .side(0) [T2 - 1] wrap() # Create the StateMachine with the ws2812 program, outputting on pre-defined pin # at the 8MHz frequency state_mach = rp2.StateMachine(0, ws2812, freq=8_000_000, sideset_base=Pin(PIN_NUM)) # Activate the state machine state_mach.active(1) # Range of LEDs stored in an array pixel_array = array.array("I", [0 for _ in range(led_count)]) # ############################################ # Functions for RGB Coloring ############################################ # def update_pix(brightness_input=brightness): # dimming colors and updating state machine (state_mach) dimmer_array = array.array("I", [0 for _ in range(led_count)]) for ii,cc in enumerate(pixel_array): r = int(((cc >> 8) & 0xFF) * brightness_input) # 8-bit red dimmed to brightness g = int(((cc >> 16) & 0xFF) * brightness_input) # 8-bit green dimmed to brightness b = int((cc & 0xFF) * brightness_input) # 8-bit blue dimmed to brightness dimmer_array[ii] = (g<<16) + (r<<8) + b # 24-bit color dimmed to brightness state_mach.put(dimmer_array, 8) # update the state machine with new colors time.sleep_ms(10) def set_24bit(ii, color): # set colors to 24-bit format inside pixel_array pixel_array[ii] = (color[1]<<16) + (color[0]<<8) + color[2] # set 24-bit color # ############################################ # Main Loops and Calls ############################################ color = (255,0,0) # looping color blank = (255,255,255) # color for other pixels cycles = 5 # number of times to cycle 360-degrees for ii in range(int(cycles*len(pixel_array))+1): for jj in range(len(pixel_array)): if jj==int(ii%led_count): # in case we go over number of pixels in array set_24bit(jj,color) # color and loop a single pixel else: set_24bit(jj,blank) # turn others off update_pix() # update pixel colors time.sleep(0.05) # wait 50ms |
rainbow.py
|
1 2 3 4 5 6 7 8 9 10 11 12 13 14 15 16 17 18 19 20 21 22 23 24 25 26 27 28 29 30 31 32 33 34 35 36 37 38 39 40 41 42 43 44 45 46 47 48 49 50 51 52 53 54 55 56 57 58 59 60 61 62 63 64 65 66 67 68 69 70 71 72 73 74 75 76 77 78 79 80 81 82 83 84 85 86 87 88 89 90 91 92 93 94 95 96 97 98 99 100 101 102 |
import array, time from machine import Pin import rp2 # Configure the number of WS2812 LEDs. NUM_LEDS = 26 PIN_NUM = 6 brightness = 0.2 @rp2.asm_pio(sideset_init=rp2.PIO.OUT_LOW, out_shiftdir=rp2.PIO.SHIFT_LEFT, autopull=True, pull_thresh=24) def ws2812(): T1 = 2 T2 = 5 T3 = 3 wrap_target() label("bitloop") out(x, 1) .side(0) [T3 - 1] jmp(not_x, "do_zero") .side(1) [T1 - 1] jmp("bitloop") .side(1) [T2 - 1] label("do_zero") nop() .side(0) [T2 - 1] wrap() # Create the StateMachine with the ws2812 program, outputting on pin sm = rp2.StateMachine(0, ws2812, freq=8_000_000, sideset_base=Pin(PIN_NUM)) # Start the StateMachine, it will wait for data on its FIFO. sm.active(1) # Display a pattern on the LEDs via an array of LED RGB values. ar = array.array("I", [0 for _ in range(NUM_LEDS)]) ########################################################################## def pixels_show(): dimmer_ar = array.array("I", [0 for _ in range(NUM_LEDS)]) for i,c in enumerate(ar): r = int(((c >> 8) & 0xFF) * brightness) g = int(((c >> 16) & 0xFF) * brightness) b = int((c & 0xFF) * brightness) dimmer_ar[i] = (g<<16) + (r<<8) + b sm.put(dimmer_ar, 8) time.sleep_ms(10) def pixels_set(i, color): ar[i] = (color[1]<<16) + (color[0]<<8) + color[2] def pixels_fill(color): for i in range(len(ar)): pixels_set(i, color) def color_chase(color, wait): for i in range(NUM_LEDS): pixels_set(i, color) time.sleep(wait) pixels_show() time.sleep(0.2) def wheel(pos): # Input a value 0 to 255 to get a color value. # The colours are a transition r - g - b - back to r. if pos < 0 or pos > 255: return (0, 0, 0) if pos < 85: return (255 - pos * 3, pos * 3, 0) if pos < 170: pos -= 85 return (0, 255 - pos * 3, pos * 3) pos -= 170 return (pos * 3, 0, 255 - pos * 3) def rainbow_cycle(wait): for j in range(255): for i in range(NUM_LEDS): rc_index = (i * 256 // NUM_LEDS) + j pixels_set(i, wheel(rc_index & 255)) pixels_show() time.sleep(wait) BLACK = (0, 0, 0) RED = (255, 0, 0) YELLOW = (255, 150, 0) GREEN = (0, 255, 0) CYAN = (0, 255, 255) BLUE = (0, 0, 255) PURPLE = (180, 0, 255) WHITE = (255, 255, 255) COLORS = (BLACK, RED, YELLOW, GREEN, CYAN, BLUE, PURPLE, WHITE) print("fills") for color in COLORS: pixels_fill(color) pixels_show() time.sleep(0.2) print("chases") for color in COLORS: color_chase(color, 0.01) print("rainbow") rainbow_cycle(0) |
Read Similar Articles:
- Getting Started Raspberry Pi Pico – Pinout, Specs – Beginner Guide
- Interfacing PIR Motion Sensor with Raspberry Pi Pico
- Raspberry Pi Pico Home Automation System
- Interface Servo Motor With Raspberry Pi Pico
- Interface 0.96″ OLED Display with Raspberry Pi Pico
- Raspberry Pi Pico Weather Station Using Dht11 Sensor
- Interface 16*2 LCD Display With Raspberry Pi Pico

