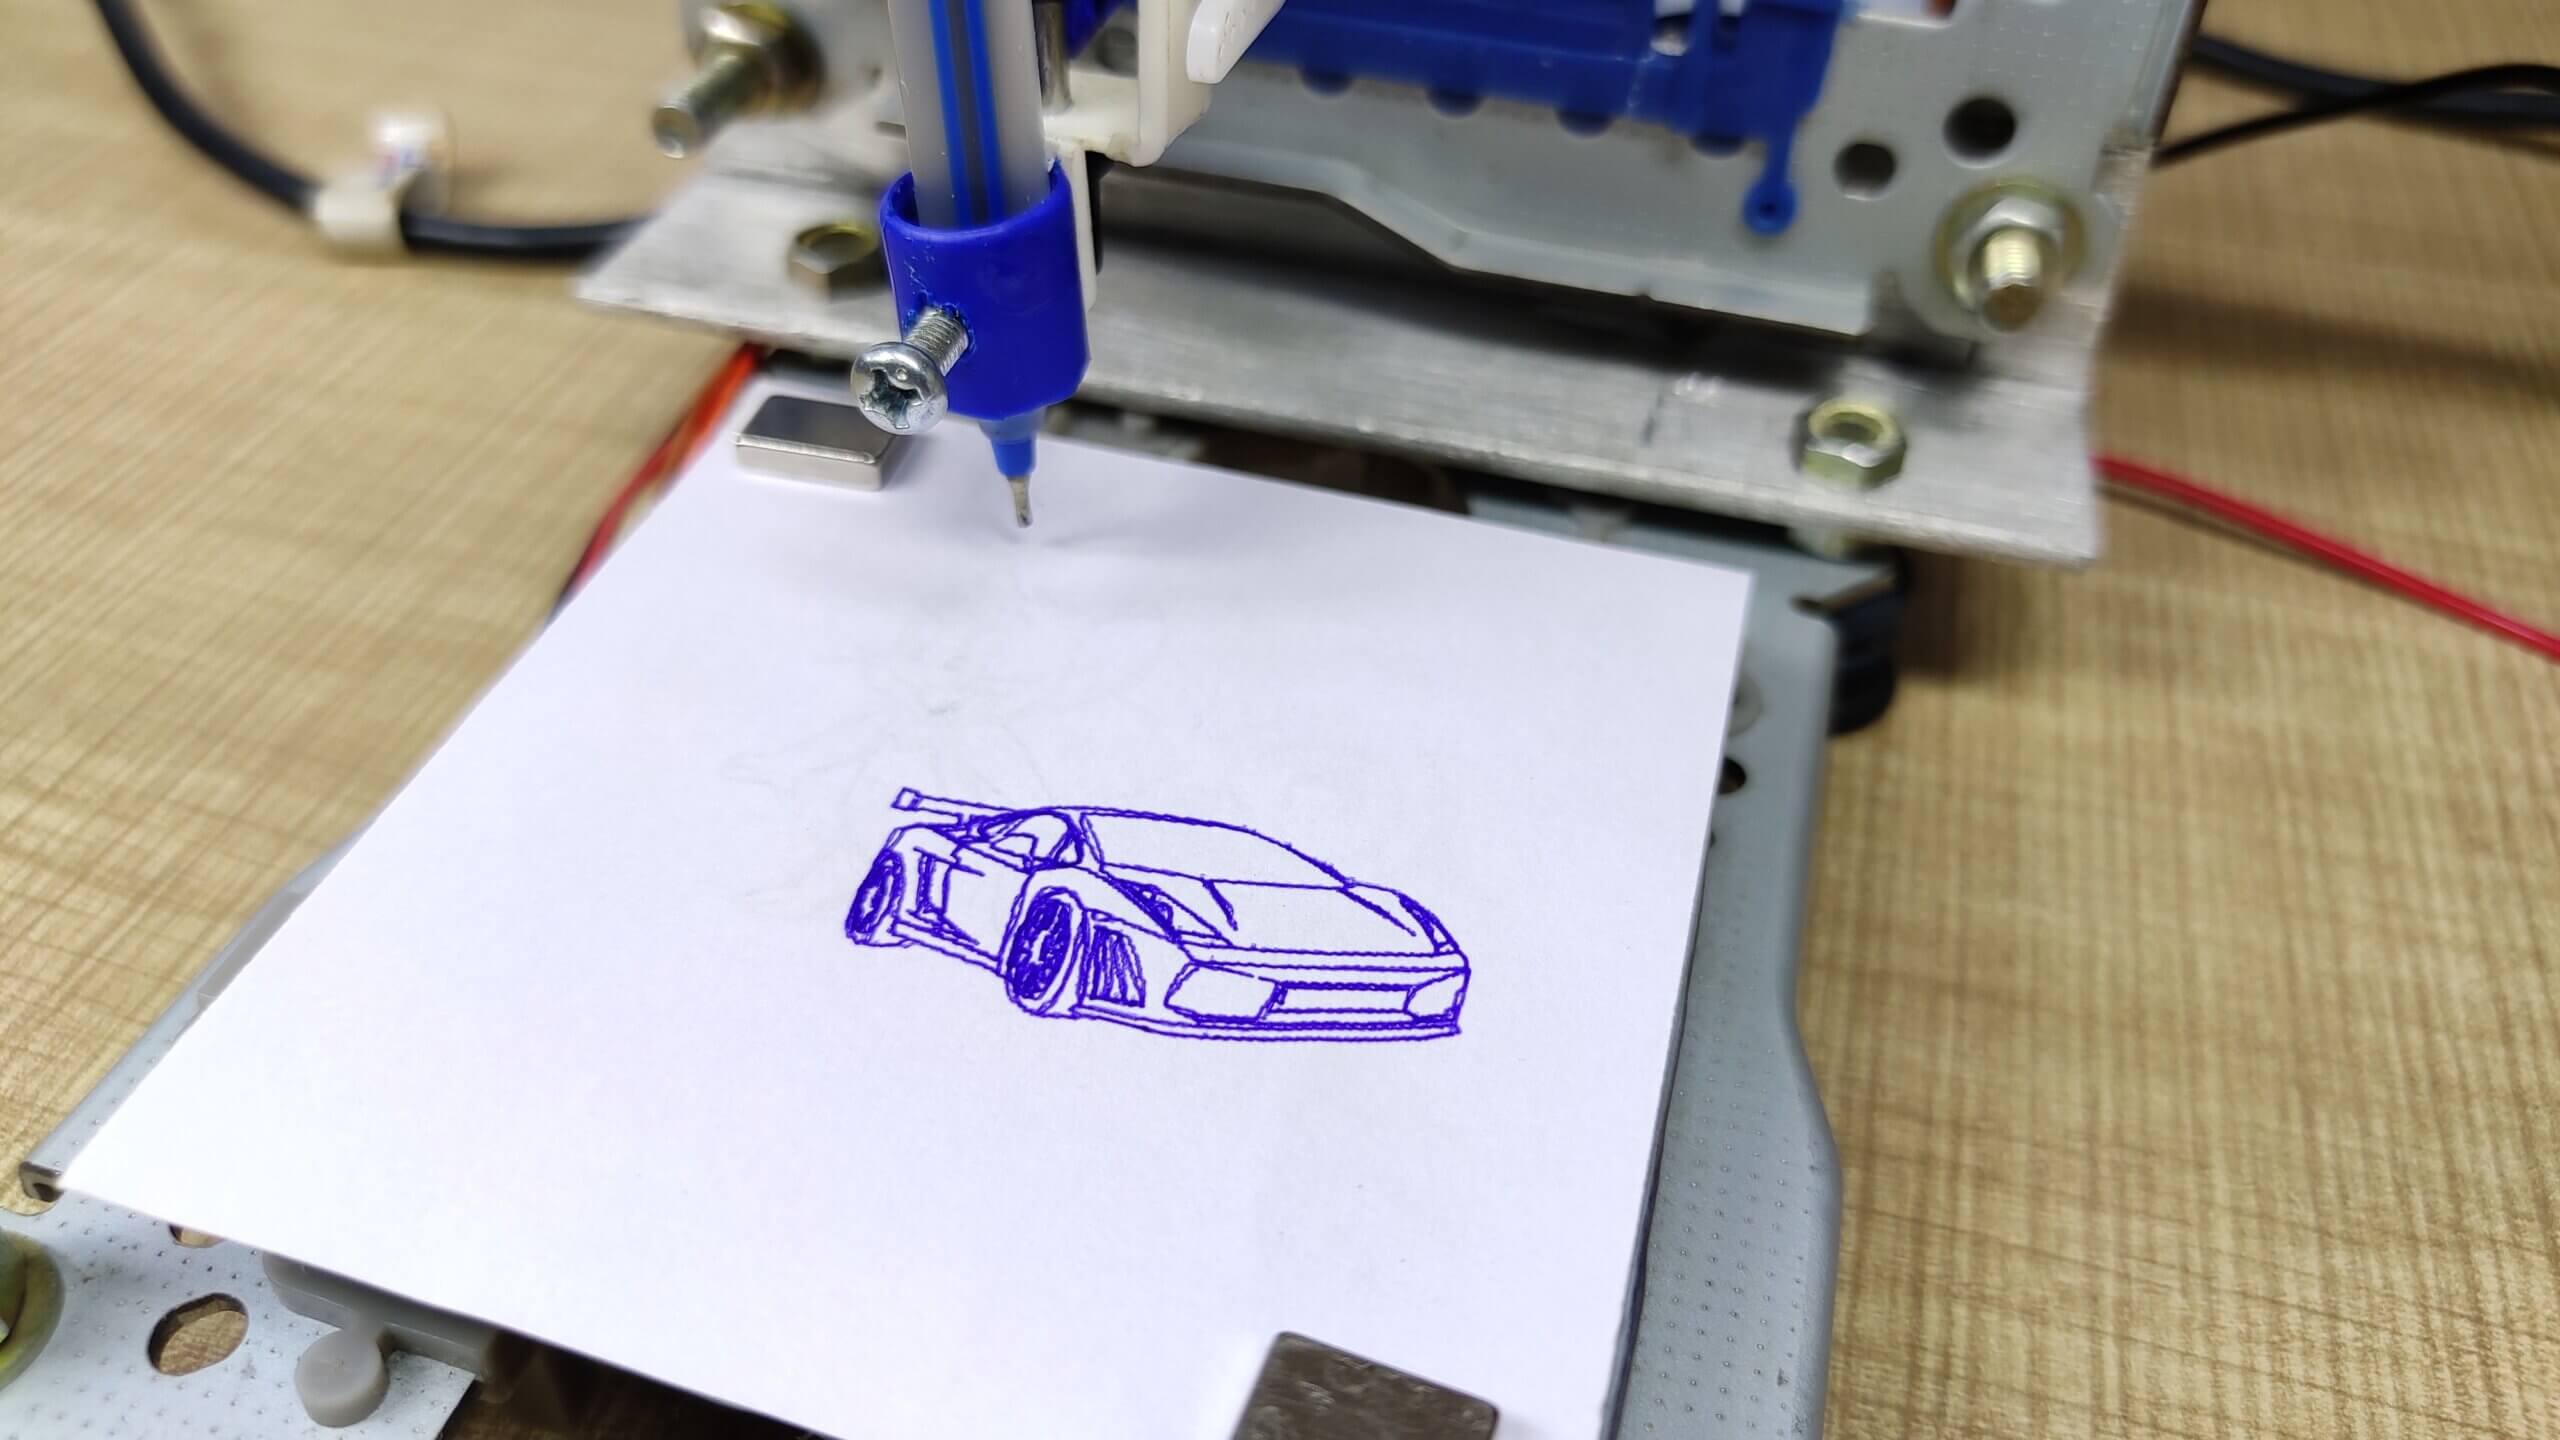
Hey, friends welcome back I hope you are all fine A few years ago, I decided I wanted to make a DIY CNC Machine With Arduino. I had seen some online and they looked like a lot of fun. I wasn’t sure how to go about it, but I knew I wanted to use an Arduino microcontroller. After doing some research, I found a great tutorial online (link below). The tutorial walks you through all the steps of making a mini CNC machine, from building the frame to wiring the electronics.
Required Material’s for CNC Machine With Arduino
Components Used
- Old/ Used DVD Writers 2X ___________ (you can get these from any computer repairing/servicing shop)
- Arduino UNO 1X ___________________ https://amzn.to/3yHhqJI
- Servo Motor 1X ____________________ https://amzn.to/3NbIjti
- CNC Shield V1 (PCB)________________
- L293D IC 2X _______________________ https://amzn.to/3Pl3L0Q
- A piece of Aluminium ________________ From local store
- M5x25mm Nuts & Bolts ______________ From local store
- flaxible Wires_______________________ From local store
Tools used:
- Soldering Iron:
- Soldering Stand:
- Soldering Wire:
- Soldering flux:
- Glue gun:
- Multimeter:
I’ve been using my mini CNC machine to make all sorts of things. It’s been a lot of fun and I’ve learned a lot along the way. If you’re thinking about making your own mini CNC machine, I highly recommend it. Just be prepared to spend some time wiring everything up.
I started by gathering all the materials I needed. The tutorial calls for a few specific parts, but I was able to find most of them at my local hardware store. I did have to order the Arduino microcontroller and a few other bits and pieces online. Once I had everything, I followed the tutorial step-by-step.
Programming for CNC machine with arduino
Firstly download the original code and all additional required software from the provided link. attach Arduino with the computer and open the Arduino code from the downloaded file. choose the correct COM port and board type from the tool menu and hit upload. after successfully uploading the program open the G code Sender EXE and select the correct COM port after selecting the COM port all options in the application will open. now click the load G-code button to select the file which you want to draw.
CNC Machine With Arduino Code
|
1 2 3 4 5 6 7 8 9 10 11 12 13 14 15 16 17 18 19 20 21 22 23 24 25 26 27 28 29 30 31 32 33 34 35 36 37 38 39 40 41 42 43 44 45 46 47 48 49 50 51 52 53 54 55 56 57 58 59 60 61 62 63 64 65 66 67 68 69 70 71 72 73 74 75 76 77 78 79 80 81 82 83 84 85 86 87 88 89 90 91 92 93 94 95 96 97 98 99 100 101 102 103 104 105 106 107 108 109 110 111 112 113 114 115 116 117 118 119 120 121 122 123 124 125 126 127 128 129 130 131 132 133 134 135 136 137 138 139 140 141 142 143 144 145 146 147 148 149 150 151 152 153 154 155 156 157 158 159 160 161 162 163 164 165 166 167 168 169 170 171 172 173 174 175 176 177 178 179 180 181 182 183 184 185 186 187 188 189 190 191 192 193 194 195 196 197 198 199 200 201 202 203 204 205 206 207 208 209 210 211 212 213 214 215 216 217 218 219 220 221 222 223 224 225 226 227 228 229 230 231 232 233 234 235 236 237 238 239 240 241 242 243 244 245 246 247 248 249 250 251 252 253 254 255 256 257 258 259 260 261 262 263 264 265 266 267 268 269 270 271 272 273 274 275 276 277 278 279 280 281 282 283 284 285 286 287 288 289 290 291 292 293 294 295 296 297 298 299 300 301 302 303 304 305 306 307 308 309 310 311 312 313 314 315 316 317 318 319 320 321 322 323 324 325 326 327 328 329 330 331 332 333 334 335 336 337 338 339 340 341 342 343 344 345 346 347 348 349 350 351 352 353 354 |
// diyprojectslab.com #include <Servo.h> #include <Stepper.h> #define LINE_BUFFER_LENGTH 512 const int penZUp = 80; const int penZDown = 40; const int penServoPin = 6; const int stepsPerRevolution = 20; Servo penServo; Stepper myStepperY(stepsPerRevolution, 2,3,4,5); Stepper myStepperX(stepsPerRevolution, 8,9,10,11); struct point { float x; float y; float z; }; struct point actuatorPos; float StepInc = 1; int StepDelay = 0; int LineDelay = 50; int penDelay = 50; float StepsPerMillimeterX = 6.0; float StepsPerMillimeterY = 6.0; float Xmin = 0; float Xmax = 40; float Ymin = 0; float Ymax = 40; float Zmin = 0; float Zmax = 1; float Xpos = Xmin; float Ypos = Ymin; float Zpos = Zmax; boolean verbose = false; void setup() { Serial.begin( 9600 ); penServo.attach(penServoPin); penServo.write(penZUp); delay(200); myStepperX.setSpeed(250); myStepperY.setSpeed(250); Serial.println("Mini CNC Plotter alive and kicking!"); Serial.print("X range is from "); Serial.print(Xmin); Serial.print(" to "); Serial.print(Xmax); Serial.println(" mm."); Serial.print("Y range is from "); Serial.print(Ymin); Serial.print(" to "); Serial.print(Ymax); Serial.println(" mm."); } void loop() { delay(200); char line[ LINE_BUFFER_LENGTH ]; char c; int lineIndex; bool lineIsComment, lineSemiColon; lineIndex = 0; lineSemiColon = false; lineIsComment = false; while (1) { while ( Serial.available()>0 ) { c = Serial.read(); if (( c == '\n') || (c == '\r') ) { if ( lineIndex > 0 ) { line[ lineIndex ] = '\0'; if (verbose) { Serial.print( "Received : "); Serial.println( line ); } processIncomingLine( line, lineIndex ); lineIndex = 0; } else { } lineIsComment = false; lineSemiColon = false; Serial.println("ok"); } else { if ( (lineIsComment) || (lineSemiColon) ) { // Throw away all comment characters if ( c == ')' ) lineIsComment = false; // End of comment. Resume line. } else { if ( c <= ' ' ) { // Throw away whitepace and control characters } else if ( c == '/' ) { // Block delete not supported. Ignore character. } else if ( c == '(' ) { // Enable comments flag and ignore all characters until ')' or EOL. lineIsComment = true; } else if ( c == ';' ) { lineSemiColon = true; } else if ( lineIndex >= LINE_BUFFER_LENGTH-1 ) { Serial.println( "ERROR - lineBuffer overflow" ); lineIsComment = false; lineSemiColon = false; } else if ( c >= 'a' && c <= 'z' ) { // Upcase lowercase line[ lineIndex++ ] = c-'a'+'A'; } else { line[ lineIndex++ ] = c; } } } } } } void processIncomingLine( char* line, int charNB ) { int currentIndex = 0; char buffer[ 64 ]; // Hope that 64 is enough for 1 parameter struct point newPos; newPos.x = 0.0; newPos.y = 0.0; // Needs to interpret // G1 for moving // G4 P300 (wait 150ms) // G1 X60 Y30 // G1 X30 Y50 // M300 S30 (pen down) // M300 S50 (pen up) // Discard anything with a ( // Discard any other command! while( currentIndex < charNB ) { switch ( line[ currentIndex++ ] ) { // Select command, if any case 'U': penUp(); break; case 'D': penDown(); break; case 'G': buffer[0] = line[ currentIndex++ ]; // /!\ Dirty - Only works with 2 digit commands // buffer[1] = line[ currentIndex++ ]; // buffer[2] = '\0'; buffer[1] = '\0'; switch ( atoi( buffer ) ){ // Select G command case 0: // G00 & G01 - Movement or fast movement. Same here case 1: // /!\ Dirty - Suppose that X is before Y char* indexX = strchr( line+currentIndex, 'X' ); // Get X/Y position in the string (if any) char* indexY = strchr( line+currentIndex, 'Y' ); if ( indexY <= 0 ) { newPos.x = atof( indexX + 1); newPos.y = actuatorPos.y; } else if ( indexX <= 0 ) { newPos.y = atof( indexY + 1); newPos.x = actuatorPos.x; } else { newPos.y = atof( indexY + 1); indexY = '\0'; newPos.x = atof( indexX + 1); } drawLine(newPos.x, newPos.y ); // Serial.println("ok"); actuatorPos.x = newPos.x; actuatorPos.y = newPos.y; break; } break; case 'M': buffer[0] = line[ currentIndex++ ]; // /!\ Dirty - Only works with 3 digit commands buffer[1] = line[ currentIndex++ ]; buffer[2] = line[ currentIndex++ ]; buffer[3] = '\0'; switch ( atoi( buffer ) ){ case 300: { char* indexS = strchr( line+currentIndex, 'S' ); float Spos = atof( indexS + 1); // Serial.println("ok"); if (Spos == 30) { penDown(); } if (Spos == 50) { penUp(); } break; } case 114: // M114 - Repport position Serial.print( "Absolute position : X = " ); Serial.print( actuatorPos.x ); Serial.print( " - Y = " ); Serial.println( actuatorPos.y ); break; default: Serial.print( "Command not recognized : M"); Serial.println( buffer ); } } } } void drawLine(float x1, float y1) { if (verbose) { Serial.print("fx1, fy1: "); Serial.print(x1); Serial.print(","); Serial.print(y1); Serial.println(""); } if (x1 >= Xmax) { x1 = Xmax; } if (x1 <= Xmin) { x1 = Xmin; } if (y1 >= Ymax) { y1 = Ymax; } if (y1 <= Ymin) { y1 = Ymin; } if (verbose) { Serial.print("Xpos, Ypos: "); Serial.print(Xpos); Serial.print(","); Serial.print(Ypos); Serial.println(""); } if (verbose) { Serial.print("x1, y1: "); Serial.print(x1); Serial.print(","); Serial.print(y1); Serial.println(""); } // Convert coordinates to steps x1 = (int)(x1*StepsPerMillimeterX); y1 = (int)(y1*StepsPerMillimeterY); float x0 = Xpos; float y0 = Ypos; // Let's find out the change for the coordinates long dx = abs(x1-x0); long dy = abs(y1-y0); int sx = x0<x1 ? StepInc : -StepInc; int sy = y0<y1 ? StepInc : -StepInc; long i; long over = 0; if (dx > dy) { for (i=0; i<dx; ++i) { myStepperX.step(sx); over+=dy; if (over>=dx) { over-=dx; myStepperY.step(sy); } delay(StepDelay); } } else { for (i=0; i<dy; ++i) { myStepperY.step(sy); over+=dx; if (over>=dy) { over-=dy; myStepperX.step(sx); } delay(StepDelay); } } if (verbose) { Serial.print("dx, dy:"); Serial.print(dx); Serial.print(","); Serial.print(dy); Serial.println(""); } if (verbose) { Serial.print("Going to ("); Serial.print(x0); Serial.print(","); Serial.print(y0); Serial.println(")"); } delay(LineDelay); Xpos = x1; Ypos = y1; } void penUp() { penServo.write(penZUp); delay(LineDelay); Zpos=Zmax; if (verbose) { Serial.println("Pen up!"); } } void penDown() { penServo.write(penZDown); delay(LineDelay); Zpos=Zmin; if (verbose) { Serial.println("Pen down."); } } |
Conclusion CNC Machine With Arduino
Hope you find this helpful. if yes, like it, share it, and comment your doubt. For more such projects, follow me! Help my Work and Subscribe to My Channel on YouTube.
Thank you So much, Friends!
Make Arduino RC transmitter For RC Toys – Drone or Plane


5 Comments
Awesome
Thanks
thanks Dude for Sharing
Thanks so much 😊
Thanks for sharing this project… Good job